KOSHER RECIPES FOR GLUTEN-FREE LIVING


Showing posts with label thanksgiving recipes. Show all posts

Wednesday, November 25, 2009

A happy gluten-free Thanksgiving to you!

Are you looking for last-minute gluten-free thanksgiving recipes? If so, click here to view all the recipes I've tagged under my "Thanksgiving recipes" tag.

In particular, check out my delicious Gluten-Free Stuffing with Dried Fruit, a kosher gluten-free adaptation of a family recipe.

And here are some links to other blogs' gluten-free Thanksgiving recipes:

Gluten-Free Cooking School
Karina's Kitchen (Egg-free, Dairy-Free)
A Gluten-Free Guide
Elana's Pantry (flour-free, alternative sweeteners)

Have a happy and healthy one, everybody!

Sunday, October 25, 2009

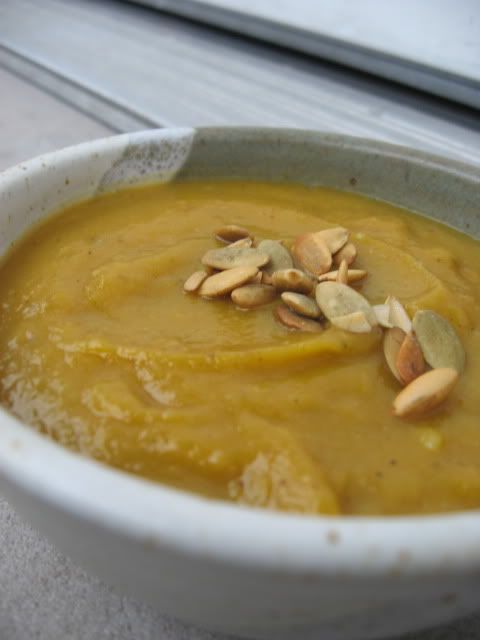
Creamy Butternut Squash and Parsnip Soup [Vegan & Pareve]

Here I am to apologize for yet another long absence from blogging, dear loyal readers. Being a full-time dietetics student is taking a lot out of me, combined with chronic health issues that have been wearing me down. I miss blogging regularly, I really do. I miss having a real back-and-forth with my readers and the excitement of trying and posting new recipes and photos all the time. Fortunately, I'm finally starting to feel way better. It's also autumn, which always makes me want to cook and bake. I made an amibitious and wonderful feast for Shabbos last week. I was recovering from a root canal (what fun) so I focused on soft, easy-to-chew foods. We had butter beans sauteed with fresh rosemary, white wine, red pepper flakes and onions (a perennial favorite of ours)... mashed potatoes... spinach sauteed with lemon zest and garlic... and though I rarely make dessert, I actually made two! We had baked apples... and a crumb cake made from Gluten-Free Pantry's Coffee Cake Mix, which was out of this world!

But the highlight of the meal wasn't the decadent dessert, it was the homeade Creamy Butternut Squash & Parsnip Soup. We are both big fans of Pacific Natural Foods' Organic Creamy Butternut Squash Soup and Imagine Foods' Organic Creamy Butternut Squash Soup, which are both kosher (pareve), vegan and gluten-free. We always keep a few containers in the house and eat this otherwise dairy-free soup with a little low-fat sour cream (or my vegan cashew sour cream) and some spicy toasted pumpkin seeds on top - I find it's a healthy and easy way to make a salad or other light fare into a real meal. Soup is also great to fill up on when you're watching your caloric intake, as it's very filling. It is often low in calories, especially if you avoid cream-based or meat-based soups.

I decided to try making butternut squash from scratch for the first time ever, this time around. I wanted to do something a little different, and at the market the parsnips looked fat and wonderful so I decided to give them a shot. The soup turned out to be fantastic, with a perfect swirl of sweet and savory flavors, and I hope some of you will try it out and let me know if you agree. It's got a little kick to it, so reduce the cayenne if you're not into that. It would be perfect for Thanksgiving. It has a thick and creamy consistency but if you like yours a bit thinner, just add more broth, rice milk or water. I haven't frozen it yet but from my experience freezing soups, this one should freeze quite nicely.

Though homemade is always the best, there are times when we can't cook soup from scratch. For those occasions, there happens to be a promotion right now where if you order Imagine Foods' Creamy Butternut Squash Soup through the link I provided you can save 15% if you enter the code HAINGF25 at checkout. [Plus, save an additional 15% when you combine the instant rebate with your Subscribe & Save order--bringing your total savings to 30%. Offer valid through October 31, 2009].

Happy fall!


CREAMY BUTTERNUT SQUASH & PARSNIP SOUP
[Gluten-Free / Dairy-Free / Soy-Free / Vegan / Pareve ]

Yield: About 10 servings


3 Tbsp extra virgin olive oil
3 lbs of cleaned, trimmed butternut squash (approx. 2 medium squash)
2 large parsnips, peeled
2 medium onions, peeled & roughly chopped
5 cloves garlic, peeled & minced
1-3 sprigs of fresh thyme
4 cups vegetable broth (if I don't have homemade I use this kind)
2" piece of fresh ginger root, peeled and sliced
1/2 tsp ground cinnamon
1/4 tsp ground nutmeg
A pinch of ground cloves
1 tsp onion powder
1 tsp garlic powder
1/2 tsp cayenne (optional)
1/4 cup amber agave nectar (or other sweetener)
2 tsp sea salt
2 tsp ground black pepper
1 tsp rubbed sage
1 1/2 cup rice milk

Cut cleaned, trimmed butternut squash into chunks or slices (about 1 1/2" in size, maximum). Slice peeled parsnips into 1/2" slices. Remove thyme leaves from woody stalks. Discard all but the leaves.

Heat large soup pot over medium-high heat. Add olive oil. When the olive oil is hot, add onion and sautee until it begins to brown. Add garlic, squash, parsnip and thyme. Stir and sautee for 2-3 minutes. Add vegetable broth, ginger and all spices and herbs. Vegetables should be almost covered by vegetable broth, but it's fine if they're not completely covered. Bring to a boil, cover and cook on medium heat until the squash and parsnips are soft.

Once the vegetables are soft, turn off heat, mix in rice milk, and allow to cool a bit (I transfered the soup to a bowl to allow it to cool more quickly). Once it's cool enough to blend safely, either use an immersion blender to puree or carefully blend in a regular blender. If you use a regular blender and the soup is still warm or hot, do not fill more than half way - Blend in batches, and as you blend each batch return it to the pot on the stove. You can reheat the soup over low or medium-low heat before serving, if necessary. Add more rice milk or vegetable broth if you prefer a thinner consistency.
This soup reheats well after freezing or refrigeration. Using a double-boiler or a heat diffuser, or adding a little extra liquid, will help avoid scorching when you reheat.

Serve plain or garnish with sour cream, vegan sour cream substitute and/or toasted pumpkin seeds.

Wednesday, November 21, 2007

Sample Gluten-Free Thanksgiving Menus

Since I know there are always folks who are looking for recipes or meal ideas at the last minute, here are a few possible gluten-free thanksgiving menus along with links to recipes.

MENU ONE:
THE GLUTEN-FREE TRADITIONALIST

Roast Turkey
Classic Stuffing
Cranberry and Pear Chutney
Gluten-Free Gravy
Kim's Sweet Potato Casserole
Green Bean Casserole
Buttermilk Biscuits
Pumpkin Cupcakes
Apple Pie with Crumble Topping
Persimmon-Pecan Cake

MENU TWO:
THE GLUTEN-FREE VEGETARIAN

Tofu Turkey Roast (Vegan)
Fresh Orange-Cranberry Sauce (Vegan)

Walnut-Sage Potatoes Au Gratin
Easy Vegetarian Collard Greens (Vegan)
Roasted Brussels Sprouts with Balsamic, Parmesan & Pine Nuts
Butternut Squash Timbales with Apple Chestnut Sauce
Scooped Biscuits
Cranberry Crumble (Vegan)
Pumpkin Cheesecake Creme Caramel
Apples Doused in Cardamom Wine

MENU THREE:
THE GLUTEN-FREE KOSHER OR DAIRY-FREE (GFCF) EATER

Maple-Cider Turkey

Gluten-Free Stuffing with Dried Fruit
Pumpkin with Cranberries
Mashed Potatoes
Roasted Brussels Sprouts
Parsnip & Carrot Pancakes
Cranberry Applesauce
Multigrain Miracle Bread
Apple-Quince Pie
Pumpkin Pie (Also see Part II and Part III)
Ginger & Cardamom Poached Pears


Have a safe and joyous Thanksgiving, everyone!

Looking for Gluten-Free Thanksgiving Recipes?

If you are one of the thousands of people who've found my site this week by doing web searches for gluten-free Thanksgiving recipes, thanks for stopping by! To make things easier for you here are some links to recipes and guides for having a healthy and happy gluten-free Thanksgiving:

Tuesday, November 20, 2007

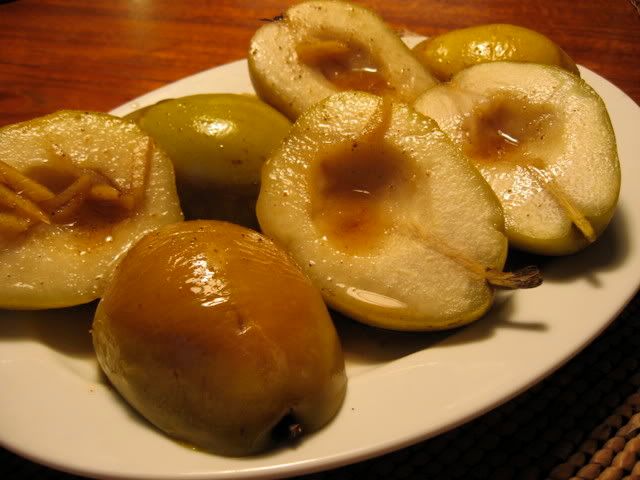
Ginger & Cardamom Poached Pears

ginger poached pears
My dear vegan and milk-allergic readers, I have not forgotten you.

This has to be one of the most popular desserts I've made, when it comes to the reactions of the people who eat the food I cook. I didn't expect that. I think I'm a pretty good cake baker, but when I tried this recipe for the first time at Rosh Hashanah dinner, I got more mmmmms and wows and ohmyg0ds with this deceptively simple fruit dessert than with the honey cakes I served it with. I made it again for Shabbat dinner on Friday and it was every bit as lovely as before. It would be a wonderful gluten-free vegan dessert option for Thanksgiving.

Easy but sophisticated is what I was going for. Peeling fruit does not equal "easy" in my book, so I didn't bother. If you'd like to try peeling the pears before halving them, go for it! This recipe works best with pears that are just ripe enough to have some softness while being firm enough to be handled without their skin getting easily damaged. How long you cook the pears will depend on how ripe they were to begin with - Five minutes on each side is plenty for a ripe piece of fruit. As for sugar, any kind should work. I have used raw sugar both times I've prepared this.

I sure wish these photos were better. The bits of stuff on top of the pears is ginger pieces, which I like to serve with the pear though they can be removed if you prefer. These pictures were taken before the sauce finished reducing into the dark, thick syrup that is drizzled on top of the pears - So the thin sauce you see on the pears is just the pre-reduction version of it, which I spooned on top of them before taking pictures. Imagine a thicker, darker and more syrupy sauce that can be truly drizzled across each pear. This recipe inevitably makes extra of the reduced ginger-cardamom syrup. The leftover syrup is divine, with its rich and slightly spicy flavor and sweet pieces of nearly candied ginger floating in it. It would be wonderful on pancakes or vanilla ice cream, so I like to save it in a little tupperware container for later enjoyment.


ginger poached pears

GINGER & CARDAMOM POACHED PEARS

[ Vegan / Pareve / Soy-Free / Dairy-Free / Gluten-Free ]

2" piece of ginger root, peeled
1/2 tsp cardamom powder
3 cups water
1 1/2 cups sugar
1 cinnamon stick
1/4 tsp cloves (powdered)
Juice of 1/2 lemon
2" piece of lemon zest
5 semi-ripe Bartlett or Anjou pears, washed and dried

Slice ginger root into very thin slices. Cut slices into narrow matchsticks. Bring water, sugar, spices, lemon zest, lemon juice and fresh ginger to a boil in a wide, heavy saucepan. Reduce heat to medium and simmer for 5 minutes.

While the liquid is simmering, slice pears in half lengthwise and use a teaspoon to scoop the seeds out of each half. Place the pears cut-side down in the sauce pan and simmer for 5 minutes, then flip over and simmer for another 5 minutes. Baste occasionally with a spoon while cooking. Using a slotted spatula, carefully lift each piece of pear out of the liquid and place on a serving platter or individual plates.

Remove the lemon zest and cinnamon sticks from the liquid (you can remove the ginger pieces, too, if you like, but I think they're wonderful left in). Bring the liquid back up to a rolling boil, and boil until it thickens into a syrup. Drizzle 1 Tbsp of the syrup across each half of pear just before serving.

Serve warm or at room temperature.

Monday, November 19, 2007

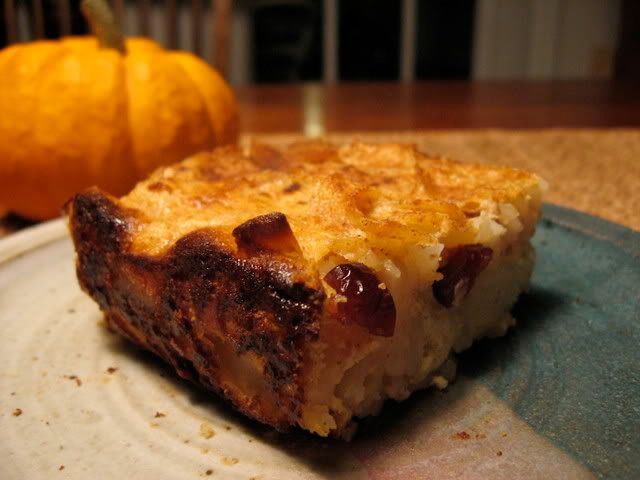
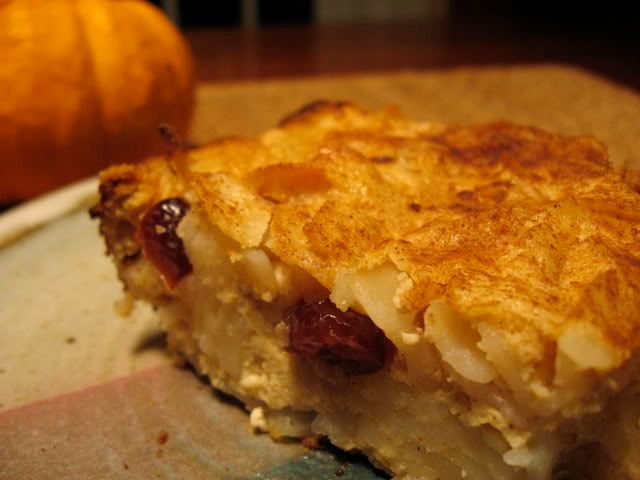
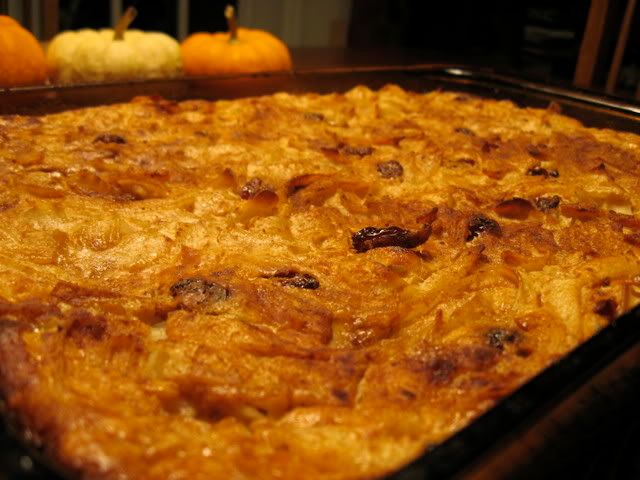
The Thanksgiving Kugel: Gluten-Free Noodle Kugel with Cranberries

gluten-free cranberry noodle kugel
I haven't been inspired by Thanksgiving yet this year, which explains the lack of Thanksgiving mania on this blog. But tonight I think the bug finally bit me, if only mildly.

This past spring I posted my recipe for Savory Gluten-Free Noodle Kugel, a hearty mushroom-flecked kugel made with Manischewitz brand gluten-free Passover egg noodles. I made a point of stocking up last Pesach so I'd have some of these fabulous noodles to last me through the year, and I used up another bag tonight making a sweet lokshen kugel (noodle and egg casserole). I still have two or three left, just enough to get me through to this spring when they are back on the shelves at kosher grocery stores. Though I generally prefer Tinkyada noodles for just about everything, there are a few things that a wide, flat egg noodle is better for - Kugel is one of them. The fact that the Pesach noodles are made from potato starch means that they are all the more absorbent, which is perfect for a kugel.

Our family has two different kugel traditions - My dad's side of the family makes savory noodle kugels. On my mom's side, it's sweet kugel all the way. Since I made savory kugel last time (and boy was it good) this time I tried to sweeten it up without overdoing it on the sugar. What I ended up with was the Thanksgiving Kugel. There are thousands of bubbes rolling over in their graves at the very mention of the words "Thanksgiving" and "kugel" next to each other. I'm usually a little bit of a purist when it comes to ethnic foods. But I think if any of those bubbes would taste this kugel, they would forgive me. The dried cranberries (or "craisins" as marketing gurus seem to have renamed them) really plump up like little sweet-tart gems and make a tasty replacement for the usual raisins.

I lightened the kugel up a little - Trying to make this kind of traditional food low fat is just not something I have the heart to do. But I did trim some fat from where the texture or flavor wouldn't suffer. If you like your sweet kugels really sweet, you'll want to add an additional 1/2 to 3/4 cups of sugar, since I made this to be a side dish more than a dessert. This easy kugel would be a really nice side dish for Thanksgiving, it works well by itself for breakfast, and it should heat up well in a toaster oven or conventional oven.

Eat it in good health!


gluten-free noodle kugel with cranberries

THANKSGIVING KUGEL
(GLUTEN-FREE CRANBERRY NOODLE KUGEL)


[ Gluten-Free / Soy-Free / Vegetarian / Dairy ]

16 oz wide gluten-free egg noodles*
6 eggs
7 to 8 oz farmers' cheese
2 cups low-fat sour cream
1/2 cup 1% milk
1 1/2 tsp pumpkin pie spice mix
1/2 tsp salt
1/2 cup brown sugar or raw sugar
1/2 cup dried cranberries
Butter or margarine for greasing the pan
Optional: Additional pumpkin pie spice and brown sugar for top

Preheat oven to 350 F. Bring a large pot of lightly salted water to a boil. Cook noodles until tender but not overly soft, remove from heat and drain immediately, rinsing with cold water. Set aside. Grease lasagna pan.

In a blender, combine spices, salt, sugar, milk, eggs, sour cream and farmers' cheese. Pulse until smooth. In a large bowl, pour liquid over the noodles. Add cranberries. Stir until well-combined. Pour entire mixture (including all "extra" liquid) into the greased pan. Dust the top with additional sugar and pumpkin pie spice.

Bake for 35-45 minutes or until the top is golden-brown and the egg mixture has become slightly firm (will still be somewhat soft - do not overcook!) Allow to cool for 15 minutes before slicing and serving warm.

*
If you don't have access to gluten-free Passover egg noodles, gluten-free tagliatelle or lasagna noodles (cut in strips after cooking) will work, though the texture won't be quite the same.

Monday, October 22, 2007

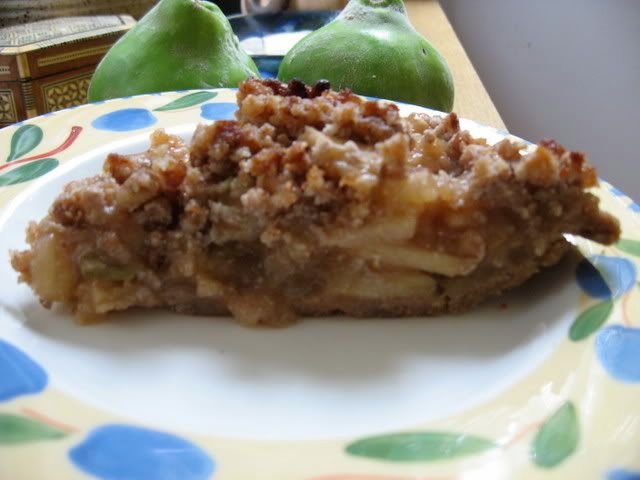
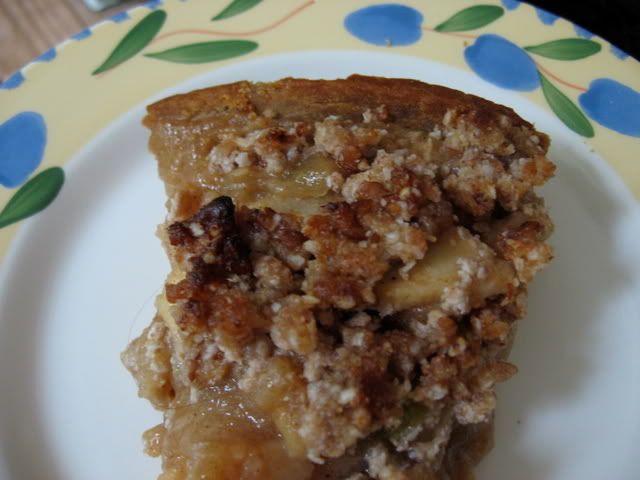
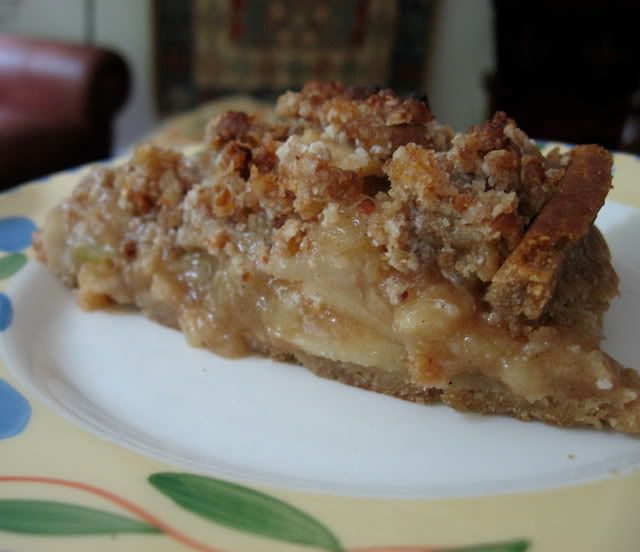
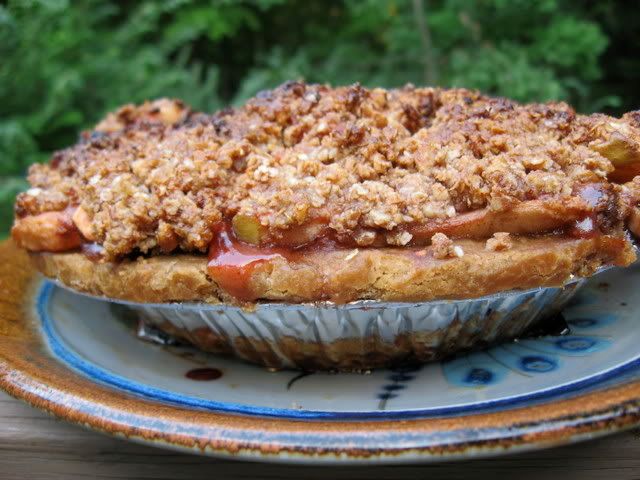
Gluten-Free Apple-Quince Pie

I got some e-mails asking me about the pie pictured in the post on my Pecan-Quinoa Streusel Crumble Topping. That's an apple-quince pie! I would have posted the recipe sooner if I hadn't been gallavanting around New York City with a bunch of gay Jews this weekend. Have you ever cooked with quince? It's a hard autumn fruit that looks like a hard and somewhat lumpy cross between an apple and a pear. It tastes unpleasantly astringent when raw but is delicious when cooked down with plenty of sweetener (agave nectar, in my case), and has a flavor that is fragrant, mild and apple-y. The texture is firmer and more grainy than an apple, which makes it stand up well to a long cooking time. Apples and quinces are lovely together. Quinces take much longer to cook than apples, so cooking them together results in an apple-quince "sauce" with a wonderful consistency - The apples will nearly dissolve into sauce while the quince retains just enough of its firmness to give the filling a good bite and appearance. I discovered later that I used unripe quinces, so keep an eye out for yellow quinces rather than the green ones I used, and they will take less time to cook.


The pie was fantastic, if not entirely photogenic. I used the Natural Feast Gluten-Free Frozen Pie Shells again. As I mentioned in this post they are gluten-free, vegan, kosher (pareve) and free of refined sweeteners. They are also free of soy and nuts. They're no replacement for a homemade crust, but they work well in a pinch. Since they come in packages of two, I had one left after making that delicious apple-raspberry pie, so I used the remaining one for this pie. This recipe calls for a pre-baked crust - If you use the Natural Feast crust, follow the directions on the package for baking it without a filling, but cut the baking time in half, then remove the crust from the oven and fill it with the fruit filling. Once you fill it, put a piece of tin foil underneath and fold the edges up so it creates a loose partial tent around the pie, with the top open. This will keep the edges from burning.


You will likely have some leftover filling, but that's intentional on my part. I think the filling is just too good to only be inside one little pie. Eat the leftovers cold, like applesauce - Or mix with yogurt. Better yet, put them in ramekins, sprinkle with leftover crumble topping, and bake in the oven or toaster oven until the topping has browned slightly. An easy breakfast or dessert. Who needs a crust, really?


APPLE-QUINCE PIE

[Gluten-Free / Pareve / Soy-Free / Vegan ]

5 quinces
8 granny smith apples
1 tsp ground ginger
1 tsp ground cardamom
1 Tbsp pumpkin pie spice mix*
1/2 tsp salt
1 tsp fresh lemon juice
1/2 cup apple cider
1 cup agave nectar, sugar or honey
2 Tbsp sweet rice flour**
1 Tbsp margarine (or butter) cut into small pieces
1 recipe Pecan-Quinoa Streusel Crumble Topping

Preheat oven to 375 F.

Peel apples and quinces, core them and cut them in thin slices - You can use an apple slicer for the apples, but make sure the quince is cut as thin as possible. Add all ingredients to a large pot, and bring to a boil. Cover the pot, reduce heat to medium-low, and simmer until the fruit is tender (about 20-30 minutes), stirring occasionally.

Pour the fruit mixture from the pot into a mixing bowl, and slowly sift in the sweet rice flour, making sure to mix it in evenly so there are no lumps.

Pour fruit mixture into a partially pre-baked pie crust. Use your fingers to crumble the streusel topping across the entire top of the pie. Arrange small pieces of margarine across the top, and bake for 20-20 minutes, or until the topping is golden-brown and the filling is bubbling. Remove from oven and allow to cool before serving.

*You can buy pumpkin pie spice mix from any spice company, or make your own.

**Sweet rice flour is not the same as white rice or brown rice flour, which are not good thickeners. You can find it at most Asian markets as well as some health food stores. It is sometimes called sticky rice flour, glutinous rice flour (yes, it's gluten-free!) or oriental rice flour. You can buy it online here.

Thursday, October 18, 2007

Flourless Streusel Crumble Topping with No Refined Sugar


It took me a while to find a gluten-free crumble topping that doesn't use oats and has a texture and appearance that I like. I guess I'm picky about my crumbles. When I finally got this recipe right, I was pleased as punch. Now I can actually convince myself that pie is health food! This crumble topping is especially for those of us who choose to avoid refined sugar, which is the backbone of the crumble toppings usually used on top of fruit crisps, pies and some bar cookies. I created this crumble topping as a healthier, whole grain alternative, free of cane sugar and full of crumbly texture and sweet, nutty flavor. I hope it will help somebody out there transform some plain old fruit or a topless pie (ha!) into something truly worthy of oohs and aahs.

Though certified gluten-free oats are now available, they are hard to find in local stores and are very expensive. There are also celiacs who cannot digest even these certified oats. So some of us still have the need for a gluten-free crumble topping that is made with alternative ingredients. This recipe relies on the versatility of pecans and the oat-like texture and outstanding nutritional profile of Ancient Harvest Quinoa Flakes for its texture. I buy quinoa flakes locally for around $3 per package. I hear there are other companies besides Ancient Harvest that make quinoa flakes, but this is the only brand I've found in stores here and I'm quite happy with it as a baking ingredient and a hot cereal for chilly mornings.

I have tried this recipe with both honey and agave nectar, and honey creates a much better crumb and holds the sweetness better when the crumble is baked. However, if you need to make this strictly vegan, agave nectar will certainly do the job.

Feel free to use butter (as if you needed my permission!) I've called for non-hydrogenated margarine only because I often like to make my pies pareve so that I can eat them at both meat and dairy meals. I would definitely choose butter if I didn't need this versatility, because butter makes everything better. My good buddy L of A Question Mark taught me that. Using butter would also make this recipe soy-free.

I have a tupperware of leftover crumble in my refrigerator after using it to top a pie I made the other day. I can't wait to go to the farmer's market to buy whatever's in season to transform into a delicious fruit crisp.

PECAN-QUINOA STREUSEL CRUMBLE TOPPING

[ Gluten-Free / Dairy-Free / Pareve / Vegan ]

1 cup pecans
3 Tbsp non-hydrogenated vegetable margarine (such as Earth Balance), softened slightly
3/4 cup quinoa flakes
3 to 4 Tbsp honey or agave nectar
Pinch of salt

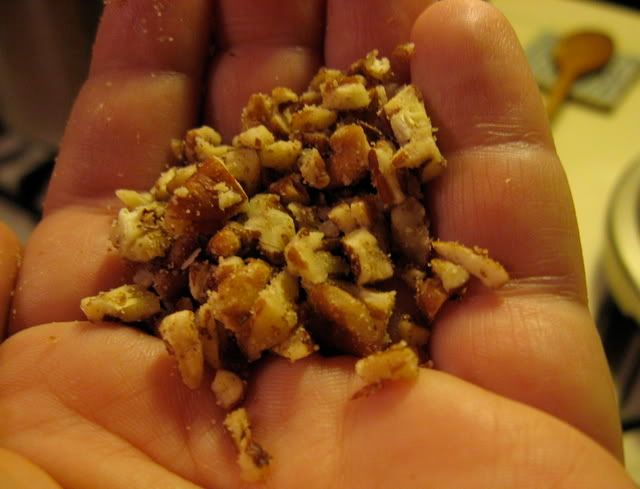
In a food processor with blade attachment, process pecans until they are in nearly uniform small chunks (see picture below). If you have a plastic blade or mixer attachment, attach it and add the rest of the ingredients. If you only have a metal blade, pulse ingredients as slowly and minimally as possible. Process only until ingredients are well combined and form a uniform, crumbly mixture. Use your fingers to crumble it into small pieces over the top of a pie, fruit crisp, muffins, or other baked good. Place dish into a preheated oven at 400 F. Bake until the crumble topping is browned but not burnt (watch carefully to make sure the top doesn't char), approximately 20 minutes.

Here's what the pecans should look like before you add the other ingredients:

Thursday, October 11, 2007

Pie. Pie. Pie. Pie. Pie. Apple Raspberry Pie.


I love pie. I've never met a pie I didn't love, though sadly some pies just don't love me back.

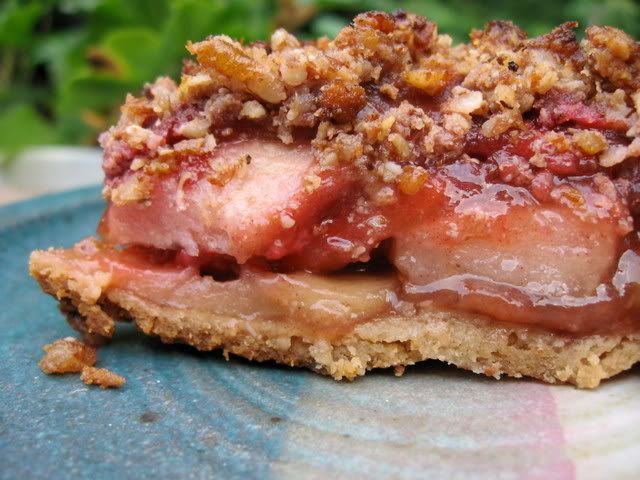
This is a vegan gluten-free apple-raspberry pie with a crumble topping, made with no refined sugar and all local fruit. It was improvisational, and I didn't write the recipe down - I mixed up apples, cinnamon, nutmeg, fresh raspberries, a little Earth Balance margarine, agave nectar and some lemon juice and a little cornstarch (or was it arrowroot starch or sweet rice flour?) for the filling. I will post the delicious whole-grain crumb topping recipe one of these days, I promise. It turned out deliciously. I have another frozen gluten-free pie crust in my freezer just waiting to be turned into another pie, so a recipe should be forthcoming in the next week or so.

The pie crust is this one, which I bought at my local Hannaford:

Natural Feast Gluten-Free Pie Shells (Frozen - 2 Units)

If you don't have a Hannaford near you, you can buy it from Gluten-Free Mall. They come in packages of two, and are vegan, kosher, gluten-free and free of refined sugar. Though my homemade pie crusts are better, these frozen guys are pretty darn decent and so very, very convenient.

Yum.

Thursday, April 12, 2007

Toasted Quinoa Pilaf with Garlic, Kale and Pine Nuts

Gluten-Free Toasted Quinoa Pilaf with Garlic and Kale

Thank you all so much for your wonderfully supportive comments to my last post. I am so grateful for all my wonderful readers, it's like having a personal cheerleading team!

Meanwhile, I'm taking a break from the packing to post this powerfully flavorful quinoa dish I created for a friend's Passover seder. I was thrilled when several people told me it was the best quinoa they'd ever tasted - I think that my use of my extremely rich homemade vegetable broth combined with the toasting of the quinoa before cooking were a large part of its success. Use the most flavorful broth you have on hand, or try water and a gluten-free bouillon cube. I enjoyed this pilaf at room temperature the next day as a quinoa salad - It makes a nutritionally balanced lunch for work or school, and will last at least a week in the refrigerator.

TOASTED QUINOA PILAF WITH GARLIC, KALE AND PINE NUTS


[ Gluten-Free / Dairy-Free / Soy-Free / Vegan / Parve ]


1 Tbsp extra virgin olive oil
1/2 cup onions, chopped finely
6 cloves garlic
1 cup quinoa
2 cups chicken or vegetable broth
1/4 tsp sea salt
1 large carrot, shredded
2 cups finely shredded kale
1 Tbsp tomato paste
1/3 cup celery, minced
1 tsp fresh thyme
Freshly ground black pepper, to taste
1/4 c pine nuts

If you purchased quinoa in bulk, rinse it thoroughly in a fine strainer to remove its bitter coating. If you purchased Ancient Grains, Trader Joe's, or any other boxed brand, no rinsing is necessary.

Place quinoa in a heavy, large skillet over medium heat. Cook for about 15 minutes, shaking the pan frequently to move the quinoa around. Cook until the quinoa becomes golden brown. Remove from heat.

Heat oil in the bottom of a medium saucepan. Add onions and sautee until just beginning to brown. Add garlic and cook for another 1-2 minutes. Add quinoa and sautee for a minute. Add all remaining ingredients except for celery and pine nuts.

Bring to a boil, then cover and reduce heat to low. Simmer for 10 minutes. Add the celery and mix well, then cover and continue cooking for 5 minutes or until done. When quinoa is done, it should be tender and the spiral-like germ will have separated from the rest of the grain.

In the dry skillet used for toasting the quinoa, now lightly toast pine nuts over medium-low heat. Pine nuts burn quickly so stir them frequently and remove them from the pan the moment they appear golden brown. Stir into pilaf before serving.

Serve hot or at room temperature.

Friday, March 23, 2007

Walnut-Sage Potatoes Au Gratin


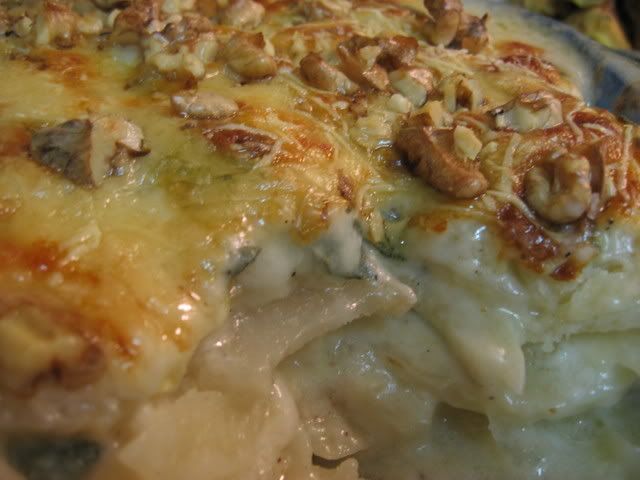
I "auditioned" a dish for Passover this week... The recipe is from user Annacia on RecipeZaar, with minor gluten-free adjustments. I offered to review the recipe for her, thinking it might work if I had a vegetarian seder. It looks like I won't be having a vegetarian seder, but this dish is a sure winner. It might just be my new favorite potato dish, second only to kugel. It is so decadent and flavorful, and reheats very well in the oven or microwave.

I have to admit I was tempted to add a lot more cheese than the recipe calls for- And ultimately, I did add a bit more to the top of the casserole at the end, and then stuck it under the broiler for 30 seconds. I like to think I made up for this by using 2% milk instead of whole, but I suppose it doesn't work that way. Oh, well. It sure was good. Don't use American-style gruyere if you can help it - make sure to find a gruyere that is Swiss, otherwise use fontina or emmenthal or another good melting cheese with a little bit of bite to it.

To make a gluten-free roux for this dish I used arrowroot flour, a fine powder which works wonderfully as a flour substitute in gravies and cream sauces. You can try using other thickeners, but stay away from gluten-free flour mixes that contain nuts or other darker or coarser particles (for example, Pamela's Baking and Pancake Mix) as you will not achieve the smooth, white consistency you are going for with a white sauce. Cornstarch is not recommended since it becomes gummy when the dish cools or is refrigerated. I've had good luck with both Asian sweet rice flour (also called sticky rice flour or glutinous rice flour) and arrowroot, which are both finely ground and white in color. For Passover, I would try using heavy cream instead of 2% milk, and using potato starch as a thickener (adjust the quantities as necessary).

This is a terrific way to use one of my favorite new ingredients, walnut oil. It is well worth seeking out walnut oil for this recipe, because it has such a beautiful flavor. Trader Joe's is now carrying it, which means it's sure to become a staple in many kitchens within the blink of an eye. It looks like Gefen and Nutola both make kosher l'pesach walnut oil. This dish also shows off the complexity of fresh sage in a way that is lovely. The sage, walnuts, and walnut oil work together to make this a more sophisticated and less pedestrian gratin. Thanks, Annacia!

WALNUT-SAGE POTATOES AU GRATIN

6 medium russet potatoes (2 lb.)
1/2 cup chopped onions
5 garlic cloves, minced
3 Tbsp walnut oil
4 Tbsp potato starch (for Passover) or arrowroot flour
1/2 teaspoon salt
1/4 teaspoon pepper
2 1/2 cups 2% or whole milk
3 tablespoons snipped fresh sage
4 ounces Swiss gruyere cheese, shredded (1 cup)
1/3 cup broken walnut pieces
Fresh sage leaves (optional)

Peel potatoes and thinly slice. Use a knife or the thin slicing blade on the food processor. Slices should be no thicker than 1/4." Place slices in a bowl, submered in cold water to keep from browning.

In a medium saucepan on medium to medium-high heat, cook the onion and garlic in walnut oil until tender but not browned. Stir in flour, salt, and pepper, then quickly add all of the milk. Cook over medium heat, stirring constantly with a whisk until thickened and bubbly. Remove from heat; stir in snipped sage.

Grease a 2-quart round casserole (with glass cover) or a deep 2-quart baking dish. Layer half of the potatoes in casserole. Cover with half the sauce. Sprinkle with half the cheese. Repeat layering with the potatoes and sauce. Cover with lid or tented tinfoil.

Bake uncovered at 350 F for 40 minutes, then uncover and bake 25-40 minutes more or until potatoes are tender. Sprinkle remaining cheese and all of the chopped walnuts over top. Bake, uncovered, 5 minutes or until cheese is melted and bubbly. Let stand 10 minutes before serving. Garnish with remaining sage leaves.


Thursday, March 15, 2007

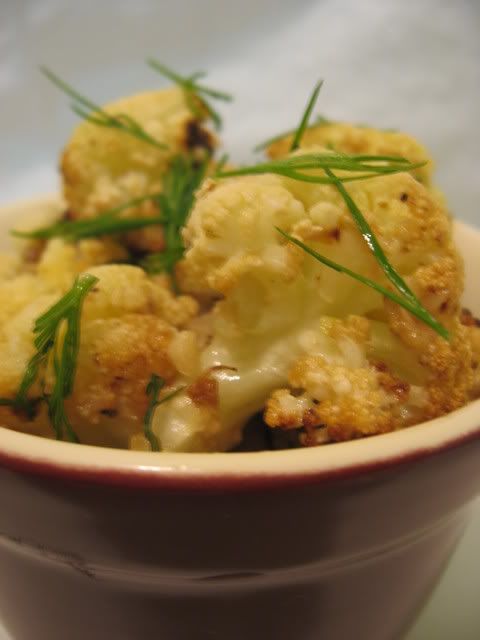
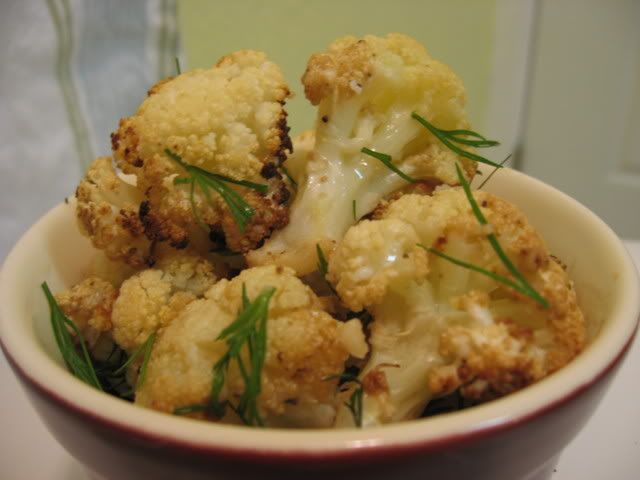
Lemon Roasted Cauliflower with Dill


More gluten-free baked goods will be finding their way to this blog in the coming days, but in the meantime it's back to vegetables.

It's amazing how the simplest dishes are so often the most successful. Roasted cauliflower, with a few added ingredients: Bam! Flavor explosion! I love the way the sweetness and tartness of the lemon juice play off of the caramalized and browned edges of the cauliflower. This dish is easy, requiring very little preparation, and I have a feeling that even cauliflower skeptics will enjoy it.

Karina wrote this week about her on-again off-again vegetarianism. For reasons ranging from religion (kosher dietary laws make vegetarianism an easier choice) to ethics and environmental concerns, my own diet has become mostly vegetarian. I have no ethical opposition to eating meat - Just concern about eating meat that I can't guarantee came from happy, healthy animals who had access to sunlight and pasture and whose raising didn't have a massive negative environmental impact. Finding grassfed beef that's also kosher here in the Bay Area? Fuggedaboutit!

There's also the fact that I am the World's Biggest Vegetable Fan (tm). My appreciation for fresh produce has really grown since becoming gluten-free. I could live on vegetables for breakfast, lunch and dinner - Which one day I realized isn't really such a bad idea from a health perspective. So my meals revolve around vegetables - And beans, whole grains, nuts, eggs and goat cheese (yes, goat cheese is in a category of its own). With fish once or twice a week, almost no chicken, and organic beef once a month or so - at that particular time of the month when my body screams out for iron.

So back to cauliflower... It's low-glycemic index and low-carb, which is part of why it's so popular in recipes for diabetics and South Beach followers. It roasts wonderfully, and lends itself to mashes, gratins, latkes and other recipes that would normally use nutritionally-empty white potatoes. The flavor from the fresh dill is really wonderful in this dish, which can be eaten at hot, at room temperature, or on top of a salad. I found it so snackable that very little ended up making it to the tupperware I had laid out for it.


LEMON ROASTED CAULIFLOWER WITH DILL

1 large head cauliflower, cut into florets
2 generous teaspoons Dijon mustard
4 cloves of garlic, crushed
Juice of 2 lemons
1 tsp salt
1 Tbsp extra virgin olive oil
1-2 Tbsp fresh dill, chopped
Fresh ground black pepper

Preheat oven to 400 F. Place cauliflower florets in a large bowl. In a smaller bowl, combine all ingredients except for cauliflower, whisking until blended. Pour marinade over the cauliflower and toss until coated. Spread on baking sheet. Drizzle any remaining marinade over the cauliflower. Bake for 30-45 minutes or until tender but not mushy. Toss once, if desired, halfway through cooking. The cauliflower should have some browning around the edges.

Monday, March 05, 2007

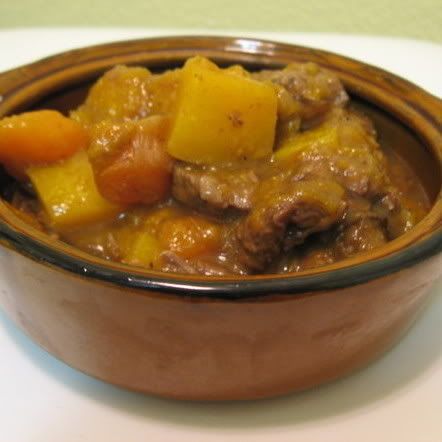
Beef Tzimmes with Butternut Squash


Tzimmes, for the uninitiated, is a sweet, slow-cooked Jewish stew or casserole that usually features root vegetables, honey, cinnamon and prunes but has as many variations as there are Jewish families. Growing up we ate it mostly for Passover or Rosh Hashanah. I've labelled it as a Thanksgiving recipe as well, simply because of the seasonal nature of the ingredients. The word tzimmes is used to refer to "a state of confusion" or "to make a fuss about something" in Yiddish, though from what I've heard it actually originates from the words zum ("to the") and essen ("eating"). Don't quote me on that, I speak only a bissel of Yiddish.

Some of you have made and enjoyed my vegetarian tzimmes recipe. Well, here's a delicious twist for the meat lovers out there. Slightly adapted from this recipe, this tzimmes features tender, slow-cooked beef and sweet butternut squash. It makes a wonderful and filling main dish. I love it! Many thanks to Mirj, who shared this recipe and considers it a family favorite. Es gezunterheyt!

BEEF TZIMMES WITH BUTTERNUT SQUASH

2 lbs boneless lean beef chuck, trimmed of fat
2 Tbsp vegetable oil
1 large onion, chopped
2 large carrots, peeled and cut in 1 inch chunks
1 tsp salt
Freshly ground black pepper, to taste
2 to 2 1/2 cups water
2 lbs butternut squash
2 tablespoons honey
1/2 teaspoon ground cinnamon
1 1/4 cups prunes, pitted and cut in half
Juice of 1 large orange

Cut beef into 1 1/2- 2 inch pieces and pat them dry. Heat 1 tablespoon of oil in a heavy stew pan. Add the beef cubes in 2 batches, browning each lightly on all sides over medium-high heat and removing browned meat with a slotted spoon to a plate.

Add remaining oil and heat it. Add onion and saute over medium heat, until brown, stirring often. Return meat to pan, along with any juices on plate. Add carrots, salt, a generous amount of fresh ground pepper, and enough water to just cover the meat and vegetables. Bring to a boil, skimming fat off the top occasionally. Cover and simmer over low heat, stirring occasionally, for 1.5 to 2 hours, or until the beef is tender.

Peel the squash and cut it in half lengthwise. Remove seeds from cavity and cut squash into 1" cubes. Add honey, orange juice, cinnamon and squash to the stew, pushing the squash pieces into the liquid. Cover and simmer for 10 to 15 minutes, stirring occasionally. Add prunes and cook for an additional 15 minutes or until squash is tender. Adjust seasoning and serve hot.

Tuesday, February 27, 2007

Collard Greens, Plain and Simple

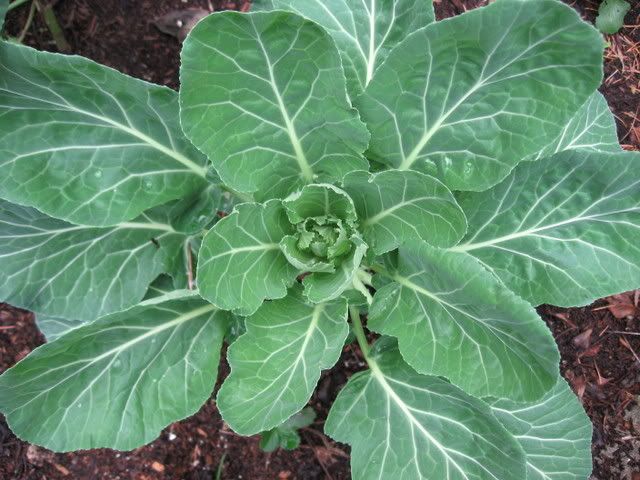
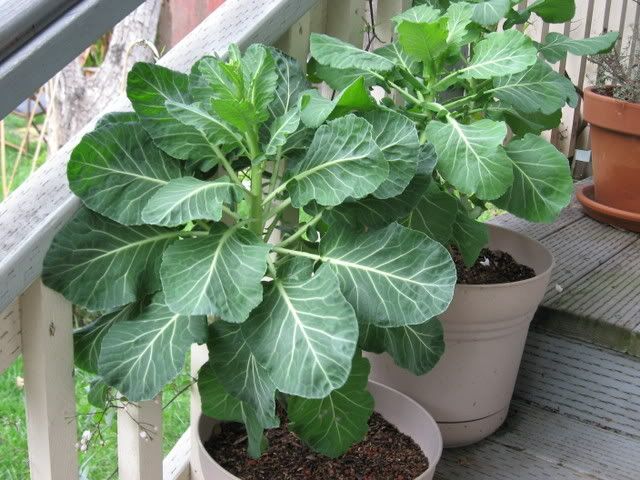
I grow collards in my garden:


And I grow collards on my porch:


I love collard greens, and they sure make my body happy.

Here in Northern California, February is a great time to buy, or harvest, various hardy green vegetables and cabbage-family veggies that thrive in the winter weather. I harvested 2 whole pounds of collards from my garden last week and cooked them up for this week's submission to the Anti-Oxidant Rich Foods / 5-A-Day Tuesday blogging event. They are very tasty by themselves or with rice and beans. I'll be enjoying for days to come. Feel free to cut this recipe in half, of course, if you don't want a week's worth of greens on your hands!

Part of why these greens turned out so deliciously is that I used my Victorious Vegetable Stock, which is incredibly flavorful and rich. However I'm sure they'd turn out fine and dandy with one of the less flavorful storebought stocks. The smoked sweet paprika in these greens imparts a wonderful smoky flavor without the traditional but decidedly non-kosher and non-vegetarian smoked ham hock.

Whatever you do, don't discard the pot liquor! It is full of the nutrients and flavor that have leached out of the greens during cooking, and makes a very full-bodied and rich broth you can use as a replacement for water when making rice (my favorite), as the base for soups or stews, or in any other savory dish that requires broth or water.

EASY VEGETARIAN COLLARD GREENS

2 pounds of collard greens
4-5 cloves of garlic, minced
1 large onion, chopped
3 cups vegetable stock
1 teaspoon salt (to taste)
1 teaspoon smoked sweet paprika
1/2 cup apple cider vinegar
Optional: Hot sauce or red pepper flakes

Wash greens well, submerging in a sink full of cold water to remove any dirt and grit. Drain well. Cut off the stems right where the leaf starts. Stack about 5-8 leaves on top of eachother, then roll lengthwise. Cut rolled up leaves into 1" slices widthwise. Repeat until all the greens are done, and add to a large pot.

Add all other ingredients. Cover and bring to a boil over high heat, then reduce heat to a simmer. Simmer for 45 minutes or until greens are extremely tender. Serve hot, using a slotted spoon to drain the liquid from the greens.

Sunday, February 25, 2007

Gluten-Free Bread That Just Might Make You Cry [For Joy]


It is hard to believe that something as ordinary as a loaf of bread could nearly bring tears to my eyes - But that is what happened the other night when I sliced into the loaf of fresh-baked bread I had just pulled from the oven.

I had adapted a recipe that was shared on the Celiac.com forums by a woman named Laurie. I certainly won't take full credit for it, as the basic structure was her creation. I owe her many thanks.

I didn't want to get my expectations up about this bread. I figured it couldn't possibly be anything more than satisfactory, at least by the standards of someone who still remembers the taste and mouthfeel of real, gluten-loaded bread. The first thing I noticed when I sliced it was that the slices were pliable. I was certain that I was hallucinating. You know what I'm talking about - Lacking the rubbery properties of gluten, even good gluten-free bread will usually break if you try to bend one of the slices. But this slice was like an acrobat, gracefully bending nearly in half without any crumbling whatsoever. It had the appearance of wheat bread. I poked at it tentatively with a finger... It gave, and bounced gently back. It was soft as a pillow. When I bit into it, all I could think was "Holy sh*t!" I got a little farklempt. At that moment I realized what I had been missing since gluten began making me ill.

There is not a single thing about this bread that tastes or feels different than a wheat loaf. This is bread I could serve to a gluten-eating guest without shame, and feel confident they would never guess that it is gluten-free.

So, about those flaxseeds: I am not a big fan, generally, but I truly could not taste them in this bread. They play a big part of giving it the wonderful texture it has, as well as the high fiber content, but thankfully they do not contribute to the flavor. It is dairy-free, which makes it a good choice for all you GFCF (gluten-free casein-free) folks. It has more protein, more fiber, less sugar, and more whole grains than most breads which makes it a perfect fit for my increasingly healthy diet.

The next morning I woke up for work, and stumbled to the kitchen. I accepted that the rest of the slices, which I'd left in a ziploc bag on the counter, would have become dry or gummy (or that special combination of both that is apparently unique to gluten-free bread). I was blown away by the fact that the bread had the same exact texture as it had the night before. This is bread that you can make a sandwich on without toasting it first. Bread that you can take to work or pack for your kid's school lunch. Best of all, it's not one of those breads that has a mediocre flavor or texture that needs to be obscured by peanut butter and jelly in order to be edible. It isn't just good - It's wonderful. This is a loaf that stands alone.


GLUTEN-FREE MULTIGRAIN MIRACLE BREAD

1/2 cup brown rice flour
1/2 cup sorghum flour
1/4 cup amaranth flour
1/4 cup tapioca starch
1/4 cup cornstarch or arrowroot starch
1/4 cup flax seed meal (ground flax seeds)
3 teaspoons xanthan gum
2 teaspoons active dry yeast
1 teaspoon salt
2 eggs
2 additional egg whites
1 cup water, room temperature
2 tablespoons vegetable oil
2 tablespoons honey
2 teaspoons apple cider vinegar

Preheat the oven to 200F.

Sift the flours, yeast and all other dry ingredients together into a medium bowl. Stir in flax meal and combine.

Combine the wet ingredients in a separate large bowl using a hand-mixer on low or medium speed. When fully combined, slowly add dry ingredient mixture and mix until fully blended, with no lumps. Scrape the sides regularly.

Grease a 9x5" bread pan, and pour the dough into the pan. Turn off the oven and immediately place the pan in it. Do not open the door again, if possible. Allow the dough to rise for 90 minutes. It should rise to the very top of the pan.

Increase heat to 350F and bake for approximately 40 minutes. The crust should be golden-brown. Allow to cool slightly before removing it from the pan to finish cooling. Do not slice until the bread is no longer hot.

This loaf does not need to be frozen, but if there are leftovers after a few days, place slices in airtight bags and freeze.

Thursday, February 22, 2007

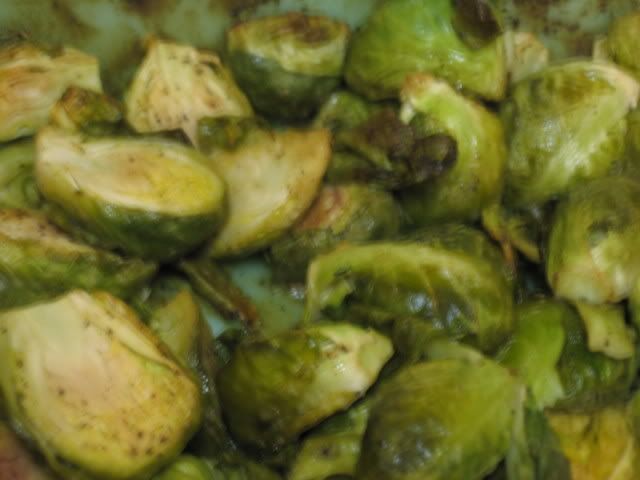
Lemon-Dijon Roasted Brussels Sprouts


For those of you who are fans of my Roasted Brussels Sprouts, here's a zesty twist on the same simple dish. If you haven't yet tried the original recipe, either one of these recipes just might make you a brussels sprout fan even if you're a sworn hater. The possibilities are endless when it comes to these itty bitty cabbage babies... Take a look at my friend Seamaiden's Caramelized Maple Brussels Sprouts - A tasty option for those who prefer their sprouts sweet.

My lemon-dijon brussels sprouts are made with fresh lemon juice - I much prefer them made with Meyer lemons but if you can't get them a regular lemon will certainly do. Beware, these peppery sprouts are addictive.

LEMON-DIJON ROASTED BRUSSELS SPROUTS

1 lb fresh Brussels sprouts
1 Tbsp extra virgin olive oil
2 Tbsp dijon mustard
1/2 tsp garlic powder
1/4 teaspoon ground black pepper
1/4 teaspoon salt
Juice of 1 lemon

Preheat oven to 400 degrees F. Cut less than 1/4" off of the bottom of each brussel sprout and then slice sprout in half lengthwise. Combine all other ingredients in a bowl. Then toss brussels sprouts with sauce in a baking dish - Spread sprouts in a single layer. Roast for 25 minutes or until brussel sprouts are slightly browned and tender throughout. Serve hot or at room temperature.

Friday, February 16, 2007

Vegetable Crisp


Apple crisp, cherry crisp... Vegetable crisp? Hey, why not? This savory casserole is a gluten-free revisioning of a recipe for Eggplant and Tomato Crisp. It's a very filling meal that I believe even one of those ubiquitous eggplant-haters could enjoy. When sliced and served, you can see the colorful layers of vegetables beneath the crumble topping. It reheats nicely in the microwave - Though the topping loses some of its crispness, it takes on the consistency of stuffing which is downright tasty. I prepare this with cheese as called for in the original recipe, but I've listed cheese as an optional ingredient, since cheese isn't an integral part of the taste or texture and I think making this dish vegan would not compromise it in any way. For the right consistency, be sure to use coarse breadcrumbs rather than fine ones.


VEGETABLE CRISP

Filling
2 Tbsp olive oil
3 Tbsp balsamic vinegar
6 garlic cloves, minced
4 Tbsp fresh basil, chopped
1 tsp dried oregano
Salt & fresh ground pepper, to taste
1 large eggplant, unpeeled and cut into 1/2-inch slices
1 yellow bell pepper, cut into 1/2-inch strips
2 large zucchini, cut into 1/2-inch slices lengthwise
4 large ripe tomatoes, cut into 1/4-inch slices

Topping
3 Tbsp chopped fresh parsley
5 cups fresh Italian Gluten-Free Breadcrumbs
1 tsp thyme, fresh or dried
2 tsp fresh rosemary, minced
2 tablespoons fresh lemon juice
2 tablespoons olive oil
Salt & fresh ground pepper, to taste
Basil leaves, for garnish
1/2 cup freshly grated parmesan cheese (optional)

Preheat oven to 425°. In a small bowl, whisk together oil, vinegar, garlic, basil, oregano, salt and pepper. Brush this mixture onto both sides of the eggplant, tomato, zucchini and pepper slices. Place vegetables on a large baking sheet. Cover with foil and bake for 10 minutes, then remove foil and bake for an additional 10 minutes.

Lightly grease a shallow casserole or gratin dish with olive oil or cooking spray. Place a layer of cooked eggplant on the bottom, followed by a layer of bell pepper, then a layer of zucchini, then a layer of sliced tomatoes. If any vegetables remain, create an additional layer, but be sure to end with a layer of tomatoes on top.

In a medium sized bowl, mix together all of the topping ingredients except for fresh basil. Sprinkle evently over the vegetables. Bake the casserole for 30 minutes. Garnish with fresh basil leaves and serve hot.

Monday, January 29, 2007

Pecan Rice Pilaf


Today I set out to answer the question:

What is wild rice, anyway?

According to Wikipedia, wild rice is part of the genus Zizania, which is a group of grasses that grow in the shallows of small lakes and ponds. Three varieties are grown in the United States. Wild rice is not a rice at all, but rather the seed of these aquatic grasses.
Almost always sold as a dried whole grain, wild rice is high in protein, the amino acid lysine and dietary fiber, and low in fat. Like true rice, it does not contain gluten. It is also a good source of the minerals potassium and phosphorus, and the vitamins thiamine, riboflavin and niacin. Because commercial, paddy grown wild rice is harder and denser than true rice, it must be cooked longer to become soft enough to be eaten; it generally requires cooking for at least 45-60 minutes in a ratio of wild rice to water of approximately 1 to 3. Because of its comparatively high cost and chewy texture it is often cooked together with true rice, often in a ratio of true rice to wild rice of 8 to 1 or 4 to 1.
[Italics are mine, for emphasis]

Wild rice adds a satisfying chewy texture and compelling color contrast to brown or white rice, and is one of my favorite additions to rice pilaf. For this recipe, inspired by a recipe posted by a woman named Bev on a recipe board I frequent, I call for a blend of brown and wild rice. You can blend the rices yourself, using the ratios indicated above, or simply buy a pre-packaged blend of brown and wild rice. Lundberg Family Farms makes several of these mixes, including their Wild and Brown Rice Blend. Their rice mixes are kosher and gluten-free.

Sadly, I have no photograph to accompany this colorful pilaf. I hope it speaks highly of the recipe that I ate it all before I had a chance to photograph it!

PECAN RICE PILAF

1 cup brown rice and wild rice mix
2 cups vegetable stock
1 1/2 tablespoons butter, ghee or olive oil
1 medium carrot, peeled and minced
1 stalk celery, minced
1/2 bell pepper, minced (optional)
1/2 cup white mushrooms, minced
1/2 cup toasted pecans, coarsely chopped
Salt & freshly ground black pepper, to taste

Follow the instructions on the package of brown rice-wild rice mix, using a medium-sized sauce pan and replacing the water with vegetable stock. Most mixes will call for 2 cups of liquid for 1 cup of rice. Bring the stock to a boil, add the rice, cover and turn heat to low. Simmer for the indicated amount of time (approximately 50 minutes).

In a 10" skillet, melt the butter or ghee (or heat oil) over medium heat. Add the carrot and peppers and saute for 2-3 minutes. Add celery, mushrooms, and pecans. Saute for about 2 minutes more, stirring frequently. Add the rice and stir until all ingredients are thoroughly combined and evenly hot. Add freshly ground black pepper to taste, and additional salt if necessary. Serve hot. Leftovers can be reheated or eaten as a rice salad at room temperature.

Makes about 6 servings.

Tuesday, January 23, 2007

Maple Butternut Squash Puree


I fretted over the air bubbles that were visible in this photo at the bottom of the bowl until my Official Photography Consultant, M of Poet With A Day Job, pointed out that the bubbles just highlight the fact that this puree was photographed while it was still steaming hot. Phew!

I've discovered that I can eat cow's milk only every 4 days or so. Oddly enough, those fried mozzarella sticks hardly bothered my stomach... yet when I baked something using butter the following day, I got sick as a dog. I need to be more careful not to overload my frustratingly fragile GI system. On that note, I made a delicious dish last night that was buttery and decadent without making me sick. The key? Ghee, that fabulous Indian incarnation of clarified butter that seems to concentrate the dreamy butter flavor while removing the lactose and casein.

There is something about butternut squash that is so alluring this time of year - The vivid color reminds me of the marigolds I love to grow. Here in my Northern California garden last year's marigolds have finally died and this year's marigolds are beginning to sprout.

The taste and texture of butternut squash are so versatile - Cut in large pieces and roasted, mashed as a side dish, pureed for the filling for a tart or ravioli, combined with vegetable stock for a rich and creamy soup. Always delicious. The spicy main dish I made this time around called out for a sweet and lightly spiced side with a creamy texture. Butternut squash puree to the rescue!

Two tablespoons of maple syrup provides plenty of sweetness, but if you want stronger maple flavor you can certainly add more.

MAPLE BUTTERNUT SQUASH PUREE (Lactose-Free, Casein-Free)

1 medium butternut squash
1/4 teaspoon salt
2 tablespoons ghee or clarified butter
2-3 tablespoons maple syrup
2 teaspoons pumpkin pie spice
3 tablespoons rice milk or soy milk or almond milk

Peel squash, cut in half lengthwise, and remove seeds. Cut into 1 1/2 inch cubes and steam until tender. Place steamed butternut squash cubes and all other ingredients in a food processor or blender. Blend until smooth and creamy. Serve hot or warm.

Monday, January 15, 2007

Oatmeal Spice Cake

This recipe is a shout out to all those readers who said they'd like some dessert recipes using non-sugar sweeteners. This delicious, low-fat oatmeal spice cake loaf is sweetened only with applesauce and honey. In addition to being gluten-free, it's also dairy-free. I was skeptical about making a cake with oatmeal, thinking it would turn out too dense - But instead I was pleasantly surprised by a moist cake that has a really lovely texture. It's a great choice for breakfast, as it has a good amount of protein and fiber and is not overwhelmingly sweet. I wish I could share a photo that really showed how lovely this loaf looked - But this fuzzy cameraphone pic will have to do. Good news, though - A brand spankin' new digital camera is en route to me, scheduled to be delivered tomorrow! [Insert deep breath of relief here.]

OATMEAL SPICE CAKE (LOW FAT, DAIRY FREE, GLUTEN FREE)

1 1/2 cups almond milk or soy milk
1 1/2 tablespoons white vinegar
1 cup gluten-free rolled oats*
2 cups gluten-free all-purpose flour
1 1/2 teaspoons baking powder
1/2 cup unsweetened applesauce
2 teaspoons pumpkin pie spice
1/3 cup pecans
2 tablespoons raisins, chopped
1/4 cup honey
2 eggs, beaten

Preheat oven to 350 F. In a large mixing bowl, combine the vinegar and the almond or soy milk. Allow to sit for 5 minutes. Stir in oats, and allow to sit for 20 minutes. Pulse the pecans several times in a food processor. Add the pecans and all other ingredients to the vinegar/milk substitute/oat mixture. Mix well. Pour the batter into a greased bread pan. Use a flexible spatula to even out the batter. Optional: Sprinkle the cake with an additional tablespoon of ground pecans. Bake for 70 minutes. Invert onto cooling rack and allow to cool for at least 20 minutes before slicing.

*You can find buy certified gluten-free oats here.