KOSHER RECIPES FOR GLUTEN-FREE LIVING


Showing posts with label condiments. Show all posts

Thursday, January 31, 2008

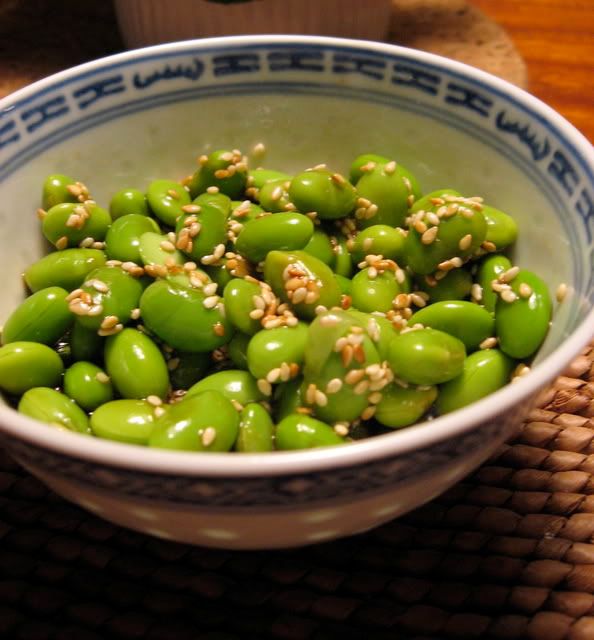
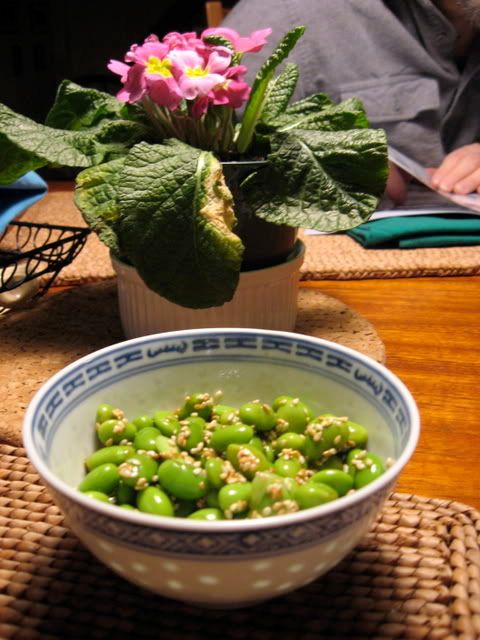
Sesame Edamame Salad


I have been eating a lot of edamame. I don't normally eat a lot of soy, but edmame (steamed or boiled soy beans) are a favorite snack on the South Beach Diet (especially during Phase 1) because they contains fiber and protein and are easy to travel with. I was a little tired of eating edamame plain so I decided to turn these humble little beans into a simple side dish with more complex flavors. What I ended up with was a dish that would be a wonderful compliment to a chicken or tofu stirfry, miso-ginger grilled fish, or sashimi and brown rice, as well as other dishes that reflect the use of Chinese or Japanese seasonings. It can also be used as a condiment of sorts, to sprinkle over the top of fish or meat. This flavorful vegan salad is high in protein and fiber, and contains no added sugars. It is suitable as an appetizer as well as a side dish. I'm a big fan of the flavors and textures of this dish and I guess my mother is, too, because I had to keep swatting her hand away from the bowl. I can tell I will be making it again and again. I thought it would last me at least two meals, but I wolfed the whole bowl down. This recipe is easy to double if you're cooking for more than one or two people.

Notes on ingredients: By the by, my partner discovered pre-shelled frozen edamame at her grocery store. It's made by Dr Praeger's, of all companies! (They are a favorite for kosher gluten-free goodies such as fish sticks and potato pancakes) I have been unable to find them anywhere else, and they're not yet listed on their website, but check your health food store or kosher grocery for them. Next time I'll use these, as they'll spare me 10 minutes of squishing the beans out of their pods. As far as rice vinegar is concerned, the brand I prefer for this dish is Eden Foods Organic Brown Rice Vinegar.


SESAME EDAMAME SALAD

[ Vegan / Dairy-Free / Pareve / Gluten-Free ]

1/2 cup shelled edamame
2 tsp gluten-free soy sauce
1 tsp sesame oil
1 tsp unsweetened brown rice vinegar or white rice vinegar
1 tsp sesame seeds

If the edamame you use are frozen, defrost them. Mix in a small bowl with soy sauce, sesame oil and rice vinegar. Adjust sesame oil to taste. For stronger flavor, marinate overnight. In a pan over low heat, toast the sesame seeds just until they start to turn golden. Immediately turn off heat, and remove directly from pan to the top of the edamame. Stir slightly and serve.

Thursday, October 18, 2007

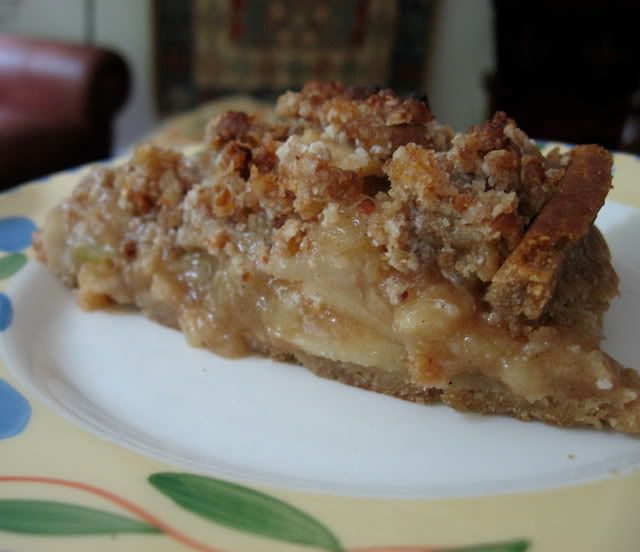
Flourless Streusel Crumble Topping with No Refined Sugar


It took me a while to find a gluten-free crumble topping that doesn't use oats and has a texture and appearance that I like. I guess I'm picky about my crumbles. When I finally got this recipe right, I was pleased as punch. Now I can actually convince myself that pie is health food! This crumble topping is especially for those of us who choose to avoid refined sugar, which is the backbone of the crumble toppings usually used on top of fruit crisps, pies and some bar cookies. I created this crumble topping as a healthier, whole grain alternative, free of cane sugar and full of crumbly texture and sweet, nutty flavor. I hope it will help somebody out there transform some plain old fruit or a topless pie (ha!) into something truly worthy of oohs and aahs.

Though certified gluten-free oats are now available, they are hard to find in local stores and are very expensive. There are also celiacs who cannot digest even these certified oats. So some of us still have the need for a gluten-free crumble topping that is made with alternative ingredients. This recipe relies on the versatility of pecans and the oat-like texture and outstanding nutritional profile of Ancient Harvest Quinoa Flakes for its texture. I buy quinoa flakes locally for around $3 per package. I hear there are other companies besides Ancient Harvest that make quinoa flakes, but this is the only brand I've found in stores here and I'm quite happy with it as a baking ingredient and a hot cereal for chilly mornings.

I have tried this recipe with both honey and agave nectar, and honey creates a much better crumb and holds the sweetness better when the crumble is baked. However, if you need to make this strictly vegan, agave nectar will certainly do the job.

Feel free to use butter (as if you needed my permission!) I've called for non-hydrogenated margarine only because I often like to make my pies pareve so that I can eat them at both meat and dairy meals. I would definitely choose butter if I didn't need this versatility, because butter makes everything better. My good buddy L of A Question Mark taught me that. Using butter would also make this recipe soy-free.

I have a tupperware of leftover crumble in my refrigerator after using it to top a pie I made the other day. I can't wait to go to the farmer's market to buy whatever's in season to transform into a delicious fruit crisp.

PECAN-QUINOA STREUSEL CRUMBLE TOPPING

[ Gluten-Free / Dairy-Free / Pareve / Vegan ]

1 cup pecans
3 Tbsp non-hydrogenated vegetable margarine (such as Earth Balance), softened slightly
3/4 cup quinoa flakes
3 to 4 Tbsp honey or agave nectar
Pinch of salt

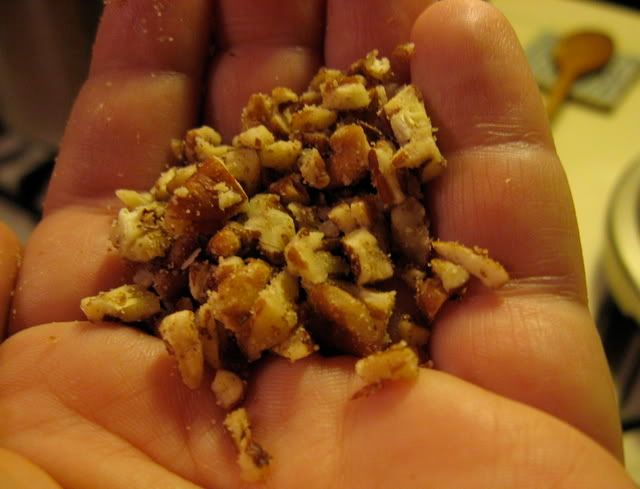
In a food processor with blade attachment, process pecans until they are in nearly uniform small chunks (see picture below). If you have a plastic blade or mixer attachment, attach it and add the rest of the ingredients. If you only have a metal blade, pulse ingredients as slowly and minimally as possible. Process only until ingredients are well combined and form a uniform, crumbly mixture. Use your fingers to crumble it into small pieces over the top of a pie, fruit crisp, muffins, or other baked good. Place dish into a preheated oven at 400 F. Bake until the crumble topping is browned but not burnt (watch carefully to make sure the top doesn't char), approximately 20 minutes.

Here's what the pecans should look like before you add the other ingredients:

Sunday, August 19, 2007

Un-Cooking: Garlic Scape & Toasted Pumpkin Seed Pesto


Dear readers, please forgive my seasonal inappropriateness.

I tend to eat, and blog, both seasonally and locally as much as possible. My recipes reflect that. This pesto is something I made back in early July. I wrote the recipe down and photographed it, but never did anything with it. Today I was daydreaming about this pesto's delightfully complex balance between the sharpness and sweetness of garlic scapes and the nutty comfort of toasted pumpkin seeds (pepitas), and I realized that though garlic scapes are now out of season (June is the prime month for them in most places), I should blog about this recipe before I lose the envelope it's scrawled on. So I hope you'll pardon me for blogging about a delicacy you can't obtain. See this as a reminder that as summer starts to wind down it is a perfect time to start thinking about what we look forward to cooking next spring and summer, or use it as an impetus for some of you gardeners to consider adding garlic to your garden plans for next year!

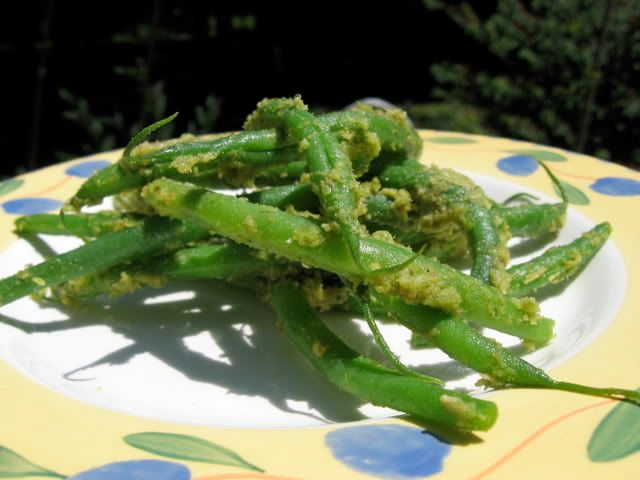
Since most of us don't follow recipes without tweaking them a bit, it occurred to me that this recipe could be a great jumping-off point for some experimentation. Maybe this recipe would be fabulous with lightly sauteed scallions and/or roasted garlic instead of scapes. Or with lightly steamed green beans pureed into the pesto with raw garlic. I can imagine that roasted leeks would also be a wonderful replacement for scapes. As far as I'm concerned, finding replacements for seasonal ingredients is always an enjoyable challenge.

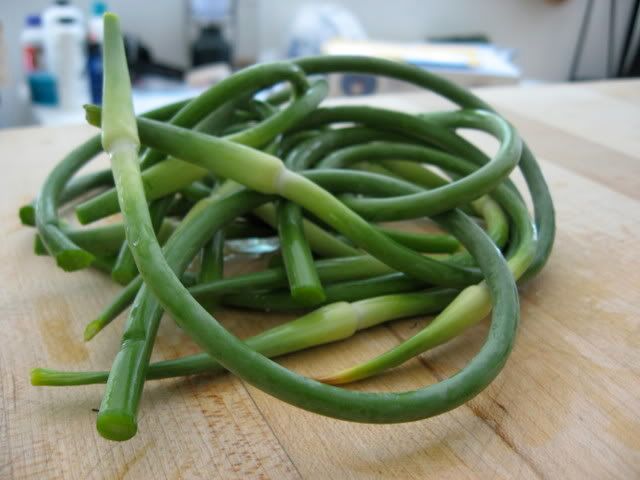
"What is a garlic scape?" ask the uninitiated, whose ranks I was a member of until this year. Why, I couldn't explain it any better than this Washington Post blogger, who writes:
The "scape" in question is hardly a typo or a secret code word; it's shorthand for garlic scape, a part of the garlic plant that is a garlic lover's nirvana.

Here's the anatomy lesson: Garlic and its relatives in the allium family, (leeks, chives, onions) grows underground, where the bulb begins its journey, soft and onion-like. As the bulb gets harder (and more like the garlic we know), a shoot pokes its way through the ground. Chlorophyll-green like a scallion (maybe even greener), the shoot is long and thin and pliable enough to curl into gorgeous tendrils.

This stage of growth is the garlic scape, folks. If left unattended, the scape will harden and transform from green to the familiar opaque white/beige color of garlic peel. Keeping the shoot attached will also curtail further growth of the bulb. So, in an effort to allow the garlic to keep growing, the farmer is getting a two-fer with this edible delectable that cooks are just beginning to discover.

The pesto I created is vegan, and truly has no need for the usual parmesan cheese. It is sharp with garlicky flavor from the scapes, which mellows over time. The nutty flavor of the toasted pumpkin seeds is just wonderful. This pesto can last for quite a while in the refrigerator. Try it tossed with steam vegetables, or mixed with steamed rice or quinoa. Spread it on fish before or after grilling or broiling. Mix it with hot Tinkyada brown rice pasta. Thin it with some additional olive oil and/or water to create a more saucy pesto that can be poured over salad, meat, fish, vegetables or grain dishes. Use it as a sandwich spread, or eat it alone on a crusty piece of bread. This is a versatile alternative to classic basil pesto or my fresh and clean tasting summery Cilantro-Lemon Pesto. I hope that next spring/summer when you see garlic scapes at your local farmers' market you'll remember this recipe and look it up... Or create an even more exciting use for these beautiful green spirals curlicues, and share it with us!


GARLIC SCAPE & TOASTED PUMPKIN SEED PESTO

[ Gluten-Free / Soy-Free / Dairy-Free / Vegan / Pareve ]


3 Tbsp lemon juice
1/2 cup pumpkin seeds, untoasted and unsalted*
Approximately 15 garlic scapes, raw or lightly sauteed
1/2 cup extra virgin olive oil
1/2 tsp sea salt
2 tsp nutritional yeast
Optional: ground black pepper to taste

Place pumpkin seeds in a dry, preheated skillet over medium flame. Stirring frequently, allow pumpkin seeds to toast until they brown slightly. They will puff up and start popping. Remove immediately from heat and pour into a bowl. Allow them to come to room temperature.

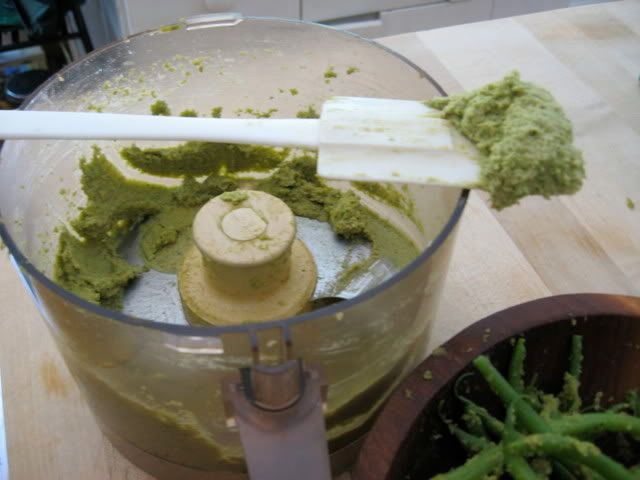
Cut scapes into 2 inch pieces. Add all ingredients to food processor and blend until smooth. Add warm water or additional olive oil to thin, if desired.

*Note: If you use pumpkin seeds that you removed from a pumpkin yourself (as opposed to pre-packaged, dry pumpkin seeds), you may want to try this method for preparing them.

This recipe is part of the Weekend Herb Blogging event, hosted this coming week by Real Epicurean.

Monday, May 14, 2007

Roasted Garlic, Artichoke and White Bean Spread


Oh, did you think I was going to stop posting recipes forever? Heck no. I'm back... well rested and beginning to settle into my new East Coast life, and excited to start posting recipes again.

For the Mother's Day luncheon I prepared this morning for my mother, grandmother, godmother and some other family members and friends, I served a green salad with pears and goat cheese and blackberry vinaigrette, a broccoli and smoked cheddar frittata, fruit salad with lime-honey-ginger sauce, and two soccas-- one topped with kalamata tapenade and the other with this delicious spread, which was inspired by a recipe of my dad's. A delicious meal, so filling that we had little room for dinner even at 8pm.

How do I describe this roasted garlic, artichoke and white bean spread to you? Is it more compelling for me to tell you that I can eat it by the spoonful or to tell you that I might like it more than hummus, which is one of my favorite foods? Oh, just try it.

It is rich, buttery and full of flavor, and works well as a spread on everything from crostini to bagels to flatbreads, as a sandwich spread, and as a dip for vegetables of all sorts. If you're like me, you will clean out the inside of the food processor with your finger so that you don't waste even a drop of this stuff.

I've heard that roasted garlic can now be purchased bottled or in tubes or something like that. If you don't have the patience for roasting garlic yourself you can give that a shot - But it's really so easy to do it yourself. You can use your toaster oven to save energy and time. And of course, there's nothing like the sticky-sweet garlic fingers you get from squeezing the caramelized garlic out of each clove.

This can be made without wine for the non-drinkers in the house, and with extra olive oil for those who don't like to skimp on such things.

ROASTED GARLIC, ARTICHOKE AND WHITE BEAN SPREAD


[ Gluten-Free / Dairy-Free / Soy-Free / Vegan / Parve ]

2 Tbsp extra virgin olive oil, plus 1 Tbsp set aside
1/2 large yellow onion, minced
19-oz can cannellini beans, rinsed and drained
6-oz jar marinated artichoke hearts, drained
1/4 tsp minced fresh rosemary, or more to taste
1 medium head garlic
1/4 tsp salt
1 Tbsp red or white wine
Freshly ground black pepper

Preheat oven to 375 F. Cut about 1/4" from the top of the head of garlic so that the very top of each clove has been removed. Brush the entire head lightly with olive oil, wrap well in tin foil, and bake for 1 hour or until the cloves are soft and the edges are brown and caramelized. Remove from oven, unwrap, and cool.

In a heavy medium pan, heat two tablespoons of olive oil over medium-high heat. Add onion and rosemary, and sautee until the onion is well browned but not burnt.

In food processor, combine rinsed and drained beans, drained artichoke hearts, contents of the pan, and all other ingredients, including the entire head of roasted garlic (use your fingers to squeeze the softened garlic out of each clove). Add a generous amount of freshly ground black pepper. Puree until completely smooth. Adjust seasonings, olive oil and wine to taste. Serve at room temperature.

Tuesday, February 13, 2007

Cilantro-Lemon Pesto


When I get tired of plain old tomato sauce on my pasta, the next stop is always pesto. I love the green stuff - I've made a million variations, including vegan pesto and kalamata olive pesto. There is no end to the possibilities. It is hard to go wrong with herbs, garlic, nuts and cheese (or a cheese substitute) pureed into a creamy sauce.

Pesto is for far more than pasta, my friends. It is wonderful spread on a filet of salmon before baking. You can also toss it with freshly steamed vegetables. It has a number of delicious applications. This pesto features the zesty combination of cilantro and lemon. It has a bit more zing to it than classic basil pesto, so use it sparingly. The flavors are particularly suited to fish, but are wonderful with pasta as well. This time I paired it with my favorite gluten-free pasta, Tinkyada Spirals (aka brown rice fusilli).

To make this pesto dairy-free and vegan, replace the romano cheese with 1/4 cup of nutritional yeast flakes, some extra salt, and a little bit of tofu.

CILANTRO-LEMON PESTO

1/3 cup pecorino romano cheese, shredded
2 cups fresh cilantro
1/3 cup pine nuts
1/3 cup extra virgin olive oil
1/4 teaspoon black pepper
1/2 lemon, juice of
Salt, to taste

Combine ingredients in food processor. Puree until ingredients are fully combined and the pesto has a smooth texture with no significant lumps (may still be just a little gritty). You may add additional olive oil if you like. May be served hot or at room temperature. Leftovers can be frozen in small tupperware containers or ice cube trays and thawed when you're ready to use.

Friday, February 02, 2007

Gluten-Free Italian Breadcrumbs

I've been saving the ends of all my loaves of gluten-free bread in a ziploc bag in the freezer, and adding to the stash any remaining slices of loaves of bread that become stale as well as storebought bread I brought home only to find inedible. When I had enough saved up, I finally got to put them to use. These breadcrumbs are wonderful for breading meat or vegetables, stuffing mushrooms, topping casseroles and more. Leave the spices out for "neutral" crumbs that can be used in any recipe - Or follow my instructions for flavorful Italian breadcrumbs that are perfect in most Mediterranean and American recipes.

ITALIAN GLUTEN-FREE BREADCRUMBS

12 slices gluten-free bread (stale bread and ends are good)
2 teaspoons salt
2 teaspoons dried parsley flakes
2 teaspoons ground black pepper
2 teaspoons garlic powder
1 teaspoons onion powder
1 teaspoons dried oregano
1 teaspoons dried basil

For fresh breadcrumbs:

Lay bread slices in a single layer on a baking sheet. Place in oven on 200 F for 10-15 minutes or until the edges have become a little hard and the bread has become dry to the touch but it has not become thoroughly toasted. Pulse in food processor until it reaches desired texture (crumbs should be distinct but not too large). Combine ingredients in a bowl.

For dry breadcrumbs:

Cube bread slices and lay in a single layer on a baking sheet. Place in a 325 F oven and bake until lightly browned, crisp, and very dry. Allow to cool. Blend in the food processor until it has a fine texture not much coarser than sand. Combine all ingredients in a bowl.

Bread crumbs can be stored in an airtight container or ziploc bag in the refrigerator for about a week for fresh breadcrumbs or 2-3 weeks for dry breadcrumbs. They can be stored in the freezer for up to 6 months.

Friday, January 26, 2007

The Day My House Became a Pupuseria


The first time I ate a pupusa I was living in San Francisco's Mission District. I discovered that just one block away (at 1142 Valencia Street) was El Majahual Restaurant, a tiny Salvadorean and Colombian restaurant and pupuseria. I was living on a tight budget and at just $1.65 each, pupusas were just about the cheapest and most filling healthy meal I could find. I recall reading an article that said the rule for making a meal of pupusas is "one for a snack, two for lunch, three for dinner." Sounds about right to me. It was easy to fall in love with these thick El Salvadoreño corn tortillas crafted out of masa harina, stuffed with cheese, beans or meat and topped with a spicy cabbage salad known as curtido.

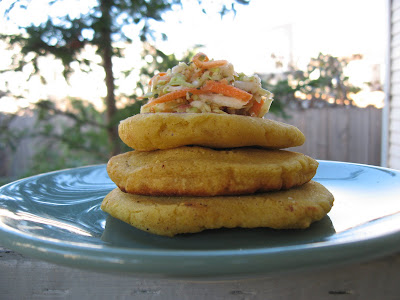
This weekend my house became a pupusa factory. My friend Melanie came over for dinner, and we ate stacks upon stacks of pupusas con curtido de repollo. I filled some with a combination of goat jack cheese and cotija*, while others were stuffed with both cheese and refried beans. We ate them with salsa, curtido, and slices of ripe avocado. I had so much masa (dough) left over that I made more for my breakfast guest the next day... and yet another batch when my aunt and uncle paid me a surprise visit later that afternoon. I made extras for my own dinner the following day, plus a batch for some dear friends. There were pupusas coming out my ears!

Masa harina is the extremely finely ground corn flour that makes a silky dough that can be used for corn tortillas, pupusas, and other Central American delicacies. The manufacturer of Maseca brand masa harina has verified that it is gluten-free and was made in a facility that does not process wheat. Maseca is widely available in the US and is inexpensive. For more information on Central American products that are gluten-free, check out the Celíacos de México blog (it's in Spanish). There are no good substitutes for masa harina - Corn flour is the closest in texture but not a match, and corn meal will give you mealy, greasy, tough results. So stick to the real thing.

Folks who are vegan, lactose intolerant, or casein-free, can omit the cheese and just stuff the pupusas with refried beans. You can serve an army with these recipes, so cut them in half if you're cooking for one or don't want leftovers!


PUPUSAS DE QUESO Y FRIJOLES REFRITOS

5 cups masa harina flour
4 cups water
1 cup canned gluten-free, vegetarian refried beans
1 1/2 cups cotija, grated (or other hard, mild white cheese)
1 1/2 cups monterey jack or other meltable white cheese, grated
Vegetable oil

In a medium bowl, mix the two cheeses together and set aside. Pour masa harina into a large mixing bowl. Pour the water in slowly, kneading with your hands. Add water a tablespoon at a time until the dough forms a cohesive ball. The dough should be dry enough to handle but moist enough that it doesn't crack at the edges when you press down on it. Allow dough to rest for 10 minutes.

Take a small handful of dough and roll it into a ball about the size of an egg or a little smaller. Flatten it between your palms until it is about 1/3 inch thick. For cheese and bean pupusas, put a generous pinch of cheese and a heaping 1/2 teaspoon of refried beans at the center of the disk of dough. For cheese-only pupusas, use more of the cheese. Beans-only pupusas can take about a teaspoon of beans. After placing the filling at the center of the pupusa, fold the edges in carefully until they meet at the top and the filling is completely covered. Roll carefully into a ball again, this time with the filling hidden inside. Now flatten again between your hands until the ball becomes as flat and thin as possible without the filling seeping out (you can perform this step with a tortilla press if you have one). Ideally they should be about 1/4" to 1/2" thick. Repair any holes to make sure no filling is visible.

Brush a griddle or heavy skillet lightly with vegetable oil and place over medium-high heat. Place each pupusa carefully on the hot griddle. Cook 3-4 minutes on each side or until lightly browned and beginning to blister. Serve hot, topped with curtido or salsa. Leftovers can be refrigerated and heated up at 300 degrees in an oven or toaster oven.


CURTIDO DE REPOLLO

1 head green cabbage
1 cup apple cider vinegar or distilled white vinegar
1/2 cup water
1 medium onion
2 large carrots
1 teaspoon salt
2 teaspoons olive oil
1 1/2 teaspoons oregano
1 teaspoon cayenne pepper
1 teaspoon cumin
1 teaspoon brown sugar (optional)

Using a hand-grater or the grater attachment of your food processor, shred cabbage, carrots and onion. Combine all ingredients in a large mixing bowl. Use the back of a wooden spoon to press all the ingredients down so they are submerged in liquid. Allow to rest at room temperature or in the refrigerator for at least 4-6 hours before serving. Serve with pupusas, or as a topping for fish, quesadillas, or black beans. Makes 10-12 servings.

*Edited 3/09 to add: Because I keep kosher more strictly than I did when I originally wrote this post, and I have yet to find cotija or any similar cheese that is hekshered with a reliable kosher certification, I have been making this with just jack cheese now, and it's great. In fact, I think any mild, hard white, meltable cheese will work well.
Friday, January 12, 2007

Leek Fritters: An amazing recipe, followed by a food blogger's worst nightmare

I cooked something gloriously delicious last night - A gluten-free adaptation of a Sephardic leek fritters, known in Greek as Prassokeftedes or Keftikes de Prassa. The recipe this is based on is by Chef Kate, a user on RecipeZaar. These are traditional for Passover in many mediterranean Jewish families, who make them with matzo meal. Because I used breadcrumbs (Ener-G brand), this recipe isn't kosher for Passover. However, you should be able to replace the breadcrumbs with additional egg and some potato starch to help keep the patties together during Pesach. I served them with Green Olive Relish, a recipe from RecipeZaar user Jewelies. You might also try making a tzatziki sauce to drizzle over the fritters.

Where does the ominous-sounding Food Blogger's Worst Nightmare part of the story come in? Well, just as I finished arranging these dishes on some lovely new plates I just bought... The screen on my digital camera went blank. My precious camera is broken, and I'm fairly sure it is beyond repair. It is definitely no longer covered under warranty. I could have cried - But instead, I suddenly realized that I have a brand new camera phone! G-d bless cell phone technology - At least I can give you a general sense of what these look like. Make these fritters, and I promise you'll forget about the terrible photographs!

PRASSOKEFTEDES (LEEK FRITTERS)

2 large potatoes, peeled and cubed
2 lbs leeks
2 large eggs, lightly beaten
3/4 cup gluten-free breadcrumbs
2 teaspoons salt
2 teaspoons fresh ground black pepper
2 tablespoons fresh oregano leaves (or 1 teaspoon dried)
Olive oil, for frying

Preheat oven to 200 F.

Trim and carefully wash leeks, removing the dark green part but leaving the white and light green areas. Go between the outer layers to remove sand and dirt. Slice in half lengthwise, then slice thinly crosswise.

Add one teaspoon of salt to about 1 1/2 quarts of water in a pot. There should be enough water to cover potatoes by at least two inches. Bring to a boil, then reduce to simmer and cook until soft (approximately 10 minutes).

Drain in colander, then place in large bowl. Use a potato masher to mash until smooth. Place the sliced leeks in a steamer basket over boiling water. Steam for 10 minutes, then remove from heat. Add the leeks to mashed potatoes. Stir in eggs, breadcrumbs, salt, pepper and oregano. Mix until all ingredients are thoroughly combined.

In a heavy skillet over medium-high heat, heat 1/2" of olive oil. When it is very hot, use a spoon to drop about 2 tablespoons of the mixture at a time into the oil. Flatten a little with the back of a spoon. Fry until golden-brown (about 3 to 4 minutes) and then flip. As you finish each batch, use a slotted spatula to move them to a paper-towel-lined plate. Keep them warm in the oven until ready to serve.


GREEN OLIVE RELISH


1 15-ounce can of green olives, pitted and roughly chopped
1/4 cup fresh parsley, roughly chopped
1/4 cup fresh basil leaves, roughly chopped
2 tablespoons pine nuts, lightly toasted
Zest and juice of 1 lemon
1 clove garlic, finely chopped
1/4 teaspoon dried chili pepper flakes
1 tablespoons capers, chopped, rinsed and dried
3 tablespoons extra virgin olive oil
1 tablespoon balsamic vinegar

Combine all ingredients in a bowl, and serve at room temperature.

Sunday, October 22, 2006

Soup 911: Cashew Sour Cream to the Rescue

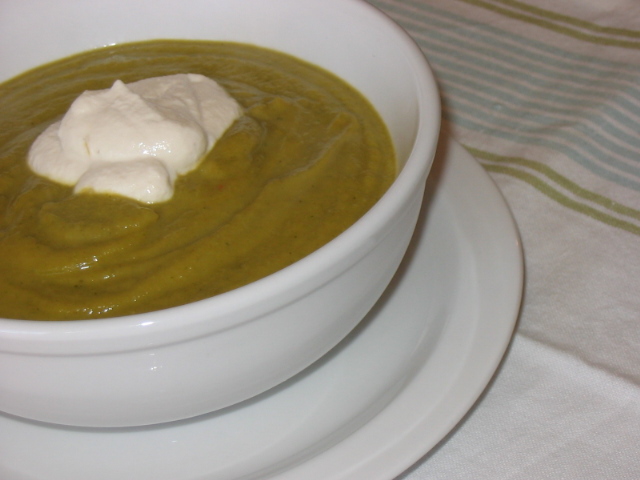
dairy-free vegan cashew sour-creamPROBLEM: I overcooked the green curry I was preparing (coconut milk, vegetable broth, ginger, onions, green curry paste, hot chili peppers, summer squash, broccoli, carrots, cauliflower, basil, cilantro). The vegetables were unbearably mushy.

SOLUTION: I ran it through the food processor to transform it into a creamy soup.

PROBLEM: The soup was way too spicy.

SOLUTION: Sour cream. Even though sour cream and Thai green curry are an unusual pairing, sour cream is always the first thing I think of to turn down the heat when I go overboard with chilis and I knew instinctively it would taste right with this soup.

PROBLEM: I'm trying to avoid both dairy and soy as much as possible to see if that helps my GI issues, so both dairy sour cream and Tofutti non-dairy sour cream were out of the question.

SOLUTION: Cashew sour cream, a soy-free, dairy-free (and vegan, and pareve) sour cream that tastes impressively similar to the "real thing" and did just the trick in toning down my fiery soup.

Cashew Sour Cream

1 cup raw cashews (must not be roasted or salted)
1/4 teaspoon salt
1 to 2 teaspoons apple cider vinegar
Juice of one small lemon

Cover cashews with water and soak for a few hours, or overnight (you can get away with soaking them for just an hour if you're in a rush but you'll need to puree them longer). Pour off all water, and place nuts in food processor. Add 1/4 cup cold water, salt, vinegar and lemon juice. Puree for 3-4 minutes or until completely smooth and creamy in consistency. Use in any recipe that calls for sour cream.