KOSHER RECIPES FOR GLUTEN-FREE LIVING


Showing posts with label casseroles and one-dish meals. Show all posts

Sunday, September 14, 2008

The Quest for the Best Gluten-Free Cholent

rival crock-pot versaware pro crockpot slow-cooker

This shabbos, I finally found one of the holy grails of kosher gluten-free cooking - A fantastic gluten-free cholent. I crafted this Ashkenazi/Sephardi fusion cholent by accident, really. Cholent is a stew that cooks slowly in a crockpot during Shabbos (the Jewish sabbath, during which observant Jews do not light or extinguish fires or electricity) without being stirred or having the heat adjusted in any way. It's the ultimate in low-maintenance cooking, since you just add a bunch of ingredients to the crockpot and let them cook overnight with no interference. People who've never tried slow cooking in a crockpot might think that all the ingredients would be mush after so much cooking - Strangely enough, vegetables tend to retain their shape and stay fairly firm during crockpot cooking. The meat, which should preferably be from a tougher cut (tough cuts do best with slow cooking in liquid), will become deliciously tender and fall apart when you stick your fork into it. Ashkenazi cholent is usually made with barley or wheat berries, neither of which people with celiac disease or gluten intolerance can eat. But you won't miss the grains with this cholent, as it's unbelievably flavorful and has a variety of textures.

The Sephardi influence on this dish is the use of spices and flavorings that you wouldn't normally find in an Ashkenazi cholent (paprika, lots of garlic, turmeric), as well as the optional addition of whole in-the-shell eggs which become hardboiled over the course of the slow-cooking process. This is a little more decadent and a little more healthy than your average cholent. It wouldn't be an exaggeration to say that this dish has completely changed my conception of cholent. It's heavy but doesn't sit in your stomach like a rock, as some cholent does. My partner is a cholent-eating afficionado and she gave this one two thumbs up.

I sauteed the meat to brown it about 1/2 hour before candlelighting on Friday (a little before 7) and then transferred it, along with all the other ingredients, to the crockpot. My crockpot (pictured above) automatically switches to its warm setting as soon as the cooking time you set it for is done - So at about 7 in the morning on Saturday it switched over, and we ate it at 12:30 PM. It was hot, and perfectly cooked. We ate the leftovers for lunch today and my partner mentioned that this was the first time she'd had the desire to eat leftover cholent. But then again, this is no ordinary cholent!

A little disclaimer: I call for "powdered gluten-free onion soup, vegetable or chicken soup mix." Most kosher soup mixes have MSG in them. That's part of what makes them so tasty. I generally refuse to purchase or consume anything with MSG. But this is my exception. It's my little vice, I guess. If you must avoid MSG at all costs, you can use a couple of gluten-free MSG-free bouillon cubes instead. I've found a kosher, gluten-free brand called Bloch's Best that has no MSG. It's imported from Europe - I found it at Natural Spot in Teaneck. They won't be quite as flavorful as the mixes with MSG, so if you like you can use more salt and more spices and a little more white wine to make up for it.

If you don't have a slow-cooker you can still make this dish - Bring the ingredients to a boil, reduce to a simmer, then right before shabbos cover the pot very tightly and either simmer over a low flame all night, or have it cook in the oven on a low setting.

I will be happy if thise recipe helps just one other gluten-free Jew have more joyful and delicious shabbos... and even happier if some non-Jews and/or non-celiacs will discover this as a new way to prepare a filling one-pot meal.

GLUTEN-FREE CROCKPOT
CHOLENT / HAMIN


A Slow-Cooked Meat & Bean Stew for Shabbos and Every Day

[ Gluten-Free / Dairy-Free / Soy-Free ]

1 Tbsp vegetable oil
1 lb to 1 1/2 lbs cholent meat / stew beef
1 onion cut into chunks
2 cups dry cholent bean mix or any combination of pinto beans, cranberry beans, white beans and/or kidney beans
3 Tbsp powdered gluten-free onion soup, vegetable or chicken soup mix*
1 or 2 carrots cut into 1" slices
5 medium yukon gold potatoes, unpeeled, cut in half
2 large sweet potatoes, peeled, cut in quarters
1 cup sliced white mushrooms
5-10 cloves of garlic, chopped roughly or sliced
1 tsp turmeric
2 tsp smoked paprika
2 bay leaves
1 tsp salt
1 tsp ground black pepper
Optional: Generous dash of white wine
Optional: 2-4 uncooked eggs in their shells

[*I use Osem's pareve, vegetarian, kosher-for-Passover "Chicken Style Consomme Instant Soup & Seasoning Mix" which is gluten-free. I purchase it at Passover to last me year-round since the rest of the year their formula includes gluten.]


In a pan, or in the ceramic liner of your crockpot (if it's the type that can be removed from the element and used like a pot on the stove) heat 1 Tbsp vegetable oil over medium heat. Add onions and sautee for 2-3 minutes. Add meat and cook only until browned on the outside. Move onion and meat mixture into the crockpot (or move your ceramic liner back onto the heating element of the crockpot). Set it so that it will cook on low for 12 hours and then switch to its warm setting.

Add dry (unsoaked) beans, then potatoes. Add all of the rest of the ingredients except for the eggs, distributing ingredients as evenly as possible. Make sure the meat won't touch the lid of the crockpot. Nestle eggs carefully on top of other ingredients. Pour water into the crockpot until it covers everything. Put the lid on, making sure it fits securely so that steam doesn't escape (use a layer of tin foil underneath if necessary).

Do not stir the cholent until you are ready to eat it, at which point you can remove the eggs so that you don't crack their shells, and stir it VERY gently.

Serve in bowls, topped with the now-hardboiled eggs (if you included them). If you've warmed your favorite gluten-free bread or challah on the top of the crockpot you can use it to sop up the stew.

NOTE: This recipe is for a 6-quart crockpot. For a smaller crockpot, reduce all the quantities slightly. No exact measurements are necessary for this recipe.

Tuesday, January 15, 2008

Spicy Black Eyed Peas and Collard Greens: A Gluten-Free Vegan South Beach Recipe


Changes are afoot around these parts. As anti-diet as I am on principle, I have chosen to embark on a new project - Kicking my major addiction to sugar and high-glycemic carbs. I've chosen to use the South Beach Diet as the framework for doing this. The general idea is that you start with a two week period (Phase 1) without grains, fruit, potatoes, sugar and other high-glycemic and high-carbohydrate foods in order to rebalance the blood sugar and get the body stopping craving high-sugar foods. This phase includes eating 3 meals and 3 snacks a day, with lots of vegetables and beans and lean protein and nuts and good fats. This is followed by Phases 2 and 3 which more or less involve gradually reintroducing whole grains and fruit (and, optionally, occasional small amounts of sugar) into the diet a little at a time until you reach an equilibrium that works for your body - In other words, until you find a way of eating where you're incorporating good carbohydrates into your diet while losing weight and fending off the sugar/bad carb cravings. It's neither low-fat nor low-carbohydrate, yet somehow it has worked for nearly everyone I know who's tried it. So when I made a commitment to losing weight and eating healthier for 2008 (a renewal of my Rosh Hashanah resolution - a second start is the advantage to having two New Years!) I realized this was worth exploring. I want to lose weight, but more than that I want my blood sugar levels to be stable, I want to keep myself from becoming insulin resistant since it runs in my family, and I want to stop craving foods that are addictive to my mind and body and bad for my health.
I have always struggled with inability to eat certain foods in moderation - Foods with refined sugar, potatoes, or "white" flours. As a gluten-free eater, "white flour" has taken on a new meaning - I now use that term to mean all the flours that are high-glycemic and/or not made of whole grains, such as tapioca flour, corn starch / flour, white rice flour, and potato starch. I will hopefully be able to find some kind of moderation with these types of ingredients in the future, but I have to start out by eliminating them.

I haven't been blogging much because in the past months I have been eating more healthfully and, frankly, I haven't thought that anyone would be interested in reading recipes that aren't gluten-free revisions of traditional gluten-y baked goods and other starchy favorites. The recipes people view on my blog most frequently are my breads and my cakes. The majority of the gluten-free cooks who e-mail me aren't interested in learning how to eat healthier now that they're gluten-free - They want to eat the same way they always did (what is called the "Standard American Diet" [SAD]). They want gluten-free versions of processed, refined, starchy, sugary comfort foods. So for a while I considered calling it a day. But I know that even if my posts on delicious and healthy recipes such as my Quinoa-Cannelini Burgers don't generate the comments or excitement from readers that my old recipes did, there is an audience for healthier gluten-free cooking. I know this from the fact that when I started blogging, most gluten-free bloggers were posting recipes for brownies, breads, and deep fried vittles - Whereas recently I've noticed several other gluten-free bloggers writing about transitioning to healthier ways of eating. I know that I do get e-mails thanking me for posting healthy alternatives. And I also know this blog is not just for my readers, it is for me - A document of the changes and growth in my own eating and cooking. So this is the next chapter in the life of Gluten-Free Bay, and I hope you will join me as I find new ways to approach food.

To kick off here is a recipe I whipped up last night when I needed a healthy and filling pareve dish that I could eat with both dairy and meat meals. It's great for Phase 1 of the South Beach Diet. It's vegan, it's nutritious and it's full of spice. The beans and greens are fabulously smoky thanks to the smoked sweet paprika. Best of all, it used up my very last collard green harvest - I dug the last collards out of a pile of snow the other day. There is nothing like harvesting fresh vegetables in the dead of a northeast winter!


SPICY BLACK EYED PEAS AND COLLARD GREENS

[Gluten-Free / Dairy-Free / Pareve / Vegan / Soy-Free]


5 cups collard greens, rinsed and chopped or shredded
2 15-oz. cans of black eyed peas, rinsed and drained
1/3 cup extra virgin olive oil
1 large onion, diced
5 cloves garlic, minced
1 1/2 tsp red pepper flakes
1/2 tsp cumin seeds
3 bay leaves
2 tsp chili powder
2 tsp smoked sweet paprika
1/4 tsp sea salt
1 large poblano or anaheim chili pepper, seeds removed, minced
1/3 cup wine (red or white)
2/3 cups tomato sauce
1/2 cup water or vegetable broth

In a large, heavy-bottomed pot or deep frying pan, heat the olive oil over medium heat. Add the onions and sautee until translucent. Add the garlic and pepper and all of the herbs and spices except the salt. Stirring frequently, cook the spices in the oil for several minutes. Add the collard greens and saute, coating the greens thoroughly in the spices and oil. Sautee for 5 minutes or until the greens begin to wilt. Add all of the remaining ingredients and cover. Turn heat to medium-low and simmer for 30 minutes or until the greens are tender. Stir regularly to make sure ingredients don't stick to the bottom of the pan. Serve hot, as a main dish or a side dish. Can be topped with sour cream, Tofutti Better Than Sour Cream, or vegan cashew sour cream.

Monday, November 19, 2007

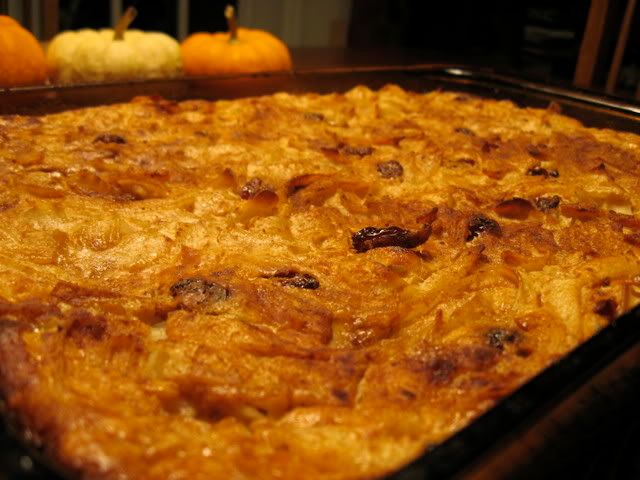
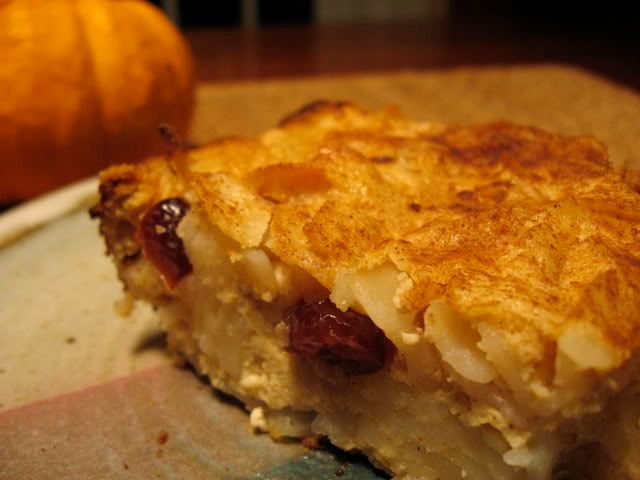
The Thanksgiving Kugel: Gluten-Free Noodle Kugel with Cranberries

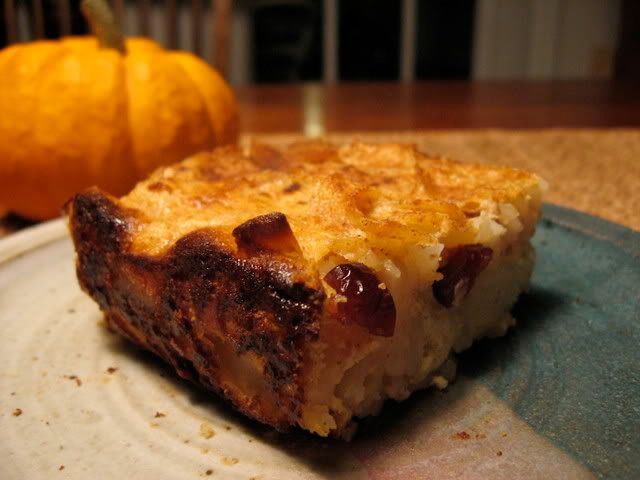
gluten-free cranberry noodle kugel
I haven't been inspired by Thanksgiving yet this year, which explains the lack of Thanksgiving mania on this blog. But tonight I think the bug finally bit me, if only mildly.

This past spring I posted my recipe for Savory Gluten-Free Noodle Kugel, a hearty mushroom-flecked kugel made with Manischewitz brand gluten-free Passover egg noodles. I made a point of stocking up last Pesach so I'd have some of these fabulous noodles to last me through the year, and I used up another bag tonight making a sweet lokshen kugel (noodle and egg casserole). I still have two or three left, just enough to get me through to this spring when they are back on the shelves at kosher grocery stores. Though I generally prefer Tinkyada noodles for just about everything, there are a few things that a wide, flat egg noodle is better for - Kugel is one of them. The fact that the Pesach noodles are made from potato starch means that they are all the more absorbent, which is perfect for a kugel.

Our family has two different kugel traditions - My dad's side of the family makes savory noodle kugels. On my mom's side, it's sweet kugel all the way. Since I made savory kugel last time (and boy was it good) this time I tried to sweeten it up without overdoing it on the sugar. What I ended up with was the Thanksgiving Kugel. There are thousands of bubbes rolling over in their graves at the very mention of the words "Thanksgiving" and "kugel" next to each other. I'm usually a little bit of a purist when it comes to ethnic foods. But I think if any of those bubbes would taste this kugel, they would forgive me. The dried cranberries (or "craisins" as marketing gurus seem to have renamed them) really plump up like little sweet-tart gems and make a tasty replacement for the usual raisins.

I lightened the kugel up a little - Trying to make this kind of traditional food low fat is just not something I have the heart to do. But I did trim some fat from where the texture or flavor wouldn't suffer. If you like your sweet kugels really sweet, you'll want to add an additional 1/2 to 3/4 cups of sugar, since I made this to be a side dish more than a dessert. This easy kugel would be a really nice side dish for Thanksgiving, it works well by itself for breakfast, and it should heat up well in a toaster oven or conventional oven.

Eat it in good health!


gluten-free noodle kugel with cranberries

THANKSGIVING KUGEL
(GLUTEN-FREE CRANBERRY NOODLE KUGEL)


[ Gluten-Free / Soy-Free / Vegetarian / Dairy ]

16 oz wide gluten-free egg noodles*
6 eggs
7 to 8 oz farmers' cheese
2 cups low-fat sour cream
1/2 cup 1% milk
1 1/2 tsp pumpkin pie spice mix
1/2 tsp salt
1/2 cup brown sugar or raw sugar
1/2 cup dried cranberries
Butter or margarine for greasing the pan
Optional: Additional pumpkin pie spice and brown sugar for top

Preheat oven to 350 F. Bring a large pot of lightly salted water to a boil. Cook noodles until tender but not overly soft, remove from heat and drain immediately, rinsing with cold water. Set aside. Grease lasagna pan.

In a blender, combine spices, salt, sugar, milk, eggs, sour cream and farmers' cheese. Pulse until smooth. In a large bowl, pour liquid over the noodles. Add cranberries. Stir until well-combined. Pour entire mixture (including all "extra" liquid) into the greased pan. Dust the top with additional sugar and pumpkin pie spice.

Bake for 35-45 minutes or until the top is golden-brown and the egg mixture has become slightly firm (will still be somewhat soft - do not overcook!) Allow to cool for 15 minutes before slicing and serving warm.

*
If you don't have access to gluten-free Passover egg noodles, gluten-free tagliatelle or lasagna noodles (cut in strips after cooking) will work, though the texture won't be quite the same.

Wednesday, November 14, 2007

Kale & Ricotta Stuffed Giant Shells ... and Absent-Minded Food Bloggers


How do the rest of you food bloggers keep track of the recipes you're creating? I have a terrible habit of writing things down as I cook on the back of an old envelope, a piece of mail, a bill. And then I lose them. I would guess I lose track of half the recipes I write down on those random scraps. This is one of those recipes. It was lost for nearly a month. I have finally found it, only to have forgotten many of the "mental notes" I had made about how to write out the recipe. So here is the reconstructed version, put together from messy incomplete notes, my sad excuse for memory, and my instincts (which I trust more than my notes and my memory put together!)

I'm impressed with the Tinkyada Brown Rice Grand Shells. They hold up pretty darn well and are easy to stuff, though I recommend undercooking them slightly and handling them with a little extra care. They're wholesome and they taste great. You could feed this dish to your friends without anyone guessing it's gluten-free. Casseroles are very much fall and winter foods for me, even if they're not made with squash or sweet potatoes. This one is a winner. This is really a tasty meal, and reheats fabulously well. I like to reheat it with a little extra sauce and/or cheese added to it for extra yums. It's a nice way to get some more vegetables and fiber into your (or your vegetable-hating child's) diet.


ALL DRESSED UP AND NOWHERE TO GO:


KALE & RICOTTA STUFFED BROWN RICE SHELLS

[ Gluten-Free / Vegetarian / Dairy / Soy-Free ]

1 package Tinkyada Gluten-Free Brown Rice Grand Shells

FILLING:
1 Tbsp olive oil
2 cups of finely shredded or chopped kale, uncooked
1 1/2 cups crimini mushrooms, minced
1/2 onion, diced finely
2 cloves garlic, minced
4 ounces reduced fat mozzarella, shredded
15 ounces low-fat ricotta
1-2 Tbsp grated parmesan
1 egg, well beaten
1 tsp Italian seasoning
Freshly ground black pepper

SAUCE & TOPPING:
1 cup marinara sauce for under shells
2 cups marinara sauce for over shells
8 ounces reduced fat mozzarella, shredded
Optional: Additional parmesan

Boil shells according to package directions in lightly salted water until al dente consistency. Remove, drain, gently rinse with cold water and allow to cool.

Preheat oven to 375 F. In a heavy pan, heat olive oil over medium-high heat. Sautee onions until translucent, then add garlic and cook for 1-2 minutes. Add mushrooms and sautee until they let off a little bit of liquid. Add shredded kale and sautee until tender. Remove from heat.

In a medium bowl, mash together ricotta, 4 ounces of mozzarella, 1-2 Tbsp of parmesan, spices and egg. When combined, add the sauteed vegetables and mix well.

In the bottom of a baking dish spread one cup of marinara sauce. Stuff each pasta shell gently but generously with the filling (you know it's properly stuffed when some filling should is coming out of the shell) and lay in the baking dish. When you have stuffed all of the shells, pour remaining two cups of sauce evenly over the shells and sprinkle with mozzarella and optional parmesan. Cover with tin foil and bake for 35 minutes. Remove tin foil and bake for additional 10-15 minutes. Remove from oven and allow to sit for at least 15 minutes before serving.

Tuesday, May 22, 2007

Reduced Fat Cheesy Baked Ziti for Shavuot and Every Day

The Shavuot dinner table:


The Shavuot cheesy baked ziti:


I'm rushing to write this post before the start of Shavuot. Shavuot, for the uninitiated, is the celebration of the Jewish people receiving the Torah at Mount Sinai. One of the ways we celebrate is eating dairy meals - Cheesecake, cheese blintzes, pizza. Anything cheesy or milky is fair game for Shavuot. What do Torah and dairy products have to do with one another? There are a variety of explanations for why we eat dairy on this holiday. Some say it is because the Hebrews in the desert ate dairy meals when they received the Torah because they had just been given the laws of kashrut (keeping kosher) and didn't yet have the time or resources to cook meat according to these laws, and dairy meals are less work. Others say it is because of King Solomon's words describing the Torah as "honey and milk are under your tongue" in the Song of Songs. Either way, this is probably the holiday that's least friendly towards the lactose intolerant, but the favorite of those who love all things cheesy.

To celebrate I made a reduced fat, reduced cholesterol gluten-free baked ziti for my parents. My mother ate two servings of it, proclaiming its goodness, when I finally admitted that she had just eaten her least favorite food: tofu. Yes, once again I have convinced my mom to unknowingly eat tofu by disguising it as cheese. The combination of garlic powder, salt, nutritional yeast and silken tofu really do create that believable an imitation of ricotta - And of course cut down on the fat and cholesterol, which was the point. I used real cheese too, of course - Shredded parmesan and reduced fat Sorrento mozzarella, which is kosher and is lower fat than regular part-skim mozzarella. Tinkyada noodles were my pick for the ziti, as they stay firm even when baked. The result was a delicious baked ziti that's plenty cheesy without being overwhelmingly rich. Serve this to your friends and smile smugly as you watch them devour it without realizing it's gluten-free and has tofu in it... I mean, if you are evil like me, that is.

Good yontif!

CHEESY REDUCED FAT BAKED ZITI

[Gluten-Free / Vegetarian / Nut-Free / Milchig]

12 oz dry Tinkyada brown rice penne (one package)
One 12.3 oz package of firm silken tofu
1 Tbsp nutritional yeast
1 tsp kosher salt
1/2 tsp garlic powder
1 cup sliced brown mushrooms (such as crimini mushrooms)
1/2 medium yellow onion, diced
3 cloves garlic, minced
1 Tbsp extra virgin olive oil
1/3 cup shredded parmesan
6 ounces shredded reduced fat mozzarella
16 ounces marinara sauce
Cooking spray or extra olive oil

Bring a pot of water to a boil. When it comes to a boil, add a small amount of salt and all of the noodles. Boil the noodles until al dente - They should not be mushy. Drain and rinse with cold water, set aside.

Preheat oven to 425 F.In a small bowl mash silken tofu with the back of a fork, along with garlic powder, kosher salt and nutritional yeast. In a separate bowl, mix parmesan and mozzarella cheese together. Remove 1/3 of the cheese mixture and add it to the tofu mixture, stirring well to combine.

In a large pan, heat olive oil over medium-high heat. Add onions and sautee until golden-brown. Add garlic and sautee for 1-2 minutes. Add mushrooms and sautee until fully cooked. Mix in marinara sauce and simmer over low heat until very hot. Remove from heat.

Stir tofu "ricotta" mixture into the pan with the sauce, then carefully stir in noodles. Pour the entire mixture into a medium baking dish that is coated with olive oil or non-stick spray. Cover with remaining cheese. Place in heated oven and bake for 10 minutes or until cheese is melted. Place under broiler (not too close to the flame or heating element) for 5 minutes or until the cheese is bubbly and browned. Serve hot.

Wednesday, March 28, 2007

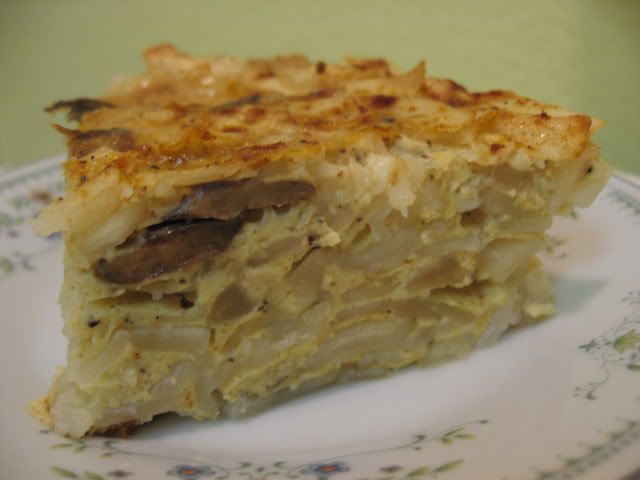
A Savory Gluten-Free Noodle Kugel for Passover


Noodle kugels generally aren't associated with Passover, since most noodles aren't kosher for this holiday. Instead we usually focus on potato and vegetable kugels, and save the noodle kugel for the rest of the year. When I saw that the company I was ordering Passover supplies from carried Manischewitz Passover Gold Wide Egg Noodles, which are kosher for Passover and made from potato starch, I got an idea... A gluten-free Passover noodle kugel! I'd heard lots about these non-gebrokts gluten-free egg noodles. They are sold only in the weeks preceding Pesach, and cannot be obtained during the rest of the year. I ordered 5 bags of them without having ever tasted them, just to make sure I had enough to last me for a couple of kugels... And I'm glad that I did.

I hear that Gefen and Flaum also make their own Passover egg noodles, and Frankel's makes a frozen version. Try your local kosher grocery. If you can't find them, you can try making your own. If you're not kosher for Passover or you follow Sephardic kashrut, you can try almost any other brand of wide, flat gluten-free noodle. I imagine that gluten-free tagliatelle or lasagna noodles (cut in strips after cooking) will work, though the texture won't be quite the same.

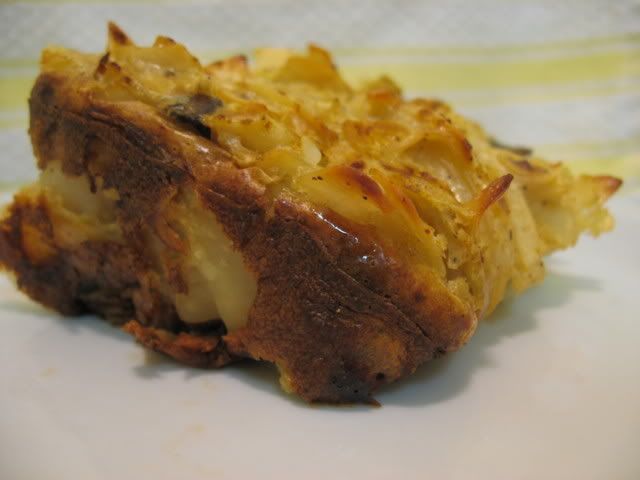
I based this recipe off of suggestions from my dad, savory kugel recipes online, and a sweet noodle kugel recipe from Mama Leah's Jewish Kitchen (by Lisa Loeb Fischer). Mama Leah, a friend of my family, used to run a chain of Jewish take-out shops in New York City. Her book never lets me down. The result was wonderful - This kugel is peppery, filling, and full of flavor. It gets crisp around the edges but stays moist within, and it reheats quite well in the oven or microwave.

While your kugel is in the oven, read up a bit on the history and cultural significance of this dish:

Kugel Unraveled (New York Times)

Wikipedia on Kugel

Enjoy!


SAVORY PASSOVER NOODLE KUGEL (LUKSHEN KUGEL)

[Non-Gebrokts / Milchig / Gluten-Free]


1 pound wide gluten-free egg noodles (Passover)
2 Tbsp butter or vegetable oil
1 large yellow onion, diced
2 cloves garlic, minced or crushed
2 cups brown mushrooms, sliced
6 medium eggs
1 1/2 cup lowfat milk
1 cup lowfat small curd cottage cheese
1 cup lowfat cream cheese or sour cream
1 Tbsp plus 1 tsp brown sugar or date sugar
1 tsp paprika
1-2 tsp ground black pepper
1 tsp salt
Butter for greasing the baking pan

Preheat oven to 350 F. Bring a large pot of lightly salted water to a boil. Add noodles and boil until tender (Manischewitz Passover Egg Noodles take about 4 minutes, but time may vary depending on brand). Drain the noodles immediately. Be very careful to not overcook them, they should not be mushy.

In a heavy saucepan, heat butter or vegetable oil on medium heat and sautee onions and 1 teaspoon of sugar until brown and beginning to caramelize. Add garlic and mushrooms and cook until mushrooms are tender. Remove from heat.

Beat eggs in a large bowl, then add milk, sour cream or cream cheese, cottage cheese, 1 tablespoon of sugar, 1 teaspoon salt, and ground black pepper. Mix together using a standing mixer, wooden spoon, or electric hand mixer, until combined (some lumps of cheese may remain). Add the noodles and onion-mushroom mixture and stir well to combine all ingredients.

Pour into a buttered 10x14 inch baking pan, and sprinkle lightly with paprika. Bake for 1 hour or until the eggs have set and the entire kugel is firm. The edges and top should be slightly browned. Allow to cool for at least 15 minutes before serving. Serve warm or at room temperature.

Friday, March 23, 2007

Walnut-Sage Potatoes Au Gratin


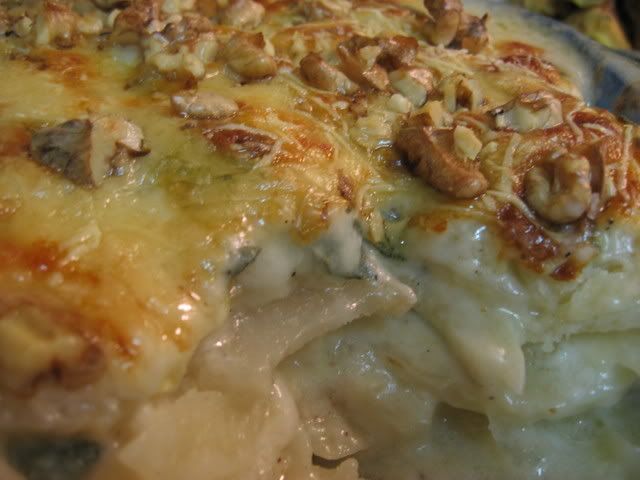
I "auditioned" a dish for Passover this week... The recipe is from user Annacia on RecipeZaar, with minor gluten-free adjustments. I offered to review the recipe for her, thinking it might work if I had a vegetarian seder. It looks like I won't be having a vegetarian seder, but this dish is a sure winner. It might just be my new favorite potato dish, second only to kugel. It is so decadent and flavorful, and reheats very well in the oven or microwave.

I have to admit I was tempted to add a lot more cheese than the recipe calls for- And ultimately, I did add a bit more to the top of the casserole at the end, and then stuck it under the broiler for 30 seconds. I like to think I made up for this by using 2% milk instead of whole, but I suppose it doesn't work that way. Oh, well. It sure was good. Don't use American-style gruyere if you can help it - make sure to find a gruyere that is Swiss, otherwise use fontina or emmenthal or another good melting cheese with a little bit of bite to it.

To make a gluten-free roux for this dish I used arrowroot flour, a fine powder which works wonderfully as a flour substitute in gravies and cream sauces. You can try using other thickeners, but stay away from gluten-free flour mixes that contain nuts or other darker or coarser particles (for example, Pamela's Baking and Pancake Mix) as you will not achieve the smooth, white consistency you are going for with a white sauce. Cornstarch is not recommended since it becomes gummy when the dish cools or is refrigerated. I've had good luck with both Asian sweet rice flour (also called sticky rice flour or glutinous rice flour) and arrowroot, which are both finely ground and white in color. For Passover, I would try using heavy cream instead of 2% milk, and using potato starch as a thickener (adjust the quantities as necessary).

This is a terrific way to use one of my favorite new ingredients, walnut oil. It is well worth seeking out walnut oil for this recipe, because it has such a beautiful flavor. Trader Joe's is now carrying it, which means it's sure to become a staple in many kitchens within the blink of an eye. It looks like Gefen and Nutola both make kosher l'pesach walnut oil. This dish also shows off the complexity of fresh sage in a way that is lovely. The sage, walnuts, and walnut oil work together to make this a more sophisticated and less pedestrian gratin. Thanks, Annacia!

WALNUT-SAGE POTATOES AU GRATIN

6 medium russet potatoes (2 lb.)
1/2 cup chopped onions
5 garlic cloves, minced
3 Tbsp walnut oil
4 Tbsp potato starch (for Passover) or arrowroot flour
1/2 teaspoon salt
1/4 teaspoon pepper
2 1/2 cups 2% or whole milk
3 tablespoons snipped fresh sage
4 ounces Swiss gruyere cheese, shredded (1 cup)
1/3 cup broken walnut pieces
Fresh sage leaves (optional)

Peel potatoes and thinly slice. Use a knife or the thin slicing blade on the food processor. Slices should be no thicker than 1/4." Place slices in a bowl, submered in cold water to keep from browning.

In a medium saucepan on medium to medium-high heat, cook the onion and garlic in walnut oil until tender but not browned. Stir in flour, salt, and pepper, then quickly add all of the milk. Cook over medium heat, stirring constantly with a whisk until thickened and bubbly. Remove from heat; stir in snipped sage.

Grease a 2-quart round casserole (with glass cover) or a deep 2-quart baking dish. Layer half of the potatoes in casserole. Cover with half the sauce. Sprinkle with half the cheese. Repeat layering with the potatoes and sauce. Cover with lid or tented tinfoil.

Bake uncovered at 350 F for 40 minutes, then uncover and bake 25-40 minutes more or until potatoes are tender. Sprinkle remaining cheese and all of the chopped walnuts over top. Bake, uncovered, 5 minutes or until cheese is melted and bubbly. Let stand 10 minutes before serving. Garnish with remaining sage leaves.


Tuesday, March 13, 2007

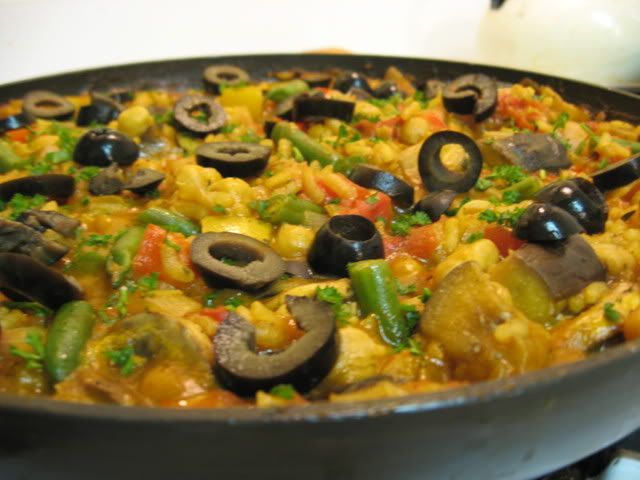
Vegetarian Kosher Paella


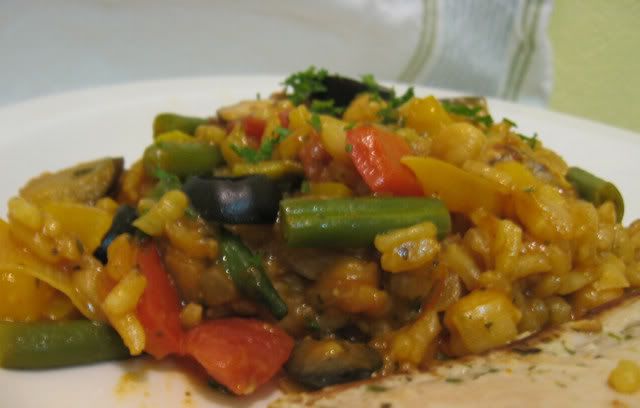
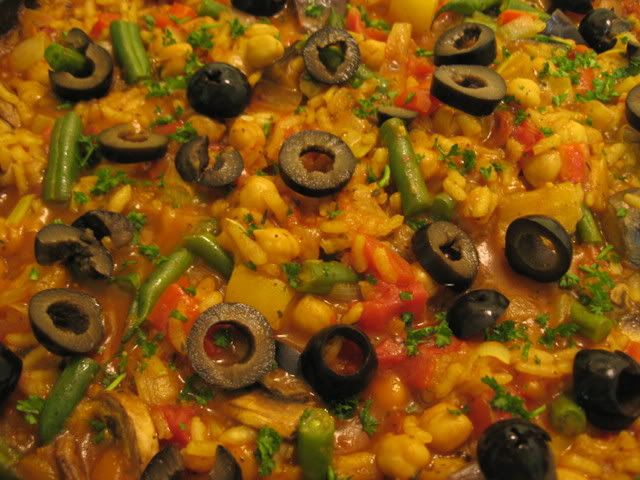
Spanish cooking seems to be sweeping the United States these days. Tapas joints, pimenton, sherry vinegar... I'm digging this trend. There are so many traditionally gluten-free dishes in the Spanish culinary repertoire, and I love the flavors it has introduced into my cooking. I've been looking forward to trying this recipe because I've always loved paella but it's loaded with shellfish, which are not kosher. It's hard to go wrong with vegetables, rice, and spices - And this dish, which I doctored with my own mix of spices, certainly didn't let me down. This beautiful vegetarian paella, with its vivid spectrum of vegetables, is a flavorful and colorful one-dish meal. The texture and combination of tastes are excellent, and didn't leave me missing the meat. OK, I'll admit it, I served it as a side dish for tuna steaks - But I promise it can hold its own as a vegan/vegetarian main dish!

I used the technique in this article to create a socarrat, the crusty layer of browned, caramelized rice at the bottom of the pan which adds a certain je ne sais quois to paella. This is why the recipe instructs you to turn the heat up at the end of the cooking process. Do take the time to do this - You won't be disappointed. The wider your pan is, the thinner the layer of rice will be and the more flavorful, chewy socarrat you will be able to create.

Keeping the rice al dente was a good move - I think leftovers will reheat perfectly. Next time I will try replacing a little bit of the broth with white wine, which I think would add depth to the flavor. I might also try adding marinated artichoke hearts with the other vegetables. Neither of these changes are necessary, but they will give this dish a little more oomph.

I look forward to eating leftover paella for lunch at work all week. Kosher, vegan, gluten-free... But most importantly, delicious.

3/10/10 UPDATE: I made this dish again, this time with turmeric instead of saffron. The result was fabulous and quite similar in color, if a little different in taste. If you can't afford saffron or don't have it on hand, eliminate the saffron and instead add 1 tsp turmeric (or to taste) at the point when you add the other spices.

VEGETARIAN KOSHER PAELLA

[Vegan / Gluten-Free / Soy-Free / Pareve ]

1 pinch saffron (approximately 1/2 tsp)
1 medium eggplant, cut into large chunks
3 Tbsp extra virgin olive oil
1 yellow onion, chopped
4 garlic cloves, crushed
1 yellow pepper, finely chopped
1 red bell pepper, finely chopped
1 tsp dried cilantro
2 teaspoons sweet Spanish paprika
1 cup arborio rice
3 1/2 cups vegetable broth
1 (15 ounce) can diced tomatoes
1/2 tsp cayenne powder
1/2 tsp sea salt
1 tsp dried thyme
Freshly ground black pepper
1 cup mushrooms, sliced
1 cup green beans, cut into thirds
1 (15 ounce) can chickpeas, rinsed and drained
1/4 cup black pitted olives, sliced
1 Tbsp fresh parsley, minced (optional)

Cover saffron with 3 tablespoons of water in a small bowl and set aside. Sprinkle eggplant chunks with salt and allow to sit in a colander for 30 minutes. Rinse and drain the eggplant.

Heat the olive oil in a wide, heavy pan. Saute the onion, garlic, cilantro, peppers and eggplant for 5 minutes. Sprinkle with paprika and toss. Then add rice, vegetable stock, tomatoes, saffron (along with the water it's been soaking in), salt, cayenne, paprika, thyme and generous amounts of freshly ground black pepper. Bring to a boil, then lower to a simmer. Cook for 15 minutes, uncovered. Stir frequently.

Add the mushrooms, green beans and chickpeas. Cook uncovered, stirring often, for another 15 minutes or until the rice has become tender but is still al dente, and the sauce has thickened. Additional broth, water or white wine may be added as needed during cooking to keep the rice moist.

Turn the heat up to high for 5 minutes or until a browned, caramelized crust forms on the bottom side of the rice. Test for this crust by inserting a fork into the paella and checking for resistance at the bottom. Watch carefully to make sure the rice does not burn. Remove from heat and allow to sit for 5 minutes before garnishing with fresh parsley and olive slices. Serve hot.


Monday, March 05, 2007

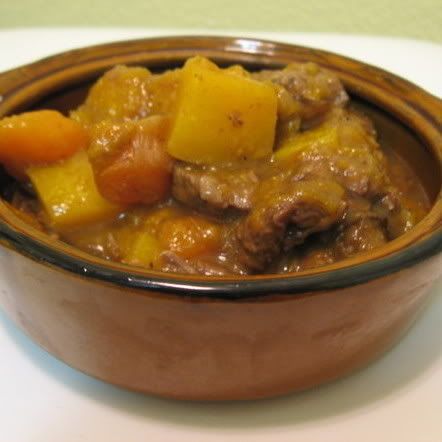
Beef Tzimmes with Butternut Squash


Tzimmes, for the uninitiated, is a sweet, slow-cooked Jewish stew or casserole that usually features root vegetables, honey, cinnamon and prunes but has as many variations as there are Jewish families. Growing up we ate it mostly for Passover or Rosh Hashanah. I've labelled it as a Thanksgiving recipe as well, simply because of the seasonal nature of the ingredients. The word tzimmes is used to refer to "a state of confusion" or "to make a fuss about something" in Yiddish, though from what I've heard it actually originates from the words zum ("to the") and essen ("eating"). Don't quote me on that, I speak only a bissel of Yiddish.

Some of you have made and enjoyed my vegetarian tzimmes recipe. Well, here's a delicious twist for the meat lovers out there. Slightly adapted from this recipe, this tzimmes features tender, slow-cooked beef and sweet butternut squash. It makes a wonderful and filling main dish. I love it! Many thanks to Mirj, who shared this recipe and considers it a family favorite. Es gezunterheyt!

BEEF TZIMMES WITH BUTTERNUT SQUASH

2 lbs boneless lean beef chuck, trimmed of fat
2 Tbsp vegetable oil
1 large onion, chopped
2 large carrots, peeled and cut in 1 inch chunks
1 tsp salt
Freshly ground black pepper, to taste
2 to 2 1/2 cups water
2 lbs butternut squash
2 tablespoons honey
1/2 teaspoon ground cinnamon
1 1/4 cups prunes, pitted and cut in half
Juice of 1 large orange

Cut beef into 1 1/2- 2 inch pieces and pat them dry. Heat 1 tablespoon of oil in a heavy stew pan. Add the beef cubes in 2 batches, browning each lightly on all sides over medium-high heat and removing browned meat with a slotted spoon to a plate.

Add remaining oil and heat it. Add onion and saute over medium heat, until brown, stirring often. Return meat to pan, along with any juices on plate. Add carrots, salt, a generous amount of fresh ground pepper, and enough water to just cover the meat and vegetables. Bring to a boil, skimming fat off the top occasionally. Cover and simmer over low heat, stirring occasionally, for 1.5 to 2 hours, or until the beef is tender.

Peel the squash and cut it in half lengthwise. Remove seeds from cavity and cut squash into 1" cubes. Add honey, orange juice, cinnamon and squash to the stew, pushing the squash pieces into the liquid. Cover and simmer for 10 to 15 minutes, stirring occasionally. Add prunes and cook for an additional 15 minutes or until squash is tender. Adjust seasoning and serve hot.

Friday, February 16, 2007

Vegetable Crisp


Apple crisp, cherry crisp... Vegetable crisp? Hey, why not? This savory casserole is a gluten-free revisioning of a recipe for Eggplant and Tomato Crisp. It's a very filling meal that I believe even one of those ubiquitous eggplant-haters could enjoy. When sliced and served, you can see the colorful layers of vegetables beneath the crumble topping. It reheats nicely in the microwave - Though the topping loses some of its crispness, it takes on the consistency of stuffing which is downright tasty. I prepare this with cheese as called for in the original recipe, but I've listed cheese as an optional ingredient, since cheese isn't an integral part of the taste or texture and I think making this dish vegan would not compromise it in any way. For the right consistency, be sure to use coarse breadcrumbs rather than fine ones.


VEGETABLE CRISP

Filling
2 Tbsp olive oil
3 Tbsp balsamic vinegar
6 garlic cloves, minced
4 Tbsp fresh basil, chopped
1 tsp dried oregano
Salt & fresh ground pepper, to taste
1 large eggplant, unpeeled and cut into 1/2-inch slices
1 yellow bell pepper, cut into 1/2-inch strips
2 large zucchini, cut into 1/2-inch slices lengthwise
4 large ripe tomatoes, cut into 1/4-inch slices

Topping
3 Tbsp chopped fresh parsley
5 cups fresh Italian Gluten-Free Breadcrumbs
1 tsp thyme, fresh or dried
2 tsp fresh rosemary, minced
2 tablespoons fresh lemon juice
2 tablespoons olive oil
Salt & fresh ground pepper, to taste
Basil leaves, for garnish
1/2 cup freshly grated parmesan cheese (optional)

Preheat oven to 425°. In a small bowl, whisk together oil, vinegar, garlic, basil, oregano, salt and pepper. Brush this mixture onto both sides of the eggplant, tomato, zucchini and pepper slices. Place vegetables on a large baking sheet. Cover with foil and bake for 10 minutes, then remove foil and bake for an additional 10 minutes.

Lightly grease a shallow casserole or gratin dish with olive oil or cooking spray. Place a layer of cooked eggplant on the bottom, followed by a layer of bell pepper, then a layer of zucchini, then a layer of sliced tomatoes. If any vegetables remain, create an additional layer, but be sure to end with a layer of tomatoes on top.

In a medium sized bowl, mix together all of the topping ingredients except for fresh basil. Sprinkle evently over the vegetables. Bake the casserole for 30 minutes. Garnish with fresh basil leaves and serve hot.

Monday, January 08, 2007

Polenta Lasagna with Feta and Kale


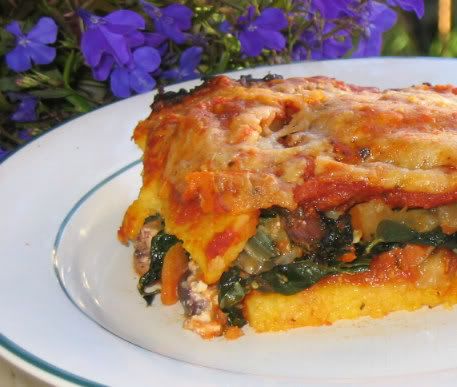
I don't share recipes with you folks unless I enjoyed them myself. Yet every now and then a certain dish will stand head and shoulders above the rest... A dish that makes me do a little happy dance. A dish so interesting or comforting that I have to stand back and feel proud, and then invite someone over to share it. This is one of those dishes. This easy one-dish gluten-free casserole is bursting with Mediterranean-inspired flavor. It is loaded with calcium, a nutrient I haven't been getting enough of since I started cutting down on cow's milk. It is comfort food, and delicious enough that I couldn't accept the delayed gratification of heating up the leftovers so I ate them cold instead. My dining companion gave it two thumbs up.

Some notes about the recipe:
  • This recipe is free from cow's milk (though not dairy-free). It uses pecorino romano, a salty parmesan-like hard cheese made of sheep's milk. I used a goat's milk feta but you can use any type of feta you can find.

  • Use lacinato kale (a/k/a dinosaur kale) if you can find it. If not, curly leaf will do.

  • You can find tubes of pre-made, ready-to-slice polenta at most health food or gourmet food stores and some mainstream groceries. I use the traditional polenta (unflavored) from Food Merchants. If you have the time, you can make polenta from scratch, spread it on a baking sheet in a 1/4" layer while it's still hot, refrigerate it until firm, and use a juice glass to cut small disks out of the polenta.

POLENTA LASAGNA WITH FETA AND KALE

1 tube (18 ounces) prepared polenta
1 1/3 cup marinara sauce
1 cup pecorino romano cheese, shredded
2 tablespoons extra virgin olive oil
1/2 onion, chopped finely
5 cloves garlic, minced
1 teaspoon fresh rosemary, minced
1 small carrot, diced
1 bunch kale (preferably lacinato), shredded
1/4 cup pitted kalamata olives, chopped finely
1 1/4 cup feta cheese, mashed with fork
Extra olive oil to grease baking pan

Preheat oven to 375 degrees F.

In a large pan, heat olive oil over medium-high flame. Sautee onions and rosemary until the onions begin to brown. Add garlic and carrots. Sautee until garlic fragrances the oil, about 2 minutes. Add kale and sautee until tender, then remove pan from heat.

Grease the bottom and sides of a 8x8" baking dish. Cut polenta into slices no thicker than 1/4 inch. Line the bottom of the pan with 1/2 of the polenta slices, overlapping them slightly to cover the whole bottom of the pan. Pour 1/2 cup of the marinara sauce over the polenta and spread it evenly. Distribute mashed feta cheese over the marinara sauce. Scatter olives over the feta, then top with an even layer of the kale mixture. Place the remaining polenta slices in a layer, overlapping slightly. Spread remaining 3/4 cup of marinara sauce. Sprinkle shredded pecorino evenly across the top.

Bake for 25 minutes or until the top layer of cheese is beginning to brown around the edges. Allow to sit for 5-10 minutes before slicing and serving (use a spatula).

Friday, January 05, 2007

Salmon with Sage and Vegetables in Parchment Paper


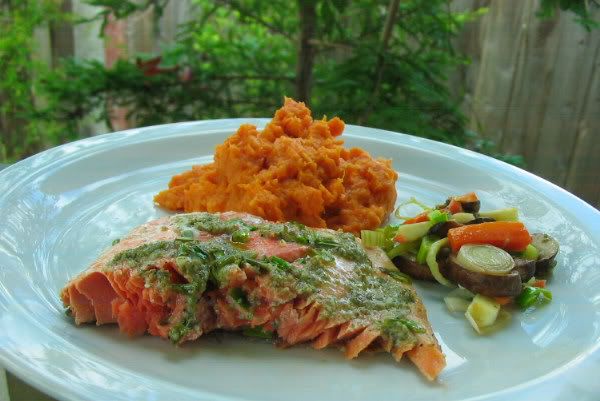
Thursday was one of those days when I just didn't want to make a big mess. I was home from work, recuperating from another epidural steroid injection. These procedures cause me a lot of pain for the 2-3 days afterwards, so I was sore and stiff and a little stoned on Tylenol with codeine. But being a blog martyr, I couldn't pass up the opportunity to prepare something delicious for lunch despite being in pain. I based the dish around my limitations (no bending to load or unload the dishwasher, no pulling out kitchen appliances not already on the counter) as well as the two fresh herbs I had on hand: sage and chives. They were starting to go bad and I just can't bear to watch beautiful fresh herbs go to waste. The best motivation of all was my New Year's commitment to participate for the first time in the Weekend Herb Blogging event, hosted this week by the ever-motivated and talented Kalyn.

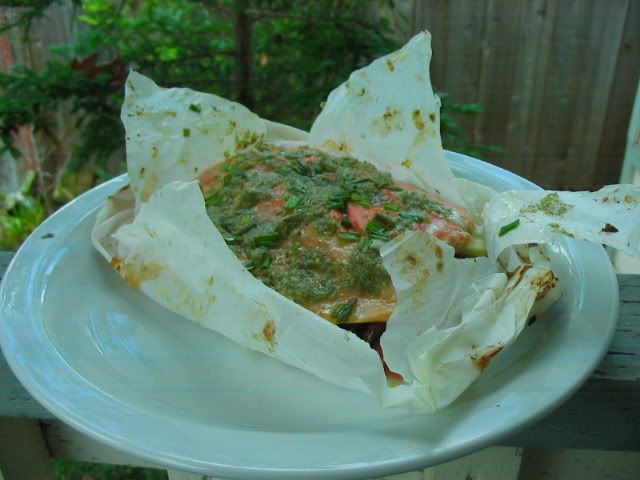
Parchment paper is seriously underrated, my friends. There is a real thrill in a complete meal wrapped up in a little self-contained packet. The joy of pulling out of the oven a perfectly cooked filet of buttery herbed salmon over flavorful vegetables wrapped neatly in a pouch of parchment paper is not so different from the satisfaction of the tasty knishes I posted about in November. Not quite as carb-laden, of course, but still satisfying and aesthetically pleasing.

In the top picture you'll see that I served the fish alongside the vegetables that it was cooked with it, accompanied by a generous portion of Coconut Mashed Yams on the side. You might also try roasting some potato wedges and throwing the parchment-wrapped fish and veggies on top of the potatoes for the last 12-15 minutes of cooking.

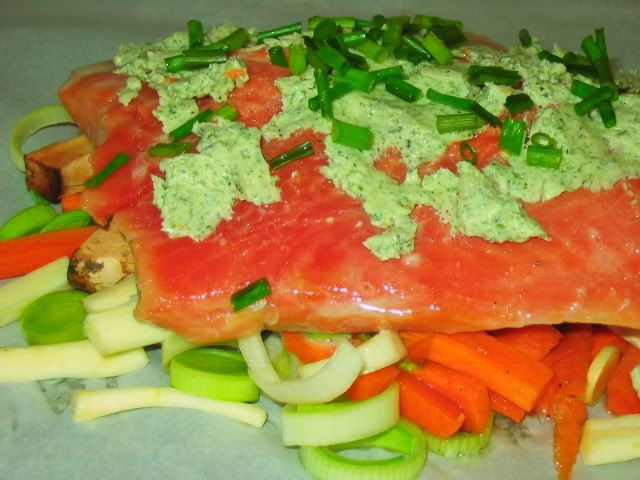
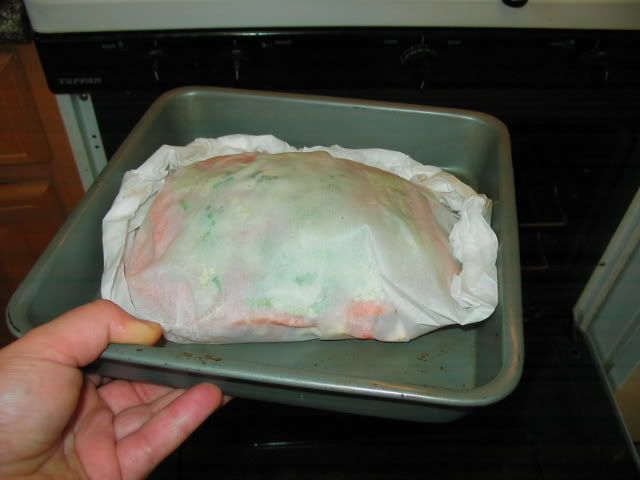
A step by step pictorial:


SALMON WITH SAGE AND VEGETABLES IN PARCHMENT PAPER

1 (8-12 ounce) boneless salmon fillet
1 small leek
1 small carrot
1/2 small parsnip
2 large cremini mushrooms
2 tablespoons unsalted butter, softened
1 fresh garlic clove
1 tablespoon fresh sage leaves (tightly-packed)
1 small lemon, juice of
1/2 teaspoon fresh ground black pepper
1/4 teaspoon salt
2 teaspoons fresh chives, chopped finely
parchment paper (One 15x24 inch piece)
Optional: 1/4 teaspoon thyme, dried or fresh

Preheat oven to 400 degrees F. Cut the tough, darker green tops from the leek and slice the tender lighter-colored section into very thin rounds. Cut (julienne) carrot and parsnip into matchsticks approximately 1/2 inch long and 1/4 inch wide. Slice crimini mushrooms in half lengthwise and then into 1/4 inch slices.

Combine butter, lemon juice, thyme, sage, pepper and salt in a food processor and pulse until thoroughly pureed.

Mix vegetables together. Lay them in a nest about the size of the salmon filet on one side of the parchment paper. Place 1/3 of the sage-butter mixture on top of the vegetables.

Place salmon on top of vegetables and spread with the rest of the sage-butter mixture. Sprinkle chopped chives on top, distributing evenly. Fold the other side of the parchment paper over on top of the salmon. Roll and crimp edges together to create a tightly-sealed half-moon shaped packet. Place packet on baking sheet and bake for 12-15 minutes. Remove from oven and allow to sit for 5 minutes.

To serve, place the packet on a dinner plate and create two slashes on the top of the paper in the shape of an X with a sharp knife. Peel back paper and enjoy. Alternately, you can cut the salmon into 2-3 pieces and place on individual plates next to a generous spoonful of the vegetables.

Tuesday, December 12, 2006

Aloo Gobi Mattar: Potato, Cauliflower and Pea Curry


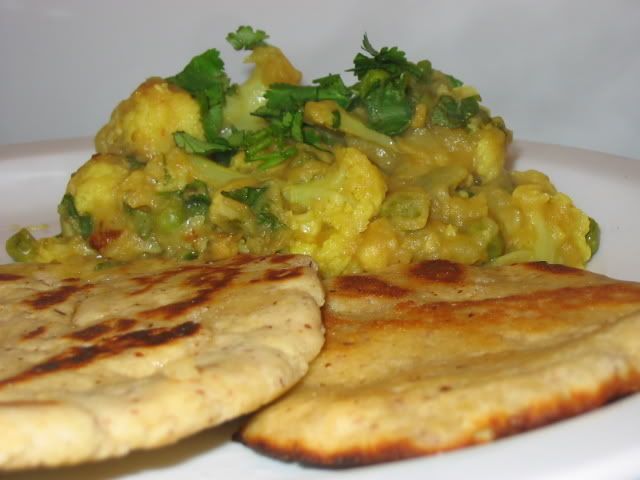
Last night I really needed some comfort food. There must be something about potatoes that sets off a chemical comfort explosion in my brain, because I knew immediately that's what I wanted. So I cooked up one of my favorites - Aloo gobi mattar, an Indian curry with potatoes, cauliflower and peas in a rich blend of spices. My recipe is a slightly more "saucy" adaptation of aloo gobi, which traditionally tends to be a dry curry.

I generally make this as a vegetarian dairy dish, using ghee and vegetable broth (I keep gluten-free bouillon cubes on hand). While you can make this dish vegan/pareve by using olive oil, ghee dramatically enhances the flavor. Serve this dish over basmati rice with naan or chapati. The flatbreads pictured were my second attempt at making gluten-free chapati. After my initial failure I threw together a slighly more palatable version which I spread some tamarind sauce on before using them to scoop up the curry. The recipe is not good enough to share with you all yet, but I'll post it when I've tweaked it a bit.

ALOO GOBI MATTAR (POTATO, CAULIFLOWER & PEA CURRY)

1 large cauliflower, cut into small florets
2 large onions, chopped into 1/2-inch chunks
3 medium baking potatoes, peeled and chopped into 1/2 "- 3/4-inch chunks
1 cup frozen green peas
1 cup vegetable stock or chicken stock
4 tablespoons olive oil or ghee
2 tablespoons fresh ginger, grated (including juice)
2 tablespoons fresh ginger, peeled and finely minced
5 garlic cloves, minced
2 medium hot green chili peppers, minced (seeds included)
2 teaspoons turmeric
1 tablespoon garam masala
2 teaspoons ground coriander
1 teaspoon salt
1/2 teaspoon white pepper (optional)
1 teaspoon fenugreek seeds
1 teaspoon ground cumin
1 teaspoon cumin seeds
1/2 lemon, juice of
1/3 cup fresh cilantro, chopped

Heat oil in a large wok, karahi, or deep nonstick pan over high heat. Add onions and cumin seeds, and cook until onions are translucent. Then add the minced garlic, chunks of ginger and chili pepper. Sautee for 2 minutes, stirring frequently.

Add all remaining spices, including salt. Stir well.

Immediately add potato to pan. Stir until coated in oil and spices. Turn heat down to medium and sautee potato for 3-5 minutes, stirring frequently.

Add chicken or vegetable stock, then put lid on pan, lower heat to medium-low and simmer for around 15 minutes.

Add the cauliflower florets, grated ginger and lemon juice. Stir well. Replace lid, turn heat to low, and let simmer for about 10 minutes. If the ingredients are sticking to the pan, you can add a bit more stock or 1/4 cup of water at this point.

Add frozen peas to pan, and stir ingredients. Cover and simmer for 10 more minutes.

Turn off heat. Add half of the fresh cilantro, and mix thoroughly. Replace the lid, then allow to rest for 10 minutes before adjusting salt to taste and serving dish over rice. Garnish with remaining fresh cilantro. Makes about 6 generous servings.


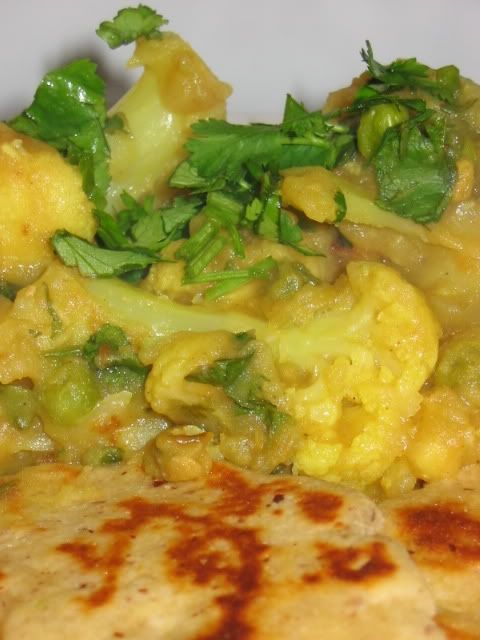
I like this picture because of the piece of cilantro that looks like it's balancing precariously
on top of a cauliflower stalk... Careful, don't fall!