KOSHER RECIPES FOR GLUTEN-FREE LIVING


Showing posts with label grains. Show all posts

Tuesday, January 12, 2010

Mushroom & Leek Risotto


I am in love with this new recipe I made on Friday night by combining and adapting two different recipes. It's terrific! So filling, too.

Six things that surprised me about this risotto:

1) It tastes like it was made with chicken stock, even though it's totally vegetarian
2) It tastes like it's made with heavy cream, even though there's no milk in it at all (the only dairy is cheese, and that's optional). It really tastes like there's massive amounts of milk and cheese, but there's not.
3) It is really good cold! I ate it for breakfast this morning and it was wonderful.
4) I realized while cooking and eating it that it could easily be made without the cheese and would be almost as good, so with a few changes (noted in the ingredient list) it could be a great dish for vegans, dairy-allergic folks and anyone who needs a pareve dish.
5) It doesn't need to be a side dish - It makes a great main dish, too! We had it as the main part of our meal.
6) Making the rice itself was quick. It took no more than 20 or 25 minutes. I had imagined it would take forever, but it didn't.

Some tips: I call for you to saute the mushrooms and leeks in a separate pan but if you want you can saute them in the pot you'll be making the risotto in, and just remove them and set them aside in a bowl while you saute the onion and make the rice. This will save you a dirty pot, but it'll create a dirty bowl... Your choice!

Use the most flavorful vegetable stock you can get your hands on. I used Imagine Foods Vegetable Cooking Stock because it's richer than the regular boxed vegetable stock. You could also use homemade vegetable stock (if you don't have your own recipe, try my VictoriousVegetable Stock). For white wine, I used Kedem White Cooking Wine since it's so much cheaper than buying a bottle of real white wine. But skip that shaker of dried-up parmesan cheese! Stick to the real shredded stuff, or just do without.


MUSHROOM & LEEK RISOTTO

[Gluten-Free / Vegetarian / Vegan & Dairy-Free Option ]

4 Tbsp butter or dairy-free margarine
1 large or 2 small leeks, sliced (only white & light green sections)
1 lbs crimini ("baby bella") mushrooms, sliced
2 Tbsp extra virgin olive oil
1/2 small yellow onion, diced finely
4 garlic cloves, minced
Salt & fresh ground black pepper, to taste
1 cup arborio rice
3 cups rich vegetable stock
1/2 cup white wine
1/2 cup water
Optional: 1/2 cup freshly shredded parmesan (plus additional to garnish)

In a saute pan, melt butter (or margarine if you want it to be dairy-free) over medium heat. Add leeks, and saute until they begin to become tender. Add mushrooms. Continue to sautee until both mushrooms and leeks are tender and leeks begin to brown just slightly. Remove from heat and set aside.

In a small pot or saucepan, combine vegetable stock, water and white wine and cook until they simmer. Cover and keep over low heat so the mixture stays hot.

In a medium pot, heat the olive oil over medium heat. Add the onion and garlic and saute until soft. Add salt and fresh ground black pepper. Stir in the arborio rice and cook for 1-2 minutes, stirring to make sure the rice becomes coated in the oil. Stir in the rice and cook 1 minute, coating rice with the oil.

Add one cup of the hot stock-wine-water mixture and allow to simmer until the liquid is mostly absorbed (there will still be some visible but when you stir it you should see that it's very thick and most has been absorbed by the rice). Stir very frequently to avoid sticking.

Add the rest of the liquid, a cup at a time, waiting each time until the liquid is absorbed by the rice.

Taste regularly to gauge doneness, as the risotto should have a creamy consistency but each grain of rice should remain a bit chewy at the center. The rice grains should not themselves be mushy. If the last of the liquid's been absorbed and the rice is still undercooked you may add additional hot water, stock or wine. Stir in the cheese and the mushroom-leek mixture, and adjust salt and pepper to taste. Serve immediately, garnished with additional shredded cheese if desired.

Monday, March 03, 2008

Gluten-Free Kosher Product Reviews

It's been a while since I did any product reviews and since I now have more of a readership of people who are both kosher and gluten-free I thought I'd start doing product reviews more regularly of products that have a hechsher (a kosher certification) and are also gluten-free. Everyone accepts different hechshers, so use your own judgment or consult your local halachic authority if you have questions. In addition, I'm hoping these product reviews will be just as useful for readers who are halal or vegetarian/vegan, or who are just plain ol' gluten-free and looking for some new GF products to try!

NANA'S NO-GLUTEN COOKIES

nana's no-gluten chocolate cookieNana's Gluten-Free Vanilla Berry Cookie Bars

Kosher Certification: Kof K Pas Yisroel - Pareve

Info for Special Diets
: All gluten-free products are vegan and contain no dairy, no refined sugars, hydrogenated oils, cane or beet sugars, cholesterol or trans fats.

Review: I wanted so much to like these cookies or at least find them edible. After all, there aren't that many products on the market that are reliably gluten-free, vegan, have no refined sugar and are reliably kosher. So I was terribly disappointed the second I bit into the No Gluten Cookie Bars - Berry Vanilla. They were incredibly grainy, had weird crunchy unidentifiable hard bits in them, and had a weird berry flavor but no actual pieces of berry. They were impossibly dry and I couldn't really taste any vanilla - But ultimately, I don't think there's any flavoring that could have countered the horrible, inedible grainy, crumbly texture. I couldn't bring myself to take more than two small bites, and when I had a friend take a bite they spit it out.

The Nana's No Gluten Chocolate Cookie was more edible. It was very, very mealy - It tastes like they use a coarse grain rice flour instead of a finely ground one. But it at least tasted pretty chocolatey. I can definitely a child enjoying this cookie. I didn't enjoy it and could only bring my chocoholic self to eat half of it, but it is a healthier option for parents with food-allergic kids they prefer not to feed sugar to.
I hate giving bad reviews, but my conclusion about Nana's products is this: If these taste good to someone, I would guess it's because they have gotten use to substandard gluten-free products. Folks, you don't have to settle for low-quality products that don't taste like real cookies! If can make good gluten-free vegan cookies at home, why can't a professional baking company make an edible product?

You can purchase Nana's No-Gluten Cookies here or at your local health food store or Whole Foods.

PEREG QUINOA MIXES


Kosher Certification: Badatz Ateret Shalom, Badatz Yoreh De'ah, CRC of the US and Canada, and the Orthodox Union (OU) - Pareve

Info for Special Diets: All products marked gluten-free. Vegan, pareve, no sugar. No visible nut or soy ingredients but I haven't been able to verify that their spice mixture is free of these allergens.

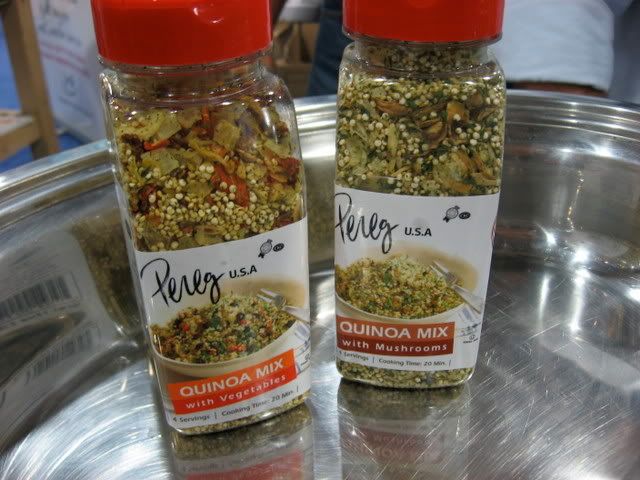
Review: Who needs boring old rice pilaf when you can have all the flavor and texture of a pilaf combined with the unbeatable nutritional profile of quinoa, that legendary "supergrain" that's not really a grain at all? I took this photo at Kosherfest back in the fall. I discovered and tasted and photographed so many new kosher gluten-free foods, and then promptly neglected to ever do a comprehensive post about my discoveries. Oops. Then a few months ago I went to Rockland Kosher, a huge kosher grocery store in Monsey, NY. Among a bunch of gluten-free goodies I found there, they carried Pereg Quinoa Mixes, which I'd tasted at Kosherfest and loved but didn't think I'd find in any stores near me. I bought two different flavors - Quinoa Mix with Vegetables and Italian Style Quinoa Mix. They also make one with mushrooms.

These quinoa mixes come in convenient plastic jars so they can be easily poured for measuring. They contain all natural ingredients, and of course are gluten-free. The ingredients include spices, raisins and dried vegetables - No MSG or preservatives. No rinsing is necessary, unlike with quinoa bought in bulk. Just follow the simple directions on the package and you end up with a fluffy and attractive quinoa pilaf that has a good amount of flavor to it. I love these mixes - Though I make my own quinoa pilafs from scratch, sometimes I just do not have the time to cook. I'm not a fan of plain steamed quinoa, so having a mix like this means I can have a flavorful side dish in a short amount of time without resorting to nutritionally-empty packaged white rice pilaf.

I really enjoy these pilafs and am excited to see them on the American market. My only suggestion for improvement is that instead of following the directions on the package I recommend using vegetable or chicken stock in place of water, to add more flavor to the quinoa. I also recommend sauteing the quinoa in the oil for more than 20 seconds before adding the water.

You can purchase Pereg Quinoa Mixes here or at your local kosher grocery.

Saturday, September 08, 2007

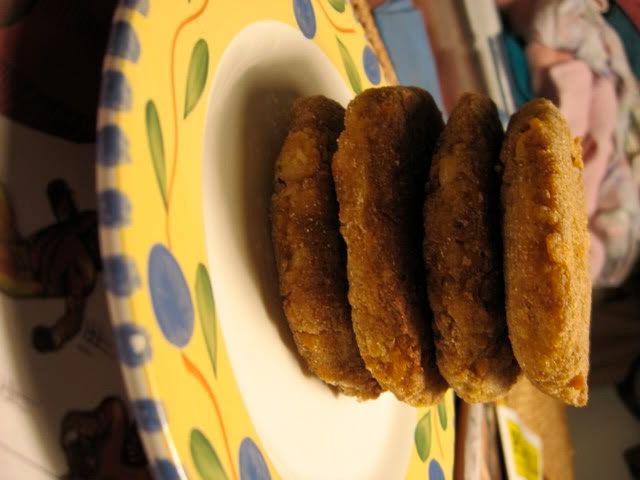
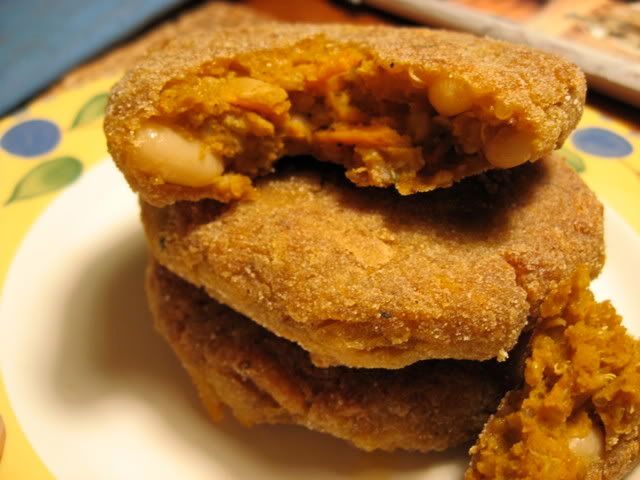
Quinoa-Cannellini Burgers: A Gluten-Free Veggie Burger for Grown-Ups


I feel slightly guilty calling these "burgers" - Not because they're vegetarian, but because they just seem too sophisticated for that moniker. The flavors are too dynamic. These firm, protein-packed, slightly spicy patties can stand alone as the "meat" of a meal, and taste as good topped with chutney or salsa as they do with ketchup (I've tried them with all three!) Chipotle aioli seems like it would be a good match, too. These burgers are delicious on a bun, but they beg for a hearty whole-grain bread or a kaiser roll rather than a plain ol' mass-produced hamburger bun. They're not all-American BBQ fare, after all. These are gourmet veggie burgers for grown-ups.


The patties are easy to make, and are a great way to use up leftover quinoa. They are packed with nutrition, and are a great way to get some whole grains into your diet. Got leftovers? Try cutting them into pieces and using them as a filling in a bean and cheese burrito made with a brown rice tortilla (believe me, it's fabulous). They heat up quite well in the toaster oven (though I'd pass on the microwave, for fear of losing their crispy outer crust). I always make an extra batch just so that I have plenty of leftovers to keep in the fridge.

I prefer to use very well-cooked quinoa for this recipe. Though I usually toast my quinoa before cooking it, I didn't find it necessary for this recipe. If you cook it in tomato soup (my preference) or in vegetable broth, the flavor of the burgers will be enhanced - But reduce the salt in the recipe by half. To prepare the quinoa, cook 1/2 cup of quinoa in 1 cup of liquid. Bring to a boil, cover and reduce heat to low. Simmer for 15 minutes or until tender. Remove from heat but keep covered, and allow to continue steaming until very soft and fluffy.

When I was making these, my mother asked what I was cooking. When I told her, she gave me a funny look. Turned out she thought I'd said "quinoa-kundalini burgers". So from now on, cannellini beans shall be known as "kundalini beans"!

VEGETARIAN QUINOA-CANNELLINI BURGERS

a/k/a Quinoa-Kundalini Burgers

[ Gluten-Free / Soy-Free / Nut-Free / Vegetarian / Pareve ]

1 cup canned cannellini beans, drained and rinsed
1 cup cooked quinoa, firmly packed
3 cloves garlic, minced finely
1 jalapeno, minced, including seeds
1 tsp fresh thyme
1 cup grated carrot
1 egg, lightly beaten
1/2 tsp salt
3/4 cup sweet sorghum flour
Generous amount of fresh ground black pepper
1/4 cup light olive oil or canola oil, for frying
Additional sorghum flour for dredging

Using the back of a fork, mash the beans slightly (they should not be completely smooth). Add all other ingredients except olive oil and flour. Mix thoroughly with a wooden spoon. Slowly sprinkle in 3/4 cup of sorghum flour, combining until a loose "dough" is formed that is dense enough to be handled (use additional flour if necessary).

In a 12" pan, heat up oil over medium-high heat. Sprinkle 1/2 cup of additional sorghum flour on a plate or in a pie tin. Compress "dough" between your hands to form 1/2" thick patties of about 4" diameter. One by one, carefully dredge them in sorghum flour, making sure the flour is distributed on both sides and along the edges of each patty. Use a slotted spatula to transfer carefully into hot oil. Cook for 3-5 minutes on each side, or until golden-brown and slightly crisp. In between batches you may want to replace the oil. Remove burgers from oil and place on a plate lined with paper towel or pieces of brown paper bag to absorb excess oil. Serve hot.

Thursday, April 12, 2007

Toasted Quinoa Pilaf with Garlic, Kale and Pine Nuts

Gluten-Free Toasted Quinoa Pilaf with Garlic and Kale

Thank you all so much for your wonderfully supportive comments to my last post. I am so grateful for all my wonderful readers, it's like having a personal cheerleading team!

Meanwhile, I'm taking a break from the packing to post this powerfully flavorful quinoa dish I created for a friend's Passover seder. I was thrilled when several people told me it was the best quinoa they'd ever tasted - I think that my use of my extremely rich homemade vegetable broth combined with the toasting of the quinoa before cooking were a large part of its success. Use the most flavorful broth you have on hand, or try water and a gluten-free bouillon cube. I enjoyed this pilaf at room temperature the next day as a quinoa salad - It makes a nutritionally balanced lunch for work or school, and will last at least a week in the refrigerator.

TOASTED QUINOA PILAF WITH GARLIC, KALE AND PINE NUTS


[ Gluten-Free / Dairy-Free / Soy-Free / Vegan / Parve ]


1 Tbsp extra virgin olive oil
1/2 cup onions, chopped finely
6 cloves garlic
1 cup quinoa
2 cups chicken or vegetable broth
1/4 tsp sea salt
1 large carrot, shredded
2 cups finely shredded kale
1 Tbsp tomato paste
1/3 cup celery, minced
1 tsp fresh thyme
Freshly ground black pepper, to taste
1/4 c pine nuts

If you purchased quinoa in bulk, rinse it thoroughly in a fine strainer to remove its bitter coating. If you purchased Ancient Grains, Trader Joe's, or any other boxed brand, no rinsing is necessary.

Place quinoa in a heavy, large skillet over medium heat. Cook for about 15 minutes, shaking the pan frequently to move the quinoa around. Cook until the quinoa becomes golden brown. Remove from heat.

Heat oil in the bottom of a medium saucepan. Add onions and sautee until just beginning to brown. Add garlic and cook for another 1-2 minutes. Add quinoa and sautee for a minute. Add all remaining ingredients except for celery and pine nuts.

Bring to a boil, then cover and reduce heat to low. Simmer for 10 minutes. Add the celery and mix well, then cover and continue cooking for 5 minutes or until done. When quinoa is done, it should be tender and the spiral-like germ will have separated from the rest of the grain.

In the dry skillet used for toasting the quinoa, now lightly toast pine nuts over medium-low heat. Pine nuts burn quickly so stir them frequently and remove them from the pan the moment they appear golden brown. Stir into pilaf before serving.

Serve hot or at room temperature.

Monday, March 19, 2007

Kalamata Olive & Rosemary Bread: The Search for a Gluten-Free Rustic Loaf


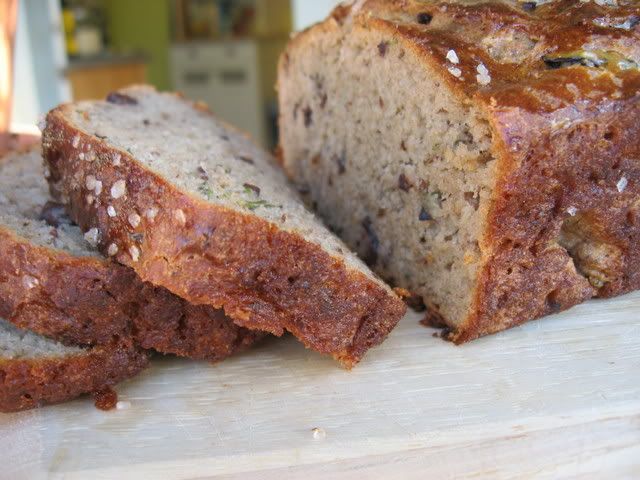
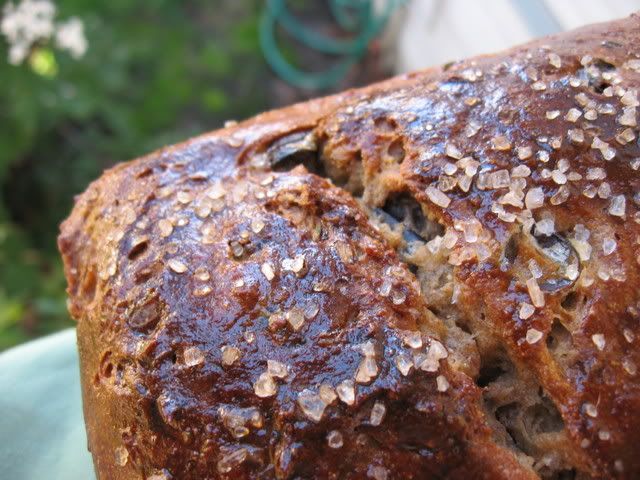
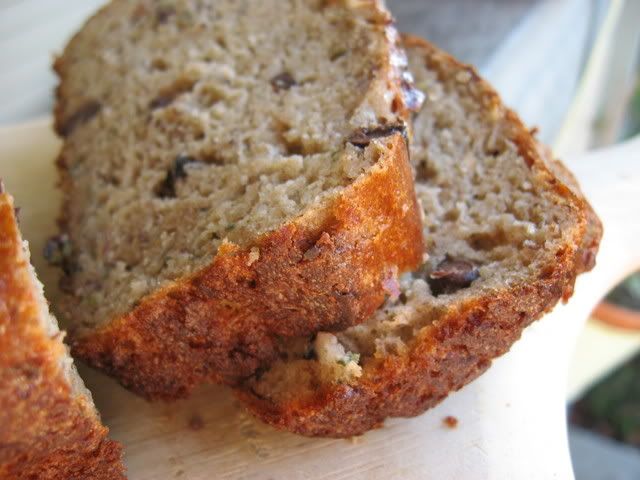
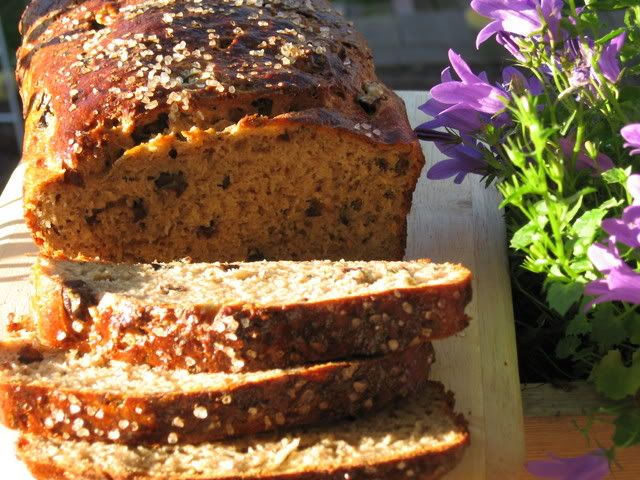
The only thing more comforting than a warm slice of home-baked bread, fresh from the oven? A warm slice of home-baked bread, fresh from the oven, that is infused with rosemary and olive oil and speckled throughout with kalamata olives!

I have been craving a hearty, rustic-style olive bread. Though this recipe did not turn out to be anywhere near as crusty or rustic as the loaves I enjoyed in my gluten-eating artisan-bread-buying days, it certainly turned out wonderfully flavorful. It has the soft, pliable, no-toasting-necessary sandwich bread texture of the Gluten-Free Multigrain Miracle Bread I posted about a few weeks ago, but with a palette of complimentary, savory flavors. Judging by the looks on the faces of the gluten eaters I fed the olive-rosemary bread to, this recipe is a success.

Try this bread with butter on it, or as an accompaniment to Southern European and Mediterranean dishes, or try it with any soup or stew. As for me, I ate the entire loaf (not at once, of course) with hummus on top because I loved how the flavors went together. It would also make a killer grilled cheese sandwich with sharp cheddar.

As for crusty, rustic-style breads - The search continues. I've yet to find a gluten-free recipe that's quite what I'm looking for, but I'll keep working on creating one in my own kitchen. I'm not sure how to describe what I think of as "rustic" bread. I suppose I think of it as heavier, drier, and less glutinous than the breads I usually make. Perhaps cutting down on the xanthan or guar gum (GF gluten replacements) would help. A satisfyingly chewy crust is another element missing from every gluten-free bread I've tasted, no matter how wonderful the taste or texture. So, my esteemed readers, go ahead and enjoy this delicious loaf - but also answer these two questions for me, while you're at it:

1) Do you have any gluten-free bread recipes that yield a "rustic" loaf with a thick or chewy crust?

2) What makes a bread rustic, anyway?

The search continues...


KALAMATA OLIVE AND ROSEMARY BREAD

1/2 cup amaranth flour
1/4 cup garbanzo flour
1/4 cup plus 2 Tbsp white rice flour
5 Tbsp teff flour
1/4 cup tapioca starch
1/4 cup arrowroot powder
2 Tbsp flax seed meal (ground flax seeds)
3 tsp xanthan gum
1 1/2 Tbsp fresh rosemary, finely minced
1/2 cup pitted kalamata olives, chopped roughly
2 tsp active dry yeast
1 tsp salt
2 whole eggs
2 eggs, whites separated from yolks
3/4 cup water, room temperature
5 Tbsp extra virgin olive oil
1 1/2 Tbsp honey
2 tsp apple cider vinegar
Optional: Coarse sea salt crystals for crust

Preheat the oven to 200°F.

Sift the flours, yeast and all other dry ingredients (except coarse sea salt) into a medium bowl. Stir in flax meal and rosemary, and combine.

Combine wet ingredients, including the two whole eggs and the two separated egg whites in a large bowl, using a hand-mixer on low or medium speed. [The two separated egg yolks should be set aside in a small bowl for later use as a glaze]. When fully combined, add kalamata olives. Slowly add dry ingredient mixture and mix with a wooden spoon until fully blended, with no lumps. Scrape the sides regularly.

Grease a 9x5" bread pan, and pour the dough into the pan. Use a spatula or knife to evenly shape the top of the loaf. Cut two diagonal slashes in the top of the loaf. Beat the two separated egg yolks that have been set aside and brush the top of the loaf very lightly with them. Optional: Sprinkle coarse sea salt crystals very sparsely to embellish the loaf.

Turn off the oven and immediately place the pan in it. Do not open the door again, if possible. Allow the dough to rise for 90 minutes. It should rise to the very top of the pan.

Increase heat to 350F and bake for approximately 40 minutes. The crust should be golden-brown. Allow to cool slightly before removing it from the pan to finish cooling. Do not slice until the bread is no longer hot.

This loaf does not need to be frozen, but if there are leftovers after a few days, place slices in airtight bags and freeze.

Tuesday, March 13, 2007

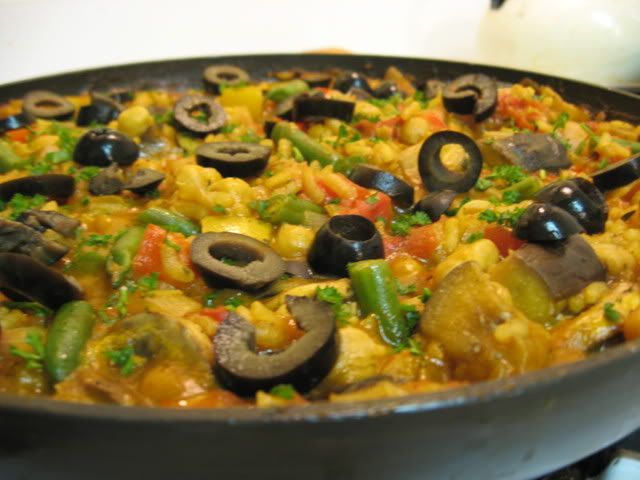
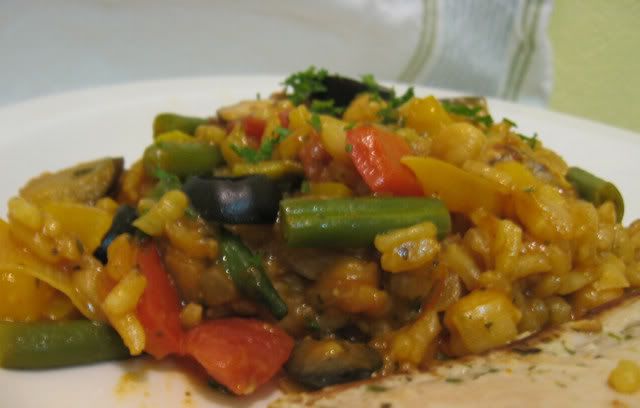
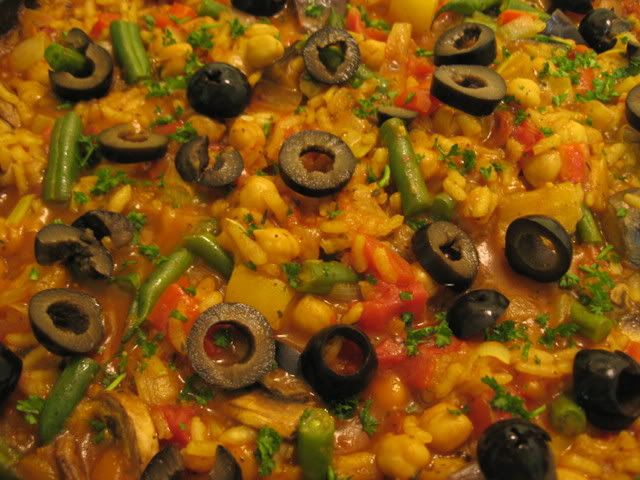
Vegetarian Kosher Paella


Spanish cooking seems to be sweeping the United States these days. Tapas joints, pimenton, sherry vinegar... I'm digging this trend. There are so many traditionally gluten-free dishes in the Spanish culinary repertoire, and I love the flavors it has introduced into my cooking. I've been looking forward to trying this recipe because I've always loved paella but it's loaded with shellfish, which are not kosher. It's hard to go wrong with vegetables, rice, and spices - And this dish, which I doctored with my own mix of spices, certainly didn't let me down. This beautiful vegetarian paella, with its vivid spectrum of vegetables, is a flavorful and colorful one-dish meal. The texture and combination of tastes are excellent, and didn't leave me missing the meat. OK, I'll admit it, I served it as a side dish for tuna steaks - But I promise it can hold its own as a vegan/vegetarian main dish!

I used the technique in this article to create a socarrat, the crusty layer of browned, caramelized rice at the bottom of the pan which adds a certain je ne sais quois to paella. This is why the recipe instructs you to turn the heat up at the end of the cooking process. Do take the time to do this - You won't be disappointed. The wider your pan is, the thinner the layer of rice will be and the more flavorful, chewy socarrat you will be able to create.

Keeping the rice al dente was a good move - I think leftovers will reheat perfectly. Next time I will try replacing a little bit of the broth with white wine, which I think would add depth to the flavor. I might also try adding marinated artichoke hearts with the other vegetables. Neither of these changes are necessary, but they will give this dish a little more oomph.

I look forward to eating leftover paella for lunch at work all week. Kosher, vegan, gluten-free... But most importantly, delicious.

3/10/10 UPDATE: I made this dish again, this time with turmeric instead of saffron. The result was fabulous and quite similar in color, if a little different in taste. If you can't afford saffron or don't have it on hand, eliminate the saffron and instead add 1 tsp turmeric (or to taste) at the point when you add the other spices.

VEGETARIAN KOSHER PAELLA

[Vegan / Gluten-Free / Soy-Free / Pareve ]

1 pinch saffron (approximately 1/2 tsp)
1 medium eggplant, cut into large chunks
3 Tbsp extra virgin olive oil
1 yellow onion, chopped
4 garlic cloves, crushed
1 yellow pepper, finely chopped
1 red bell pepper, finely chopped
1 tsp dried cilantro
2 teaspoons sweet Spanish paprika
1 cup arborio rice
3 1/2 cups vegetable broth
1 (15 ounce) can diced tomatoes
1/2 tsp cayenne powder
1/2 tsp sea salt
1 tsp dried thyme
Freshly ground black pepper
1 cup mushrooms, sliced
1 cup green beans, cut into thirds
1 (15 ounce) can chickpeas, rinsed and drained
1/4 cup black pitted olives, sliced
1 Tbsp fresh parsley, minced (optional)

Cover saffron with 3 tablespoons of water in a small bowl and set aside. Sprinkle eggplant chunks with salt and allow to sit in a colander for 30 minutes. Rinse and drain the eggplant.

Heat the olive oil in a wide, heavy pan. Saute the onion, garlic, cilantro, peppers and eggplant for 5 minutes. Sprinkle with paprika and toss. Then add rice, vegetable stock, tomatoes, saffron (along with the water it's been soaking in), salt, cayenne, paprika, thyme and generous amounts of freshly ground black pepper. Bring to a boil, then lower to a simmer. Cook for 15 minutes, uncovered. Stir frequently.

Add the mushrooms, green beans and chickpeas. Cook uncovered, stirring often, for another 15 minutes or until the rice has become tender but is still al dente, and the sauce has thickened. Additional broth, water or white wine may be added as needed during cooking to keep the rice moist.

Turn the heat up to high for 5 minutes or until a browned, caramelized crust forms on the bottom side of the rice. Test for this crust by inserting a fork into the paella and checking for resistance at the bottom. Watch carefully to make sure the rice does not burn. Remove from heat and allow to sit for 5 minutes before garnishing with fresh parsley and olive slices. Serve hot.


Monday, March 05, 2007

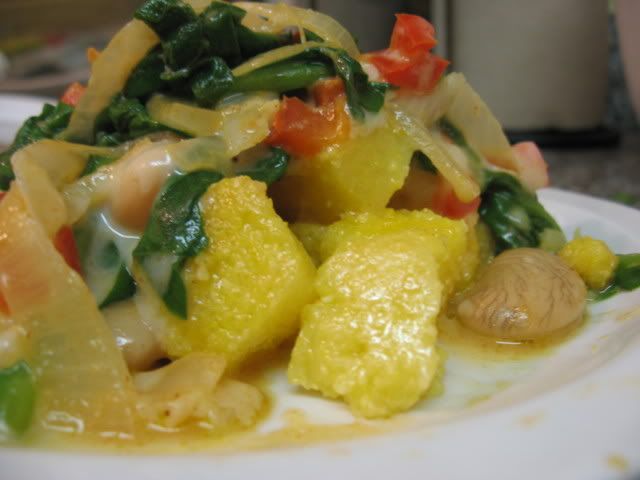
Catalan Sauteed Polenta and Butter Beans


I love polenta and frequently seek new ways to prepare it, especially recipes that use quick-cooking polenta or the tubes of pre-made ready-to-use polenta that are available at most grocery and natural foods stores in my area. I usually choose Food Merchant brand pre-made polenta since it is verified to be gluten-free.

This Spanish-inspired dish is a wonderful new polenta option to add to my repertoire. I adapted it from a recipe that was posted on RecipeZaar. However, a quick web search found that the original source of this recipe is Eating Well Magazine. This gorgeous dish is just great - A perfectly balanced vegetarian main dish that is impressively flavorful and satisfying. I used plain paprika, but will try it with Spanish smoked paprika (sweet or spicy) next time. If you can't find butter beans, try replacing the butter beans with cannelini beans - But if you can find butter beans, which are sometimes on the shelf next to lima beans and peas rather than with the beans, they are well worth using for their mild taste and smooth texture. ¡Buen apetito!

CATALAN SAUTEED POLENTA AND BUTTER BEANS

1 tbsp plus 2 tsp olive oil, divided
1 (16 ounce) package prepared polenta, cut into 1/2-inch cubes
2 garlic cloves, minced
1 small onion, halved and thinly sliced
1 red bell pepper, diced
1 teaspoon paprika, sweet or smoked
1 (15 ounce) can butter beans, rinsed
4 cups baby spinach
3/4 cup vegetable broth
3/4 cup monterey jack cheese, shredded
2 teaspoons sherry wine vinegar or apple cider vinegar

Heat 1 tablespoon of olive oil in a large nonstick skillet over medium-high heat. Add polenta cubes and cook in a single layer, stirring occasionally, until it begins to brown (approximately 8 to 10 minutes). Transfer to plate or bowl.

Reduce the heat to medium, add the remaining 2 teaspoons of olive oil and the minced garlic to the pan, and cook until fragrant - Approximately 30 seconds. Add onion and bell pepper. Sautee just until tender (3-5 minutes). Sprinkle with paprika and stir. Mix in beans, spinach, and broth. Cook until for 3 to 5 minutes, or until the beans are heated through and the spinach has wilted. Stir occasionally. Remove from heat; stir in cheese and vinegar. Serve vegetables over polenta. Optional: Sprinkle with extra paprika.

Thursday, February 15, 2007

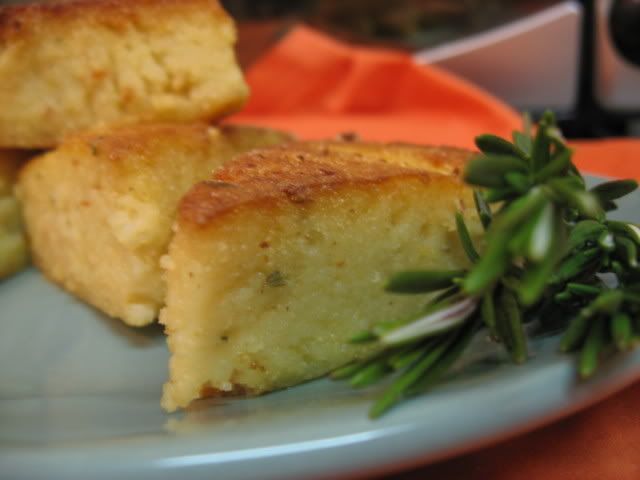
Rosemary Polenta Triangles


I love rosemary and rosemary loves me back. It tastes as good as it smells, and looks as lovely as it tastes. It thrives under the care of the lazy gardener, as it's drought resistant and hardy. I grow it in a pot on my porch, and it valiantly struggles to keep up with rate at which I clip its branches away for my cooking. Weekend Herb Blogging is hosted by a fellow Jewish food blogger this week - The Chocolate Lady of In Mol Araan, who blogs in both Yiddish and English. For this event I chose to adapt a recipe with Italian flavor to be both vegetarian and kosher. In doing so, I was reminded of the long history of Jews in Italy, and a search online brought me a new cookbook to add to my wishlist: Cucina Ebraica: Flavors of the Italian Jewish Kitchen.

This fabulous rosemary-infused polenta recipe is originally from Ina Garten (a/k/a The Barefoot Contessa), one of my favorite TV chefs, whose cooking is normally high fat and far from kosher or vegetarian. While this is not a low-fat dish by any stretch of the imagination, I have managed to reduce the fat content a bit from the original recipe. The transformed recipe turned out to be one of the most delicious incarnations of polenta that I've experienced.

The flour I used to coat the polenta triangles before pan-frying was my Rice Flour Mix, and for vegetable stock I put to use some of the leftover Isaiah's Victorious Vegetable Stock I had in my freezer, which lent an impressive amount of flavor and richness that a storebought broth would lack. This recipe could be easily and deliciously made vegan by substituting margarine (or additional olive oil) for the butter, using an unflavored soy milk as a replacement for milk, and eliminating the cheese.

Though they are terrific all by themselves, I served these tasty triangles on top of a puddle of hot marinara sauce, which was absolutely perfect.


ROSEMARY POLENTA TRIANGLES

5 tablespoons unsalted butter
1/4 cup olive oil
4 cloves minced garlic
1 tsp crushed red pepper flakes
2 tsp finely minced fresh rosemary leaves
1/2 tsp kosher salt
1/2 tsp freshly ground black pepper
3 cups vegetable stock
4 cups milk (whole or 2%)
2 cups cornmeal or instant polenta
1/2 cup grated parmesan or pecorino romano cheese
Gluten-free flour mix
1 tablespoon olive oil, for frying
1 tablespoon butter, for frying

Heat 6 tablespoons of butter and 1/4 cup of olive oil in a medium-sized pot on medium heat. Add the garlic, red pepper flakes, rosemary, salt, and pepper and sauté for 2 minutes. Add the vegetable broth and milk, and bring to a boil.

Remove the pot from the heat and slowly sprinkle the cornmeal or instant polenta into the hot milk while stirring constantly with a whisk. Cook over low heat, stirring constantly, until thickened and bubbly (about 5-10 minutes). For instant polenta, follow the instructions on the package (usually requires only 3 minutes). Remove from heat and stir in cheese.

Pour the polenta into a 9 x 13 x 2-inch pan, smooth the top with a rubber spatula so that it is even, and refrigerate until firm and cold (approximately 1 hour).

Cut the chilled polenta into 12 squares, as if it were brownies. Then carefully lift each square out of the pan with a spatula and cut it diagonally into two triangles. Dust each triangle lightly in gluten-free flour.

Heat 1 tablespoon olive oil and 1 tablespoon butter in a large sauté pan and cook the triangles in batches over medium heat for 3 to 5 minutes, turning once. Cook until browned on the outside and heated throughout. Additional butter and oil may be added as necessary. Serve immediately, alone or with tomato sauce.

Monday, January 29, 2007

Pecan Rice Pilaf


Today I set out to answer the question:

What is wild rice, anyway?

According to Wikipedia, wild rice is part of the genus Zizania, which is a group of grasses that grow in the shallows of small lakes and ponds. Three varieties are grown in the United States. Wild rice is not a rice at all, but rather the seed of these aquatic grasses.
Almost always sold as a dried whole grain, wild rice is high in protein, the amino acid lysine and dietary fiber, and low in fat. Like true rice, it does not contain gluten. It is also a good source of the minerals potassium and phosphorus, and the vitamins thiamine, riboflavin and niacin. Because commercial, paddy grown wild rice is harder and denser than true rice, it must be cooked longer to become soft enough to be eaten; it generally requires cooking for at least 45-60 minutes in a ratio of wild rice to water of approximately 1 to 3. Because of its comparatively high cost and chewy texture it is often cooked together with true rice, often in a ratio of true rice to wild rice of 8 to 1 or 4 to 1.
[Italics are mine, for emphasis]

Wild rice adds a satisfying chewy texture and compelling color contrast to brown or white rice, and is one of my favorite additions to rice pilaf. For this recipe, inspired by a recipe posted by a woman named Bev on a recipe board I frequent, I call for a blend of brown and wild rice. You can blend the rices yourself, using the ratios indicated above, or simply buy a pre-packaged blend of brown and wild rice. Lundberg Family Farms makes several of these mixes, including their Wild and Brown Rice Blend. Their rice mixes are kosher and gluten-free.
Sadly, I have no photograph to accompany this colorful pilaf. I hope it speaks highly of the recipe that I ate it all before I had a chance to photograph it!

PECAN RICE PILAF

1 cup brown rice and wild rice mix
2 cups vegetable stock
1 1/2 tablespoons butter, ghee or olive oil
1 medium carrot, peeled and minced
1 stalk celery, minced
1/2 bell pepper, minced (optional)
1/2 cup white mushrooms, minced
1/2 cup toasted pecans, coarsely chopped
Salt & freshly ground black pepper, to taste

Follow the instructions on the package of brown rice-wild rice mix, using a medium-sized sauce pan and replacing the water with vegetable stock. Most mixes will call for 2 cups of liquid for 1 cup of rice. Bring the stock to a boil, add the rice, cover and turn heat to low. Simmer for the indicated amount of time (approximately 50 minutes).

In a 10" skillet, melt the butter or ghee (or heat oil) over medium heat. Add the carrot and peppers and saute for 2-3 minutes. Add celery, mushrooms, and pecans. Saute for about 2 minutes more, stirring frequently. Add the rice and stir until all ingredients are thoroughly combined and evenly hot. Add freshly ground black pepper to taste, and additional salt if necessary. Serve hot. Leftovers can be reheated or eaten as a rice salad at room temperature.

Makes about 6 servings.

Monday, January 08, 2007

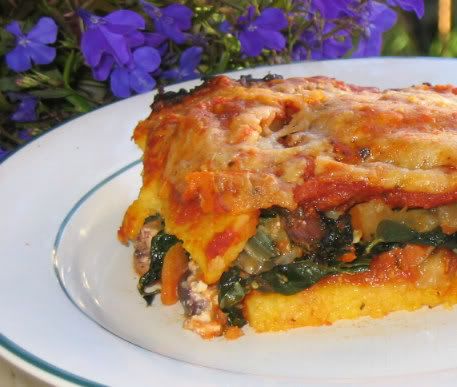
Polenta Lasagna with Feta and Kale


I don't share recipes with you folks unless I enjoyed them myself. Yet every now and then a certain dish will stand head and shoulders above the rest... A dish that makes me do a little happy dance. A dish so interesting or comforting that I have to stand back and feel proud, and then invite someone over to share it. This is one of those dishes. This easy one-dish gluten-free casserole is bursting with Mediterranean-inspired flavor. It is loaded with calcium, a nutrient I haven't been getting enough of since I started cutting down on cow's milk. It is comfort food, and delicious enough that I couldn't accept the delayed gratification of heating up the leftovers so I ate them cold instead. My dining companion gave it two thumbs up.

Some notes about the recipe:
  • This recipe is free from cow's milk (though not dairy-free). It uses pecorino romano, a salty parmesan-like hard cheese made of sheep's milk. I used a goat's milk feta but you can use any type of feta you can find.

  • Use lacinato kale (a/k/a dinosaur kale) if you can find it. If not, curly leaf will do.

  • You can find tubes of pre-made, ready-to-slice polenta at most health food or gourmet food stores and some mainstream groceries. I use the traditional polenta (unflavored) from Food Merchants. If you have the time, you can make polenta from scratch, spread it on a baking sheet in a 1/4" layer while it's still hot, refrigerate it until firm, and use a juice glass to cut small disks out of the polenta.

POLENTA LASAGNA WITH FETA AND KALE

1 tube (18 ounces) prepared polenta
1 1/3 cup marinara sauce
1 cup pecorino romano cheese, shredded
2 tablespoons extra virgin olive oil
1/2 onion, chopped finely
5 cloves garlic, minced
1 teaspoon fresh rosemary, minced
1 small carrot, diced
1 bunch kale (preferably lacinato), shredded
1/4 cup pitted kalamata olives, chopped finely
1 1/4 cup feta cheese, mashed with fork
Extra olive oil to grease baking pan

Preheat oven to 375 degrees F.

In a large pan, heat olive oil over medium-high flame. Sautee onions and rosemary until the onions begin to brown. Add garlic and carrots. Sautee until garlic fragrances the oil, about 2 minutes. Add kale and sautee until tender, then remove pan from heat.

Grease the bottom and sides of a 8x8" baking dish. Cut polenta into slices no thicker than 1/4 inch. Line the bottom of the pan with 1/2 of the polenta slices, overlapping them slightly to cover the whole bottom of the pan. Pour 1/2 cup of the marinara sauce over the polenta and spread it evenly. Distribute mashed feta cheese over the marinara sauce. Scatter olives over the feta, then top with an even layer of the kale mixture. Place the remaining polenta slices in a layer, overlapping slightly. Spread remaining 3/4 cup of marinara sauce. Sprinkle shredded pecorino evenly across the top.

Bake for 25 minutes or until the top layer of cheese is beginning to brown around the edges. Allow to sit for 5-10 minutes before slicing and serving (use a spatula).

Wednesday, November 15, 2006

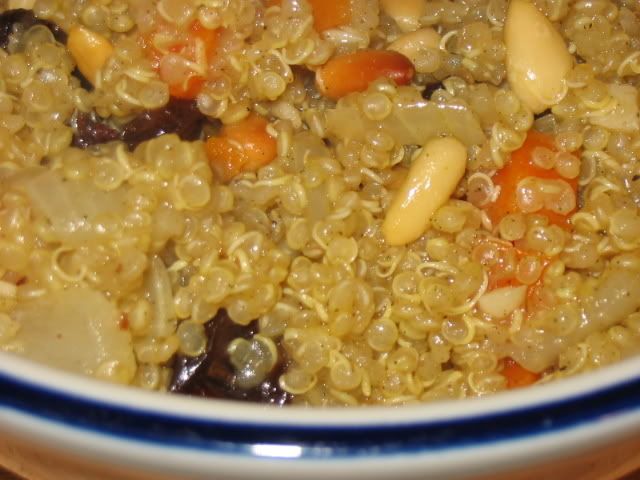
The Spice Is (Almost) Right: Quinoa Pilaf with Cardamom and Sage

Danielle of Habeas Brulee is this month's host of The Spice is Right. The theme for this event is using a spice (or blend of spices) in a way that is atypical or unusual. I chose powdered cardamom, as I had quite a bit of it in my cabinet. Cardamom is the seed of a ginger-like plant. One site describes it as "pungent, warm and aromatic... Warm and eucalyptine with camphorous and lemony undertones." Eucalyptine might just be my new favorite word. Honestly, I had little idea of what cardamom tasted like. I had only used it in curries and baked goods - Dishes that have so many other strong flavors that I could not clearly distinguish cardamom from the others. I had bitten down on a cardamom pod now and then in basmati rice at an Indian restaurant, but it had overall been a neglected spice in my cooking (and eating) repertoire.

Sage, on the other hand, is a familiar and common ingredient in my cooking. I usually cook with fresh sage from my garden, but I chose powdered sage this time since my sage plant is getting sparse now that I cut its leaves off several times a week for use in the kitchen! I had an instinct that sage would be an unusual but subtly appropriate compliment to cardamom in a lightly-spiced grain dish inspired by the Indian biryanis I enjoy so much. I chose quinoa, which is a versatile, high-protein gluten-free grain with a very mild flavor.

The result was an enjoyable, aromatic quinoa pilaf with a wonderful texture. The problem is, it was missing some... oomph. I can't for the life of me tell you what the missing ingredient is that would propel this from "enjoyable" to "delicious." My friend and I discussed adding more salt, some cayenne pepper, or garlic powder. Ultimately, I decided to leave it alone to be exactly what it is: A satisfying, filling side dish that would be best accompanied with meat or vegetables in a more emphatically spiced sauce. If you try this recipe out, let me know if you find its missing oomph!


QUINOA PILAF WITH CARDAMOM & SAGE

1 cup quinoa
2 cups chicken or vegetable broth
2 tablespoons olive oil
1/2 onion, diced
3 cloves of garlic, minced
1 carrot, chopped finely
1/2 teaspoon salt
1/2 teaspoon ground black pepper
1 teaspoon ground cardamom
1/2 teaspoon ground sage
1/4 cup lightly toasted pine nuts
1/4 cup raisins

Heat olive oil in 1-quart saucepan over medium-high heat. Add onions, and sautee until they begin to brown. Lower heat to medium and add garlic and carrots. Sautee for 1-2 minutes, then add quinoa, pepper, cardamom and sage. Stir constantly for 2-3 minutes.

Add chicken stock and salt, and bring to a boil. Cover and simmer on low heat for 15 minutes or until all liquid is absorbed and quinoa is tender. Gently stir in raisins, cover and allow to sit for 2-3 minutes. Add lightly toasted pine nuts, fluff with a fork, and serve.