(Thanks to Ethicurean.com for the lowdown!)
Tuesday, February 27, 2007
John Mackey vs. Michael Pollan: The Smackdown
I'm headed to UC Berkeley this evening with my dear friends Ms. L and Poet With A Day Job for the much-anticipated dialogue between John Mackey (CEO of Whole Foods) and Michael Pollan, the author of The Omnivore's Dilemma and a food ethicist who is an outspoken critic of Whole Foods, which is part of what he calls "Big Organic." Pollan is troubled by the negative environmental and social impact of Whole Foods and other companies who capitalize off of their progressive images while undermining local agriculture. And a whole lot of other things. He has lots of good things to say about a variety of issues including nutrition, animal treatment, and sustainable agriculture. The whole blog world seems to be abuzz today about this sold-out event, so I wanted to let those of you who aren't local or who weren't able to obtain tickets know that you can watch it for free as a webcast here, beginning at 6:50 PM (Pacific).
(Thanks to Ethicurean.com for the lowdown!)
(Thanks to Ethicurean.com for the lowdown!)
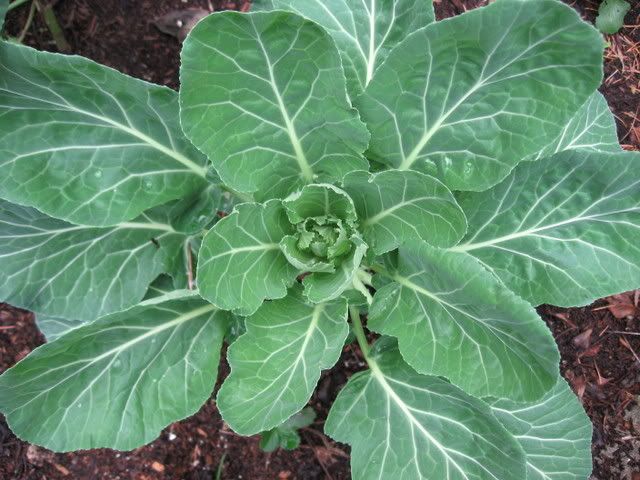
Collard Greens, Plain and Simple
I grow collards in my garden:

And I grow collards on my porch:

I love collard greens, and they sure make my body happy.
Here in Northern California, February is a great time to buy, or harvest, various hardy green vegetables and cabbage-family veggies that thrive in the winter weather. I harvested 2 whole pounds of collards from my garden last week and cooked them up for this week's submission to the Anti-Oxidant Rich Foods / 5-A-Day Tuesday blogging event. They are very tasty by themselves or with rice and beans. I'll be enjoying for days to come. Feel free to cut this recipe in half, of course, if you don't want a week's worth of greens on your hands!
Part of why these greens turned out so deliciously is that I used my Victorious Vegetable Stock, which is incredibly flavorful and rich. However I'm sure they'd turn out fine and dandy with one of the less flavorful storebought stocks. The smoked sweet paprika in these greens imparts a wonderful smoky flavor without the traditional but decidedly non-kosher and non-vegetarian smoked ham hock.
Whatever you do, don't discard the pot liquor! It is full of the nutrients and flavor that have leached out of the greens during cooking, and makes a very full-bodied and rich broth you can use as a replacement for water when making rice (my favorite), as the base for soups or stews, or in any other savory dish that requires broth or water.
EASY VEGETARIAN COLLARD GREENS
2 pounds of collard greens
4-5 cloves of garlic, minced
1 large onion, chopped
3 cups vegetable stock
1 teaspoon salt (to taste)
1 teaspoon smoked sweet paprika
1/2 cup apple cider vinegar
Optional: Hot sauce or red pepper flakes
Wash greens well, submerging in a sink full of cold water to remove any dirt and grit. Drain well. Cut off the stems right where the leaf starts. Stack about 5-8 leaves on top of eachother, then roll lengthwise. Cut rolled up leaves into 1" slices widthwise. Repeat until all the greens are done, and add to a large pot.
Add all other ingredients. Cover and bring to a boil over high heat, then reduce heat to a simmer. Simmer for 45 minutes or until greens are extremely tender. Serve hot, using a slotted spoon to drain the liquid from the greens.
Monday, February 26, 2007
The Curse of the Lazy Blogger: A Letter to My Readers
 My dear and loyal readers,
I just received a few e-mails from readers who pointed out that in the Multigrain Miracle Bread recipe I forgot to write the word "flour" after the first few ingredients. This led some people to wonder if I was calling for flour or for cooked grains instead. I have now corrected the recipe and it should now be clearer. In addition, I was tipped off to the fact that I left out the dijon mustard in the Lemon-Dijon Roasted Brussels Sprouts. Oy! This is what I get for lazily proof-reading my recipes late at night.
These errors have now been changed. Many thanks to all of my detail-oriented readers who took the time to let me know. I am a good proofreader of other peoples' writing, but clearly not a good proofreader of my own. I hope you enjoy these recipes.
A word to e-mail subscribers: You are not sent a revised version when I revise a blog entry because you were already e-mailed a post. This means that in situations like these, where I update a recipe for clarity's sake or to correct an error, the recipe you have in your inbox will not be correct. Thus, I recommend clicking the link within each e-mail to actually visit the original post on the website itself. The URL of my blog is:
Check the actual site periodically for occasional changes to posts and recipes, new links on the sidebar, etc... And to comment on my posts, of course!
You might also consider subscribing to a feed reader or RSS aggregator such as Google Reader (my favorite), MyYahoo, MyAOL or NewsGator. I find these much better ways to read blogs than through e-mail subscription. These sites all enable you to read ALL of your favorite blogs in one place on one page. You simply "subscribe" to a blog through one of these sites and check the aggregator site daily to see all of the latest posts, without having to individually visit each blog. It saves time and mouse clicks and energy.
Thanks for your patience with my mistakes, everybody. Please never hesitate to let me know if there's something confusing or inaccurate in my posts and my recipes!
Gluten-Free, Cane-Sugar-Free Hamantaschen

It's getting close to Purim, which means it's time for hamantaschen! These three-cornered cookies are made to look like villain Haman's tri-cornered hat, and are filled with delicious things - Growing up we had them with apricot, prune or poppyseed filling. I think they are one of the most delicious of all Jewish foods, and they are as much a part of Purim as costume-wearing, cross-dressing, and drunken raucousness.
This is a recipe for gluten-free, cane-sugar-free hamantaschen. It works great with most gluten-free baking mixes, such as Better Batter Gluten-Free All Purpose Flour (Orthodox Union certified), Arrowhead Mills All-Purpose Gluten-Free Baking Mix
(kosher ingredients, non-certified) or my Rice Flour Mix. I was inspired partly by a recipe by user "debmidge" on Celiac.com, as well as by my own instincts as to what would taste right and work for my gluten-free, no cane sugar diet. A warning to those who, like me, grew up with the crumbly, crisp sugar-cookie variety of hamantaschen: These do not have a sugar-cookie consistency. Instead, they have a thicker, softer, more cakelike texture, which is traditional for some Jews. Think more buttery pastry than crumbly cookie. Whether or not they're the kind you grew up with, I think you will find them quite delicious!
A word about hamantaschen fillings: I filled half of my hamantaschen with no-sugar-added apricot preserves. The other half I filled with lekvar, a puree of dried prunes that have been softened in boiling water. You can buy canned lekvar, which has sugar or corn syrup in it, or you can try making it yourself. Try a recipe such as this one, but replace or omit the sugar. Don't be scared of the prune filling - In my humble opinion it is by far the tastiest filling for hamantaschen - It is sweet but also has a nice tartness to it. Other kinds of jams can be used, or a poppy seed filling.
*A note about agave: Agave nectar is controversial in that it is billed as "unrefined" but it actually goes through quite a bit of refinement. What is known is that it naturally contains fructose it is much lower on the glycemic index (GI) than other natural sweeteners, which supposedly makes it more suitable for diabetics, sugar-sensitive people, low-carbers, and hypoglycemics. I've noticed it doesn't give me the same kind of strung-out feeling and anxiety as I get from cane sugar. Please remember, however that it does still affect one's blood sugar, so it's not something that diabetics can eat in large quantities and it will affect their blood sugar in a way that truly sugar-free non-caloric sweeteners (like Splenda) won't.
CHAG PURIM!

HAMANTASCHEN
1 stick (8 tbsp) margarine or butter, softened
3/4 cup agave nectar
1 egg
2 T lemon juice
1/4 tsp lemon zest
1 tsp vanilla
1 1/2 tsp xanthan gum
2 tbsp corn starch
2 1/2 cups gluten-free baking mix (rice-flour based)
1/2 cup potato starch
1 additional egg, well beaten and set aside
With an electric hand mixer, or in the bowl of a standing mixer, cream the butter or margarine with the agave nectar. Add the unbeaten egg, lemon juice, lemon zest and vanilla and continue combining. In a separate bowl, combine all dry ingredients. Slowly add the dry mixture into the liquid mixture. Mix until combined into a cohesive ball of dough. Refrigerate for 2 hours or overnight.
Line two cookie sheets with parchment paper. Flour a counter or other surface thoroughly. Remove dough from refrigerator and immediately roll into a ball and roll the ball in flour before placing it on the floured counter. Roll out until 1/4" to 1/8" thickness. Using a juice glass or biscuit cutter, cut into 3-4" circles. Immediately move dough circles to parchment-lined cookie sheets. If the dough begins to stick to the counter, use a pastry scraper to gently transfer the disks of dough. Place approximately 1 teaspoon of filling (apricot preserves, lekvar, poppyseed filling, raspberry jam, etc) in the center of each circle. Using a pastry brush, apply well-beaten egg to the perimeter of each dough circle and immediately fold 3 sides of circle together so that the cookie becomes a triangle, and pinch corners to seal. Seal completely and firmly, using beaten egg so they do not come apart in baking. The final cookie should look like a triangle with the filling showing through only at the center. Use the remaining beaten egg to lightly brush the top of each pastry.
Bake at 350 F for 12-15 minutes or until lightly golden on top but not over-browned on the bottom (lift one cookie up after 12 minutes to make sure the bottom hasn't become dark brown). Let cool slightly before serving or transferring to cooling rack.
Makes approximately 24 cookies.
Sunday, February 25, 2007
Gluten-Free Bread That Just Might Make You Cry [For Joy]

It is hard to believe that something as ordinary as a loaf of bread could nearly bring tears to my eyes - But that is what happened the other night when I sliced into the loaf of fresh-baked bread I had just pulled from the oven.
I had adapted a recipe that was shared on the Celiac.com forums by a woman named Laurie. I certainly won't take full credit for it, as the basic structure was her creation. I owe her many thanks.
I didn't want to get my expectations up about this bread. I figured it couldn't possibly be anything more than satisfactory, at least by the standards of someone who still remembers the taste and mouthfeel of real, gluten-loaded bread. The first thing I noticed when I sliced it was that the slices were pliable. I was certain that I was hallucinating. You know what I'm talking about - Lacking the rubbery properties of gluten, even good gluten-free bread will usually break if you try to bend one of the slices. But this slice was like an acrobat, gracefully bending nearly in half without any crumbling whatsoever. It had the appearance of wheat bread. I poked at it tentatively with a finger... It gave, and bounced gently back. It was soft as a pillow. When I bit into it, all I could think was "Holy sh*t!" I got a little farklempt. At that moment I realized what I had been missing since gluten began making me ill.
There is not a single thing about this bread that tastes or feels different than a wheat loaf. This is bread I could serve to a gluten-eating guest without shame, and feel confident they would never guess that it is gluten-free.
So, about those flaxseeds: I am not a big fan, generally, but I truly could not taste them in this bread. They play a big part of giving it the wonderful texture it has, as well as the high fiber content, but thankfully they do not contribute to the flavor. It is dairy-free, which makes it a good choice for all you GFCF (gluten-free casein-free) folks. It has more protein, more fiber, less sugar, and more whole grains than most breads which makes it a perfect fit for my increasingly healthy diet.
The next morning I woke up for work, and stumbled to the kitchen. I accepted that the rest of the slices, which I'd left in a ziploc bag on the counter, would have become dry or gummy (or that special combination of both that is apparently unique to gluten-free bread). I was blown away by the fact that the bread had the same exact texture as it had the night before. This is bread that you can make a sandwich on without toasting it first. Bread that you can take to work or pack for your kid's school lunch. Best of all, it's not one of those breads that has a mediocre flavor or texture that needs to be obscured by peanut butter and jelly in order to be edible. It isn't just good - It's wonderful. This is a loaf that stands alone.

GLUTEN-FREE MULTIGRAIN MIRACLE BREAD
1/2 cup brown rice flour
1/2 cup sorghum flour
1/4 cup amaranth flour
1/4 cup tapioca starch
1/4 cup cornstarch or arrowroot starch
1/4 cup flax seed meal (ground flax seeds)
3 teaspoons xanthan gum
2 teaspoons active dry yeast
1 teaspoon salt
2 eggs
2 additional egg whites
1 cup water, room temperature
2 tablespoons vegetable oil
2 tablespoons honey
2 teaspoons apple cider vinegar
Preheat the oven to 200F.
Sift the flours, yeast and all other dry ingredients together into a medium bowl. Stir in flax meal and combine.
Combine the wet ingredients in a separate large bowl using a hand-mixer on low or medium speed. When fully combined, slowly add dry ingredient mixture and mix until fully blended, with no lumps. Scrape the sides regularly.
Grease a 9x5" bread pan, and pour the dough into the pan. Turn off the oven and immediately place the pan in it. Do not open the door again, if possible. Allow the dough to rise for 90 minutes. It should rise to the very top of the pan.
Increase heat to 350F and bake for approximately 40 minutes. The crust should be golden-brown. Allow to cool slightly before removing it from the pan to finish cooling. Do not slice until the bread is no longer hot.
This loaf does not need to be frozen, but if there are leftovers after a few days, place slices in airtight bags and freeze.
Friday, February 23, 2007
Double-Bean Pasta with Tomatoes
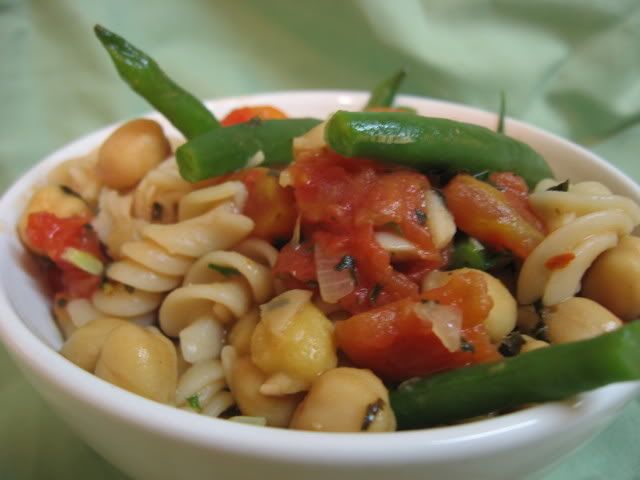
On Sundays I cook with weekday lunches in mind, favoring big pots of tasty dishes that reheat well in the microwave at work. This low-fat, whole grain, high-fiber and vegan pasta dish is full of some of my favorite foods - Green beans, chickpeas and pasta. Mmm. Nutritional yeast adds B-12 and other vitamins and a slightly cheesy taste, though folks who love cheese can try parmesan or romano instead. Bob's Red Mill and Red Star brands of nutritional yeast are both gluten-free.
DOUBLE-BEAN PASTA WITH TOMATOES
2 cups gluten-free Tinkyada brown rice spirals
2 tsp olive oil
1/2 large red bell pepper, chopped
1 Tbsp garlic, finely chopped
1 shallot, finely chopped
1 (15 ounce) can diced tomatoes, undrained
1/2 tsp crushed red pepper flakes (to taste)
1 (16 ounce) can garbanzo beans, rinsed and drained
1/2 lb fresh green beans, trimmed and cut into thirds
1 Tbsp dried basil
1 Tbsp fresh basil, minced
2 Tbsp parsley flakes
2 Tbsp nutritional yeast
1-2 Tbsp balsamic vinegar
1 tsp sea salt
Fresh ground black pepper, to taste
Cook pasta in salted water until done, according to package instructions. Drain in a colander and set aside. In the same pot, steam green bean pieces until tender but still crisp. Add to colander with pasta.
Heat olive oil in a large saucepan or deep frying pan over medium heat. Add red pepper flakes, dried parsley and dried basil and shallot. Sautee until the shallot has become translucent. Add bell pepper and garlic and cook until vegetables are soft, stirring often. Add tomatoes and garbanzo beans and bring to a boil over high heat. Reduce the heat and simmer, uncovered, for about 10 minutes. Stir in pasta and green beans, nutritional yeast, and balsamic vinegar. Garnish with fresh basil and serve.
Thursday, February 22, 2007
Lemon-Dijon Roasted Brussels Sprouts
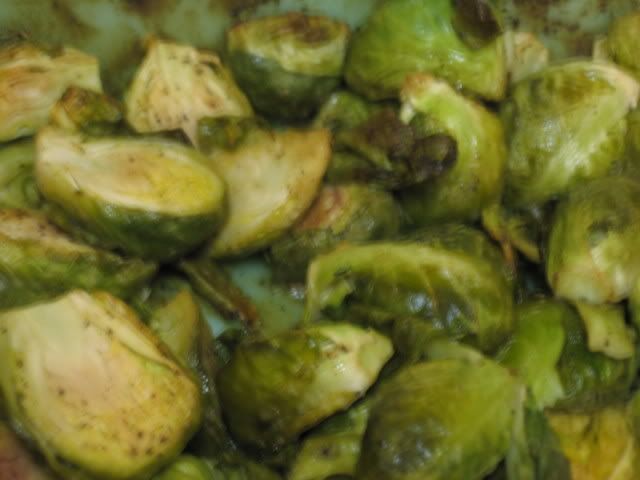
For those of you who are fans of my Roasted Brussels Sprouts, here's a zesty twist on the same simple dish. If you haven't yet tried the original recipe, either one of these recipes just might make you a brussels sprout fan even if you're a sworn hater. The possibilities are endless when it comes to these itty bitty cabbage babies... Take a look at my friend Seamaiden's Caramelized Maple Brussels Sprouts - A tasty option for those who prefer their sprouts sweet.
My lemon-dijon brussels sprouts are made with fresh lemon juice - I much prefer them made with Meyer lemons but if you can't get them a regular lemon will certainly do. Beware, these peppery sprouts are addictive.
LEMON-DIJON ROASTED BRUSSELS SPROUTS
1 lb fresh Brussels sprouts
1 Tbsp extra virgin olive oil
2 Tbsp dijon mustard
1/2 tsp garlic powder
1/4 teaspoon ground black pepper
1/4 teaspoon salt
Juice of 1 lemon
Preheat oven to 400 degrees F. Cut less than 1/4" off of the bottom of each brussel sprout and then slice sprout in half lengthwise. Combine all other ingredients in a bowl. Then toss brussels sprouts with sauce in a baking dish - Spread sprouts in a single layer. Roast for 25 minutes or until brussel sprouts are slightly browned and tender throughout. Serve hot or at room temperature.
Wednesday, February 21, 2007
Lemon-Blueberry Pancakes
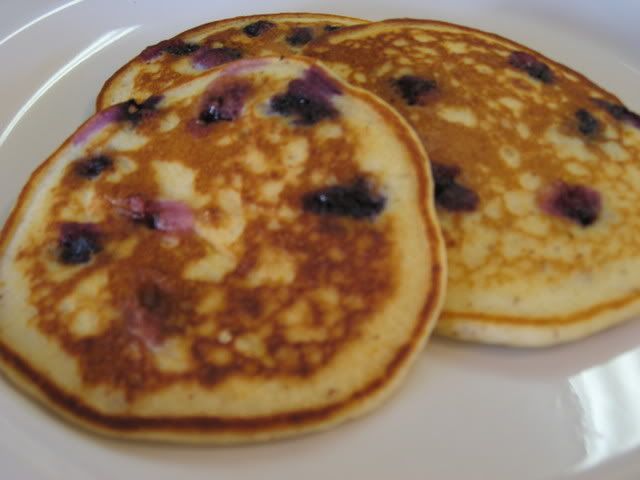
When I found out that IHOP was serving free pancakes yesterday for Shrove Tuesday / National Pancake Day, I was sad for a moment that I couldn't take advantage of the offer. I sure am a sucker for free food. The disappointment was short-lived, however, because I remembered that I had made a huge batch of gluten-free lemon-blueberry pancakes on Sunday and still had a number of them in the fridge. I popped them in the toaster oven for a few minutes, spread no-sugar-added Raspberry Jam on them, and dug in. Pancake heaven!
I used Meyer lemons from my uncle's tree to prepare these - If you have access to this sweet, juicy variety I recommend using them. If not, a regular lemon will certainly do. I prefer them with real eggs and rice milk, but you can use egg replacer and any type of milk replacement. Try raspberry jam on them instead of syrup... it works wonderfully with the flavor and texture of the pancakes.
I've decided that pancake joy is its own special category of joy.
LEMON-BLUEBERRY PANCAKES
2 cups Pamela's Baking & Pancake Mix
2 large eggs or equivalent egg replacer
1 1/2 cups rice milk or almond milk
2 tablespoons vegetable oil
1 teaspoon lemon zest
Juice of 1/2 lemon
1/2 teaspoon pure lemon extract
1/2 cup fresh blueberries
Preheat a lightly oiled griddle over medium heat. Mix all of the ingredients together thoroughly until they are smooth with no olumps. Fold blueberries in gently. Pour approximately 1/4 cup of the batter onto the griddle at a time. Cook until golden brown on one side, then flip and cook the second side. Serve hot with butter, real maple syrup and/or raspberry preserves. Leftover pancakes should be cooled, then stored in ziploc bags in the freezer or refrigerator. They can be reheated in a toaster oven or on a griddle, or microwaved for about 1 minute.
Makes approximately 12 pancakes.
*Edited 3/09 to add: Pamela's baking mixes are under kosher supervision but are not certified by a mainstream kosher certifying agency, so most people who keep strictly kosher kitchens will want to use another gluten-free pancake mix such as Gluten-Free Pantry Brown Rice Pancake Mix
Tuesday, February 20, 2007
Semi-Weekly Gluten-Free Recipe Roundup: 2/20/07
 Last week sped by without the time to corral recipes for the roundup, a good reminder of why I named it the "semi-weekly" roundup rather than "weekly." Here's the cream of the crop... I've included some new blogs this week. Hope everyone eats well this week!
Friday, February 16, 2007
Vegetable Crisp

Apple crisp, cherry crisp... Vegetable crisp? Hey, why not? This savory casserole is a gluten-free revisioning of a recipe for Eggplant and Tomato Crisp. It's a very filling meal that I believe even one of those ubiquitous eggplant-haters could enjoy. When sliced and served, you can see the colorful layers of vegetables beneath the crumble topping. It reheats nicely in the microwave - Though the topping loses some of its crispness, it takes on the consistency of stuffing which is downright tasty. I prepare this with cheese as called for in the original recipe, but I've listed cheese as an optional ingredient, since cheese isn't an integral part of the taste or texture and I think making this dish vegan would not compromise it in any way. For the right consistency, be sure to use coarse breadcrumbs rather than fine ones.

VEGETABLE CRISP
Filling
2 Tbsp olive oil
3 Tbsp balsamic vinegar
6 garlic cloves, minced
4 Tbsp fresh basil, chopped
1 tsp dried oregano
Salt & fresh ground pepper, to taste
1 large eggplant, unpeeled and cut into 1/2-inch slices
1 yellow bell pepper, cut into 1/2-inch strips
2 large zucchini, cut into 1/2-inch slices lengthwise
4 large ripe tomatoes, cut into 1/4-inch slices
Topping
3 Tbsp chopped fresh parsley
5 cups fresh Italian Gluten-Free Breadcrumbs
1 tsp thyme, fresh or dried
2 tsp fresh rosemary, minced
2 tablespoons fresh lemon juice
2 tablespoons olive oil
Salt & fresh ground pepper, to taste
Basil leaves, for garnish
1/2 cup freshly grated parmesan cheese (optional)
Preheat oven to 425°. In a small bowl, whisk together oil, vinegar, garlic, basil, oregano, salt and pepper. Brush this mixture onto both sides of the eggplant, tomato, zucchini and pepper slices. Place vegetables on a large baking sheet. Cover with foil and bake for 10 minutes, then remove foil and bake for an additional 10 minutes.
Lightly grease a shallow casserole or gratin dish with olive oil or cooking spray. Place a layer of cooked eggplant on the bottom, followed by a layer of bell pepper, then a layer of zucchini, then a layer of sliced tomatoes. If any vegetables remain, create an additional layer, but be sure to end with a layer of tomatoes on top.
In a medium sized bowl, mix together all of the topping ingredients except for fresh basil. Sprinkle evently over the vegetables. Bake the casserole for 30 minutes. Garnish with fresh basil leaves and serve hot.
Thursday, February 15, 2007
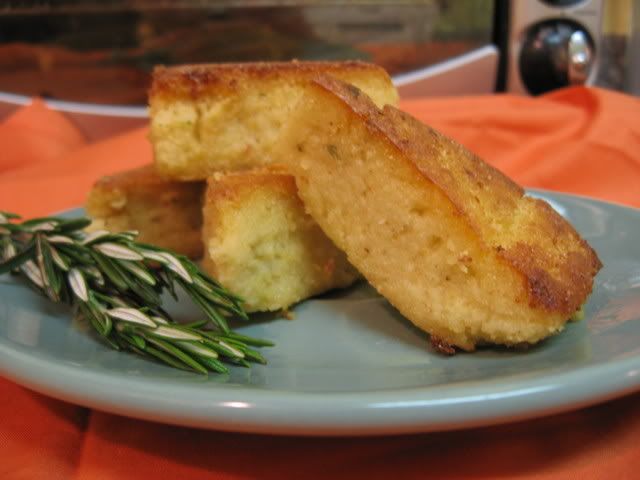
Rosemary Polenta Triangles
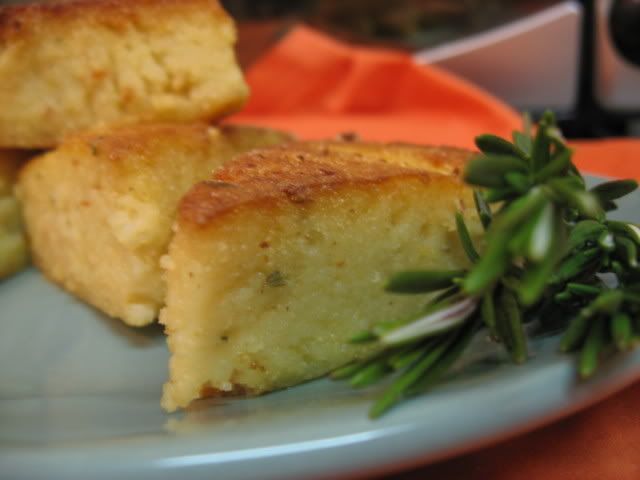
I love rosemary and rosemary loves me back. It tastes as good as it smells, and looks as lovely as it tastes. It thrives under the care of the lazy gardener, as it's drought resistant and hardy. I grow it in a pot on my porch, and it valiantly struggles to keep up with rate at which I clip its branches away for my cooking. Weekend Herb Blogging is hosted by a fellow Jewish food blogger this week - The Chocolate Lady of In Mol Araan, who blogs in both Yiddish and English. For this event I chose to adapt a recipe with Italian flavor to be both vegetarian and kosher. In doing so, I was reminded of the long history of Jews in Italy, and a search online brought me a new cookbook to add to my wishlist: Cucina Ebraica: Flavors of the Italian Jewish Kitchen.
This fabulous rosemary-infused polenta recipe is originally from Ina Garten (a/k/a The Barefoot Contessa), one of my favorite TV chefs, whose cooking is normally high fat and far from kosher or vegetarian. While this is not a low-fat dish by any stretch of the imagination, I have managed to reduce the fat content a bit from the original recipe. The transformed recipe turned out to be one of the most delicious incarnations of polenta that I've experienced.
The flour I used to coat the polenta triangles before pan-frying was my Rice Flour Mix, and for vegetable stock I put to use some of the leftover Isaiah's Victorious Vegetable Stock I had in my freezer, which lent an impressive amount of flavor and richness that a storebought broth would lack. This recipe could be easily and deliciously made vegan by substituting margarine (or additional olive oil) for the butter, using an unflavored soy milk as a replacement for milk, and eliminating the cheese.
Though they are terrific all by themselves, I served these tasty triangles on top of a puddle of hot marinara sauce, which was absolutely perfect.

ROSEMARY POLENTA TRIANGLES
5 tablespoons unsalted butter
1/4 cup olive oil
4 cloves minced garlic
1 tsp crushed red pepper flakes
2 tsp finely minced fresh rosemary leaves
1/2 tsp kosher salt
1/2 tsp freshly ground black pepper
3 cups vegetable stock
4 cups milk (whole or 2%)
2 cups cornmeal or instant polenta
1/2 cup grated parmesan or pecorino romano cheese
Gluten-free flour mix
1 tablespoon olive oil, for frying
1 tablespoon butter, for frying
Heat 6 tablespoons of butter and 1/4 cup of olive oil in a medium-sized pot on medium heat. Add the garlic, red pepper flakes, rosemary, salt, and pepper and sauté for 2 minutes. Add the vegetable broth and milk, and bring to a boil.
Remove the pot from the heat and slowly sprinkle the cornmeal or instant polenta into the hot milk while stirring constantly with a whisk. Cook over low heat, stirring constantly, until thickened and bubbly (about 5-10 minutes). For instant polenta, follow the instructions on the package (usually requires only 3 minutes). Remove from heat and stir in cheese.
Pour the polenta into a 9 x 13 x 2-inch pan, smooth the top with a rubber spatula so that it is even, and refrigerate until firm and cold (approximately 1 hour).
Cut the chilled polenta into 12 squares, as if it were brownies. Then carefully lift each square out of the pan with a spatula and cut it diagonally into two triangles. Dust each triangle lightly in gluten-free flour.
Heat 1 tablespoon olive oil and 1 tablespoon butter in a large sauté pan and cook the triangles in batches over medium heat for 3 to 5 minutes, turning once. Cook until browned on the outside and heated throughout. Additional butter and oil may be added as necessary. Serve immediately, alone or with tomato sauce.
Tuesday, February 13, 2007
Cilantro-Lemon Pesto

When I get tired of plain old tomato sauce on my pasta, the next stop is always pesto. I love the green stuff - I've made a million variations, including vegan pesto and kalamata olive pesto. There is no end to the possibilities. It is hard to go wrong with herbs, garlic, nuts and cheese (or a cheese substitute) pureed into a creamy sauce.
Pesto is for far more than pasta, my friends. It is wonderful spread on a filet of salmon before baking. You can also toss it with freshly steamed vegetables. It has a number of delicious applications. This pesto features the zesty combination of cilantro and lemon. It has a bit more zing to it than classic basil pesto, so use it sparingly. The flavors are particularly suited to fish, but are wonderful with pasta as well. This time I paired it with my favorite gluten-free pasta, Tinkyada Spirals
To make this pesto dairy-free and vegan, replace the romano cheese with 1/4 cup of nutritional yeast flakes, some extra salt, and a little bit of tofu.
CILANTRO-LEMON PESTO
1/3 cup pecorino romano cheese, shredded
2 cups fresh cilantro
1/3 cup pine nuts
1/3 cup extra virgin olive oil
1/4 teaspoon black pepper
1/2 lemon, juice of
Salt, to taste
Combine ingredients in food processor. Puree until ingredients are fully combined and the pesto has a smooth texture with no significant lumps (may still be just a little gritty). You may add additional olive oil if you like. May be served hot or at room temperature. Leftovers can be frozen in small tupperware containers or ice cube trays and thawed when you're ready to use.
Friday, February 09, 2007
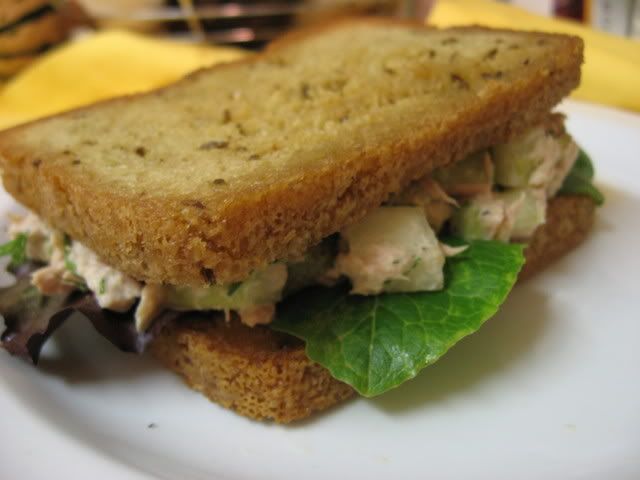
Tuna on Gluten-Free "Rye" Bread
 Last Friday I came home to a FedEx package from Enjoy Life Foods waiting on the porch. That sure was a great way to start shabbos! The company made a very smart PR move by sending product samples to a couple of us gluten-free bloggers.
I was skeptical about Enjoy Life Foods Rye-less Rye Gluten-Free Sandwich Bread because I have had mostly negative experiences with Enjoy Life products in the past. I find their chocolate chips to be undersized, chalky, and practically unmeltable... And in my opinion, their cookies do not deserve to be called "cookies." I was also skeptical because of my high standards for rye bread. As a New York Jew I grew up eating a lot of Jewish rye bread. My favorite sandwiches in high school were melted cheddar cheese on Jewish rye, hummus on Jewish rye, or tuna salad on Jewish rye. It was a sad day when I learned that rye contained gluten, and therefore was one more grain I could no longer eat. Back when I was eating gluten I liked my rye bread to have a chewy crust and a soft, squishy center. Most importantly, it must be full of whole caraway seeds. Since becoming gluten-free, my standards for bread have certainly become less strict. But I was pleasantly surprised! Though certainly not the "real thing," the Rye-less "Rye" Bread came a heck of a lot closer to what I remembered than I ever would have expected or imagined. It had the perfect amount of caraway seeds. When well-toasted (careful, because it goes from well-toasted to charred very quickly!) it had a really nice texture and is actually one of the better gluten-free storebought breads I've tasted. It unfortunately does not have the chewy, shiny crust that I associate with rye bread, but I really enjoyed the taste. I can't begin to tell you the joy I felt eating my first tuna on "rye" sandwich in eons.
I'll write about some of Enjoy Life's other allergen-free products (which can be purchased here) at a later date. For now, let me leave you with a recipe for my favorite tuna salad. This is a reduced-fat tuna salad that tastes wonderful on rye bread, real or fake. My favorite way to serve this sandwich is on toasted bread with a slice of tomato, a slice of avocado and some lettuce. A pickle on the side, of course. The chopped pickles and dill are key to the fabulous taste - The more sour the pickles the better (cornichons are great for this). You can try substiting a smaller amount of dried dill if you don't have access to fresh herbs.
TASTY REDUCED-FAT TUNA SALAD
1 (6 ounce) can solid albacore tuna in water
1 stalk celery
2 tablespoons finely diced sour dill pickles
1 1/2 tablespoons mayonnaise (real mayo, preferably Hellman's)
1 tablespoon lemon juice
1 teaspoon Dijon mustard
2 teaspoons fresh dill, minced
fresh ground black pepper (generous amount)
Drain tuna. With a fork, break it up in a bowl into the size and texture you prefer (I like to leave some chunks - others prefer it totally mashed). Add all the other ingredients and stir until fully combined. Serve cold in a sandwich or over a green salad.

Why Passover Is a Gluten-Free Goldmine
 Please welcome guest blogger Lisa Mandl of Chicago, who generously shares in this post her many helpful ideas for how Passover can be a boon to all gluten-free folks, whether or not they are Jewish. This is the first of a series of articles, links, product reviews and recipes I will be posting over the next two months to help gluten-free Jews have a happy, healthy, delicious Pesach... and to help non-Jewish people with celiac disease take advantage of the wonderful gluten-free products on the shelves during the Passover season.
A PASSOVER REMINDER
by Lisa Mandl
by Lisa Mandl
It's getting close to this time of year again. The first seder may not be until April 2, but some stores (especially Kosher ones) are slowly starting to prepare for Passover and bring in the special food. This is just a yearly reminder that you will be finding some additional food choices in not only Kosher stores, but in regular grocery stores. For those who've been gluten-free for awhile, this won't be anything new, but this information could be very helpful to those newer to the diet.
Passover is a great time for finding new and different gluten-free selections due to the restrictions of the holiday. During Passover, wheat, rye, oats, barley, corn, soy, rice & beans (the last two for Jews from European descent only) and several other foods are forbidden. This makes it possible to go to a Kosher bakery and typically be able to find something ready-made that you can enjoy. I take the opportunity to purchase ready-made salads at the deli counters as well.
Now I say typically and this is very important. One main thing people have on Passover is matzah - this is made of wheat. Also made of wheat is matzah meal (ground matzah), matzah farfel (matzah in small pieces) and cake meal (finely ground matzah). You MUST avoid all foods with those ingredients. You want to keep your eyes open for this Hebrew phrase- "non-gebroktz". This means that no wheat was used and means that any item with that on it is safe for us.
Non-gebroktz is a way the very observant know if a food is safe for them to consume. Matzah is unleavened bread, hence the wheat, and for many, there is a concern that even a drop of matzah could become leavened if mixed with a liquid so they only eat non-gebroktz products for the first seven of this eight-day holiday.
Many companies cater to the needs of those who follow a non-gebroktz diet for Passover and there are cookies, cakes and other great foods available only during this time of year. We don't have to worry about cross-contamination because the companies that make these products have to thoroughly clean everything and/or use completely other equipment for the production of Passover items.
There are a few companies I look forward to getting items from: Lieber's has a large line of products that are safe and even marked "gluten free" (their Kneidel mix is outstanding - think matzah balls, yet better); Paskez - they make a product called Pesach Crumbs (Pesach is Passover in Hebrew) and this takes the place of matzah meal in cooking/baking (I also use potato pancake mix as a substitute for matzah meal); Schick's Bakery in NY makes some mouth-watering desserts - I have no stock, I'm just drooling thinking of their Bon-Bons! Wilton's - they make delicious blintzes - you just have to make sure you buy the box(es) that say non-gebroktz because they make blintzes year-round that are not gluten-free. There are ice cream cones and even ice cream sandwiches that are gluten free. They are delicious and sell out very quickly.
Each year, there are more and more products created to make Passover easier and in turn, it can help all of us who follow a gluten-free diet. So keep your eyes open, you may find a new treat and some ready-made items to enjoy right away or freeze for later. Some of the prices can be really high, but when the holiday ends, they drop the price on whatever's left over because other than us, no one else will want them!
For those with corn allergies, you'll find soda, marshmallows (if you eat these), etc - some say they use "Kosher gelatin" which in my mind is an oxymoron since pigs aren't even Kosher, but it's supposedly from fish bones, gum and other foods.
Again, this is a great time to shop for gluten-free items you just can't get the rest of the year. There are some online Kosher stores, but you'll want to make sure items are non-gebroktz before you order - I haven't done this because I'm lucky enough to have a number of great Kosher stores in the Chicago area.
For those observing the holiday who'd like matzah on their seder tables, you can find oat shmura matzah that is made by a Rabbi from the UK who has a daughter who is a Celiac. I have had it (the last time I bought it it was $18 for a box), I miss oat products, so enjoyed the taste, but just couldn't justify the cost so I haven't bought it again.
Have fun finding new items!
--
Note from Isaiah: The gluten-free oat matzo that Lisa is talking about is Rabbi E. Kestenbaum's Shemura Oat Matzos, which are made from completely gluten-free oats. Start looking for them now, as they may not be easy to find and may require ordering depending on where you live. Here is a list of their distributors. The photo above shows part of the production process of these matzot.
Thursday, February 08, 2007
Semi-Weekly Gluten-Free Recipe Roundup - 2/8/07
 Plantain latkes, pão de queijo and gluten-free tabouleh... Oh my! Putting this roundup together this week sure made my mouth water.
This Week's Featured Recipe:
Can you believe the soup in that beautiful photograph contains just 5 major ingredients, plus salt and olive oil? And that it has no dairy or gluten? Ilva of Lucullian Delights is one of the blog world's biggest allies to us gluten-free folk. Though she herself does not have celiac disease, many of her recipes are gluten-free. As you can see in this photo she graciously shared with us, her photographs are an example of food photography at its best. Her recipes are wonderful, leaning towards sublime simplicity. This week I am happy to feature her Leek and Potato Soup with Fennel Seeds, a simple soup perfect for a cold winter evening.
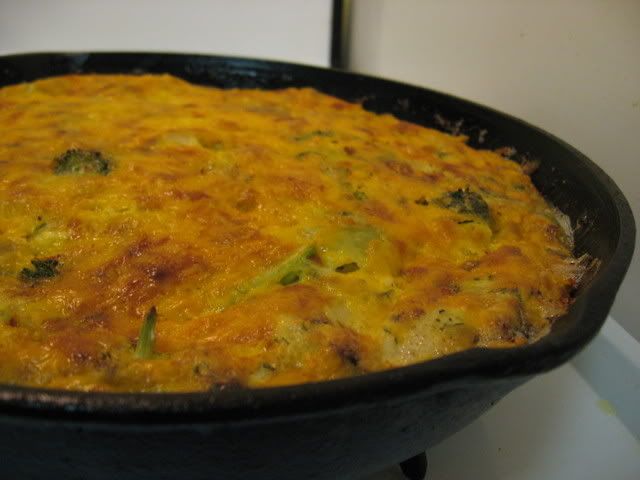
Artichoke and Broccoli Frittata
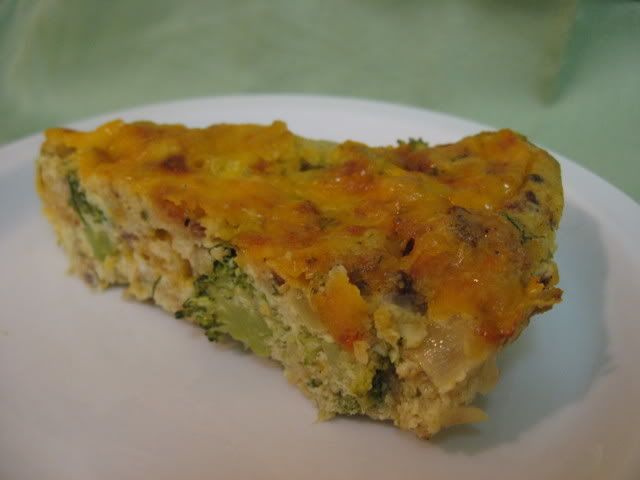
Friends sometimes laugh at my version of scrambled eggs, because I put more "stuff" in them than eggs. I like eggs, but I enjoy them less for their own virtue and more as way to hold everything together or give a fluffy texture to a breakfast dish. My scrambles are mostly vegetables and herbs and cheese, with egg serving only to bind them together and add protein. A frittata works on this principle - It is a perfect palette for colorful vegetables and strongly flavored cheeses. What I love about frittatas is that they are one of the few egg dishes that are delicious at room temperature and can be stored in the refrigerator (or even frozen) for days. Basically a crustless quiche, a frittata is not just for breakfast - Frittatas make a wonderful lunch or dinner, accompanied by a salad or steamed vegetables or potatoes. This one has been my breakfast, lunch and dinner for the past few days - Eaten at room temperature at work and heated up in my toaster oven at home. I love the way the fresh dill combines with the light flavor of artichoke. I will post some more vegan recipes soon, I promise!
ARTICHOKE AND BROCCOLI FRITTATA
8 eggs
1/2 cup milk
1 6-oz jar of artichoke hearts, drained
2 cups small broccoli florets
3 cloves garlic, minced
1/2 onion, chopped
1/4 tsp salt
1/4 tsp ground black pepper
1/4 tsp cayenne pepper
2 tsp fresh dill, minced
1/2 cup gluten-free breadcrumbs
2 cups shredded cheddar cheese
1/4 cup shredded parmesan cheese
2 tablespoons olive oil
Preheat oven to 350 F. Chop the artichoke hearts coarsely. Heat olive oil in a 10-inch cast iron pan over medium flame. Add onions and cook until they are translucent. Add garlic and broccoli, sautee until the onions have begun to brown and the broccoli is cooked through but still crisp. Remove from heat.
In a large bowl, combine eggs, herbs and spices and milk. Whisk until well beaten. Add parmesan, breadcrumbs, artichokes, and half of the cheddar cheese. Stir gently. Pour mixture over the broccoli and onions. Sprinkle remaining cup of cheddar cheese over the top of the eggs - Do not stir.
Bake for 30 minutes or until firm. Place under the broiler for 2-3 minutes or until cheese is bubbly and lightly browned. Serve hot or at room temperature. Leftovers can be successfully reheated in oven, microwave or toaster oven. Serves 10.
Monday, February 05, 2007
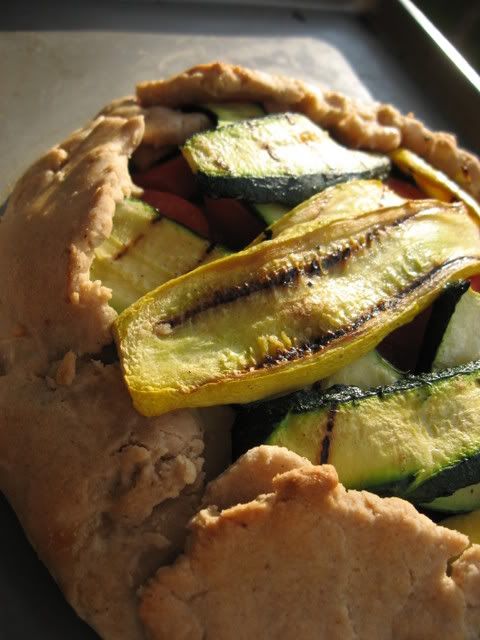
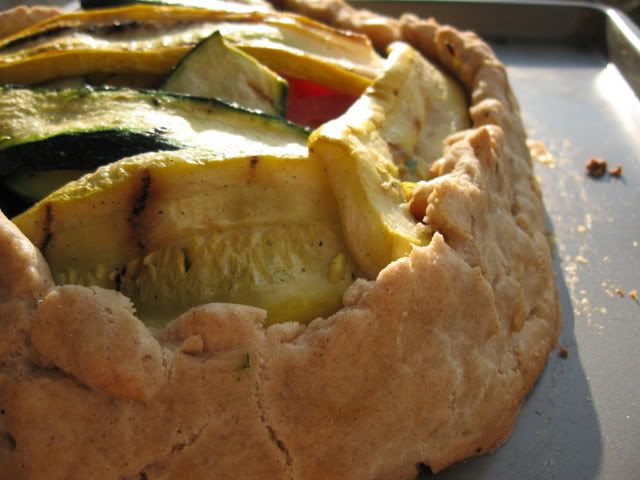
Summer Squash and Tomato Galette
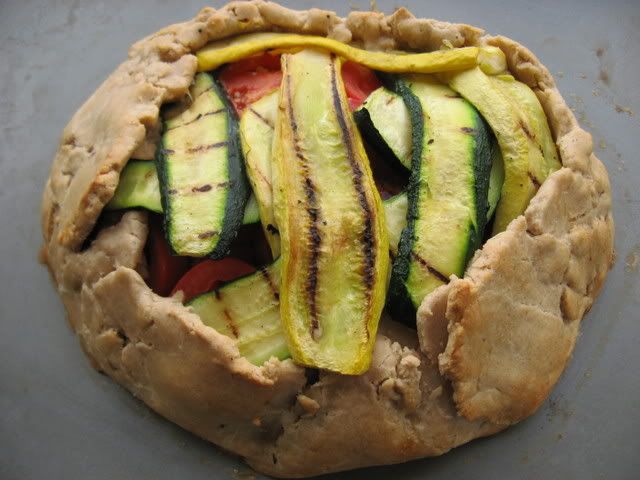
This colorful galette is one of those cooking projects I'm quite proud of yet can't fully take credit for. The pie crust was created by merging many recipes kindly contributed by the fabulous folks of the SillyYak list with crust recipe from Rebecca Reilly's book Gluten-Free Baking
SUMMER SQUASH AND TOMATO GALETTE
Galette Crust
1 cup white rice flour
1/2 sorghum flour
1/2 cup potato starch
3 Tbsp tapioca flour
1 tsp sugar or other sweetener (optional)
1/4 tsp salt
1 1/2 tsp cinnamon
8 Tbsp (1 stick) cold butter
1 large egg, lightly beaten
2 Tbsp apple cider vinegar
1/3 cup ice-cold water
Filling
2 yellow summer squash
2 medium zucchini
1 1/2 tsp olive oil
1/4 tsp salt
1/2 cup finely grated parmesan cheese
1/2 cup fresh gluten-free Italian breadcrumbs
2 Tbsp finely chopped fresh basil
4 plum tomatoes
1 egg white, beaten
To make the crust:
Sift dry ingredients together in a large bowl. Cut the butter into small chunks (about 1/2" thick) and add to dry ingredients. Work it into the dry ingredients using a pastry cutter or your finger tips, mashing until the butter has crumbled into pea-size pieces.
Make a well in the dry ingredients. Pour the egg and apple cider vinegar into the well, and use a fork to stir gently, outwards from the center. Once all the ingredients are incorporated, drizzle the ice-cold water into the mixture very slowly, just a little at a time. Only add water until the mixture has become a cohesive ball of dough that's just moist enough to handle without being wet.
Place ball between two large pieces of parchment paper. Using hands or rolling pin, gently push the dough outward, equally in all directions, until it is a pie-sized thick, even disc of dough. Leave between parchment paper layers and seal well in plastic wrap or ziploc bag. Refrigerate for at least two hours. Remove the dough from the refrigerator and allow to sit at room temperature for 15-20 minutes.
Lightly grease a cookie sheet. Leaving the dough in between two parchment paper layers, roll it out gently, as thin as you can When the dough is between 1/4" and 1/3" thick, remove the top layer of parchment and even out the edges of the crust. Place the top of a cookie sheet over the crust so that it is centered, place a hand underneath the bottom piece of parchment, and slowly flip so that the crust is lying in the center of the cookie sheet. Carefully peel off the parchment paper. If any holes have already formed at this point, mend them with a finger or pastry brush dampened in excess egg white or water.
To make the filling:
Wash the summer squash and zucchini, remove ends, and cut lengthwise in 1/4" slices. Wash tomatoes and cut in 1/4" rounds.
Heat a grill or lightly greased grill pan. In a large bowl, combine oil and salt. Toss with squash and zucchini slices. Grill the vegetables on each side, about 10 minutes or until they are tender. Allow to cool.
In a separate bowl, combine cheese, bread crumbs and basil.
To Assemble the Galette:
Preheat oven to 400 degrees. Spread the breadcrumb and cheese mixture evenly in a 8" circle in middle of piecrust. Place half of the grilled vegetable slices in the shape of spokes radiating out from the center of the crust, covering cheese and breadcrumb mixture. Over this layer of squash place tomato slices, slightly overlapping one another. Arrange the remaining squash slices over the tomatoes, then fold the outer edge of the pie crust over the vegetables. The pie crust should contain but not completely cover the vegetables. Mend any holes carefully with excess dough or a moistened finger. Brush the visible parts of the crust with beaten egg white. Bake for 30 minutes or until crust is golden brown. Serve warm or at room temperature. Slice with a very sharp serrated knife, such as a bread knife.
Friday, February 02, 2007
Gluten-Free Italian Breadcrumbs
 I've been saving the ends of all my loaves of gluten-free bread in a ziploc bag in the freezer, and adding to the stash any remaining slices of loaves of bread that become stale as well as storebought bread I brought home only to find inedible. When I had enough saved up, I finally got to put them to use. These breadcrumbs are wonderful for breading meat or vegetables, stuffing mushrooms, topping casseroles and more. Leave the spices out for "neutral" crumbs that can be used in any recipe - Or follow my instructions for flavorful Italian breadcrumbs that are perfect in most Mediterranean and American recipes.
ITALIAN GLUTEN-FREE BREADCRUMBS
12 slices gluten-free bread (stale bread and ends are good)
2 teaspoons salt
2 teaspoons dried parsley flakes
2 teaspoons ground black pepper
2 teaspoons garlic powder
1 teaspoons onion powder
1 teaspoons dried oregano
1 teaspoons dried basil
For fresh breadcrumbs:
Lay bread slices in a single layer on a baking sheet. Place in oven on 200 F for 10-15 minutes or until the edges have become a little hard and the bread has become dry to the touch but it has not become thoroughly toasted. Pulse in food processor until it reaches desired texture (crumbs should be distinct but not too large). Combine ingredients in a bowl.
For dry breadcrumbs:
Cube bread slices and lay in a single layer on a baking sheet. Place in a 325 F oven and bake until lightly browned, crisp, and very dry. Allow to cool. Blend in the food processor until it has a fine texture not much coarser than sand. Combine all ingredients in a bowl.
Bread crumbs can be stored in an airtight container or ziploc bag in the refrigerator for about a week for fresh breadcrumbs or 2-3 weeks for dry breadcrumbs. They can be stored in the freezer for up to 6 months.
Thursday, February 01, 2007
A Vegetable Stock Victory: Broth That Can't Be Beat


Since beginning the process of becoming kosher, meat has taken a less and less prominent role in my diet. It is so much easier to adhere to Jewish dietary laws while eating a diet that is vegetable and fish based. I also find that my taste for chicken and beef continues to diminish, to the point where I could probably happily subsist without it... Well, almost.
For a long time I have been looking for a packaged gluten-free vegetable stock that could hold its own in my cooking. Instead I found watery, flavorless broths - Often unnecessarily sweetened with cane sugar or corn syrup, or flavored with "yeast extract" (a form of MSG). The convenience of vegetable broth in a can or aseptic container paled next to the taste of these anemic stocks. They were just plain awful. Certainly none of them could hold a candle to chicken stock.
This recipe is my answer to the vegetable stock dilemma. This is a stock so chock full of vegetables and herbs that it rivals a good strong Jewish chicken soup in flavor. This broth is very rich, and has a golden color reminiscent of meat stocks. It is naturally sweet, flavorful and fragrant. You can freeze it in tupperware containers, or freeze it in ice cube trays and then transfer the cubes to a ziploc bag so that you can remove only the number of cubes you need for each recipe.
This stock is, of course, gluten-free and vegetarian. If you omit the optional parmesan rind, it is also vegan and parve. It can be used in any recipe that calls for chicken or vegetable broth. Use it as a base for gravies, for stews, for soups. Sautee with it instead of oil if you're watching your fat intake. Add it to foods you're reheating to keep them moist. Boil noodles in it, or float dumplings on it. It would be perfect with matzo balls or potato kneidlach for Passover - Just skip the nutritional yeast! Best of all, this broth is perfectly delightful all by itself.
VICTORIOUS VEGETABLE STOCK
[ Gluten-Free / Soy-Free / Dairy-Free Option / Pareve or Dairy ]
1/2 ounce dried porcini mushrooms
5 stalks of celery
3/4 pound leeks, including green part
4 large carrots
2 large parsnips
1 cup sliced fresh mushrooms
1 medium yellow onion
2 apples or pears, cored
1 teaspoon finely ground white pepper
20 peppercorns
1 tablespoon turmeric
3 cloves garlic, peeled
4 bay leaves
1/4 cup fresh parsley, tightly packed
1/2 large bunch of fresh dill, including stalks
2 sprigs rosemary
2 sprigs thyme
2 tablespoons nutritional yeast
2 tablespoons salt
2 sprigs fresh oregano and/or sage (optional)
1-2 tablespoons olive oil (optional)
Parmesan rind (optional)
Use the flat side of a chef's knife to gently crush the garlic cloves. Wash unpeeled vegetables well and cut them roughly into large pieces. Add to a large stock pot along with all other ingredients. Add entire sprigs of the herbs rather than removing the leaves from the stem. Cover with water. Water level should be about 4 inches above the top of the vegetables. Bring to a boil, skim off any foam from the top of the stock, then partially cover. Reduce heat and simmer for 1 1/2 hours. At the end of the cooking time, if you wish to make the stock richer, remove the lid and continue cooking uncovered to slightly reduce it.
When the stock has cooled slightly, strain it through a seive or cloth, pressing all of the remaining liquid out of the vegetables. Compost or discard the remaining vegetables. What you don't eat immediately can be refrigerated for 3-5 days, or frozen. Makes approximately 15 servings.
Subscribe to:
Posts (Atom)


