KOSHER RECIPES FOR GLUTEN-FREE LIVING


Showing posts with label breads. Show all posts

Tuesday, March 17, 2009

How to Order Gluten-Free Matzo for Passover 2009

"This is the (gluten-free) bread of oppression that
our ancestors would have eaten in the land of Egypt
if they had been celiacs."

I've been getting so many e-mails about ordering gluten-free matzo that I realized it was high time I make a post about how to get your hands on some gluten-free matzo for Pesach (Passover) 2009.

Keep in mind that for matzo to be considered matzo by halacha (Jewish law) it needs to be made of one of the five grains. The only one of those grains that is (or can be) gluten-free is oats. Historically oats have been unsafe for celiacs due to being cross-contaminated with wheat. Fortunately, today we have certified gluten-free oats, which are grown and processed separately from wheat to eliminate cross-contamination, and then tested by food allergy testing labs to confirm their gluten-free status. So a truly gluten-free oat matzo is now possible. That said, there are some people with celiac disease who simply cannot digest oats, even gluten-free ones. If you are one of those people who has celiac disease and cannot digest oats I strongly suggest you speak with a competent rabbi. In fact, if you're an observant Jew it wouldn't hurt to consult with a rabbi regardless... Since I hear that there are some rabbis who don't accept oat matzo for celiacs. But for the rest of us, there's a great (if very pricy) option out there.

Starting last year, there are actually two sources for gluten-free matzo, not just one! I posted last year about Lakewood Matzoh Bakery which had begun making certified gluten-free oat matzo for the first time. They were kind enough to send me some of this year's batch to sample. It's true that it tastes nothing like the matzo I grew up eating and I'll personally never be a big fan of the burnt taste of shmura matzo (regardless of its gluten status). However, I'm excited because Lakewood Matzoh Bakery's matzo is quite improved from last year, due to being rolled out more thinly. This will make it more enjoyable for a lot of people, myself included. I also like supporting local-ish businesses when I can. In addition, Lakewood's price is significantly lower than the price offered by Kosher.com and other vendors for the imported UK brand Gluten-Free Oat Matzo. That makes Lakewood the winner in my home.

The one item that the other company, Gluten-Free Oat Matzos, sells that Lakewood doesn't is gluten-free matzo meal. It's ridiculously expensive but makes killer matzo balls using my dad's recipe! When I bought it a few years ago I called the matzo balls I made "million-dollar matzo balls" because I figured out they cost a couple of bucks a peace. A link to buying gluten-free matzo meal can be found below.

Did I mention that oat matzo is totally delicious turned into matzo pizza? Just spread tomato sauce and mozzarella on it and bake until the cheese is melted and edges of the matzo are crisp. Mmm... just call it "Bread of Oppression Pizza."

WHERE TO BUY GLUTEN-FREE MATZO

Here are links for ordering gluten-free matzo online or finding out where it's retailed locally near you. It's popping up in more and more local kosher groceries these days, but many places find they are sold out quickly so be sure to inquire about it at your local grocery now.

Gluten-Free Matzo from Lakewood Matzoh Bakery


Gluten-free oat matzo made in Lakewood, NJ. Shmura (handmade). $23 a box. Shipping available. Order online at the link above or inquire about where it's sold near you. I've seen it at shops in the NY/NJ area.

Gluten-Free Matzo from Rabbi Kestenbaum's Gluten Free Oat Matzos


Gluten-free oat matzo made in the UK. To buy online, go to Kosher.com. They offer machine-made matzo at $39.95 a box, handmade matzo for $39.95 a box and gluten-free matzo meal for $19.99 per box. Find out where to buy it locally here. (Available internationally).

Sunday, November 30, 2008

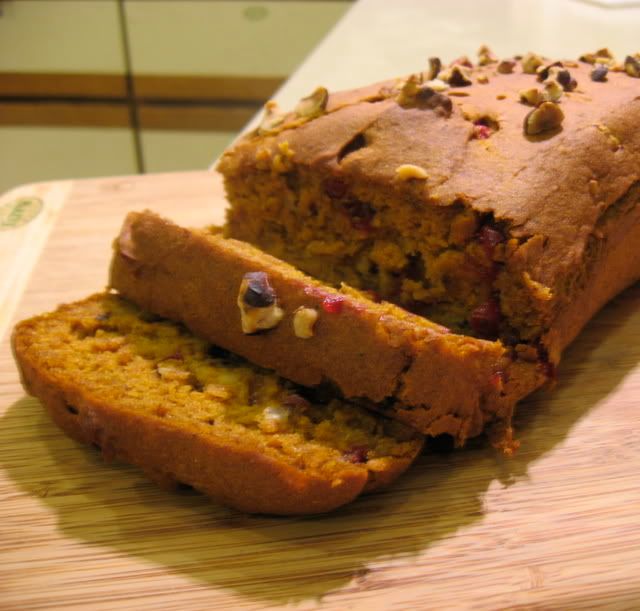
Adopt A Gluten-Free Blogger: Karina's Pumpkin Chai Bread with Cranberries


Seamaiden of the vegetarian gluten-free blog Book of Yum is hosting another round of Adopt a Gluten-Free Blogger, a blogging event in which we adopt another GF blogger and prepare one of their recipes. Last time I participated in this event, I baked gluten-free pita bread. This time it's the "Thanksgiving Edition" so we were all asked to prepare a dish from another blog that was thematically appropriate. I chose to prepare the vegan, gluten-free Pumpkin Chai Bread with Cranberries from the blog Karina's Kitchen (a/k/a The Gluten-Free Goddess). Karina has long been one of my favorite bloggers. She has supported and inspired me ever since I entered the blogging world several years back. When she got diagnosed with a huge list of food allergies in addition to celiac disease, the gluten-free blogging showed their support for her in the Cooking for Karina event I hosted. They made it clear with their numerous submissions that she is one of the best-loved residents of the gluten-free (and food allergy) blogosphere. But I have to make an embarrassing confession: Though I've used Karina's recipes often to inspire my own cooking, I don't think I've ever truly and thoroughly followed one of her recipes! Until today, that is. I chose this recipe in order to use up the cranberries left over from canning cranberry applesauce a few weeks ago and to stretch myself by actually following a recipe for a change.

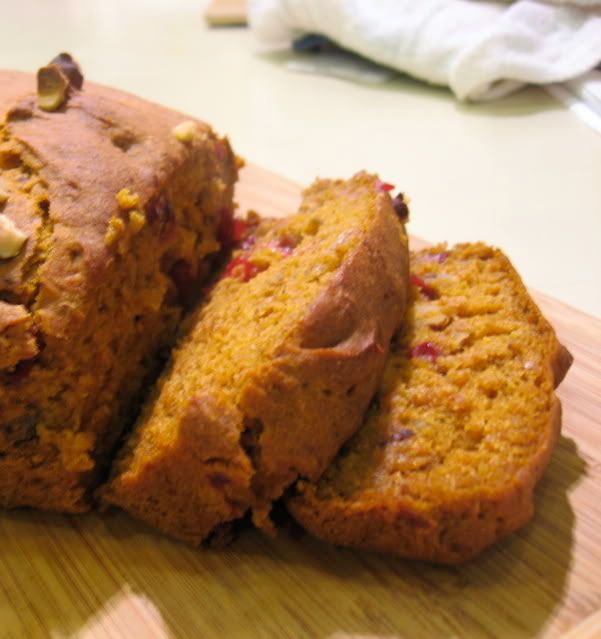
I was a little worried about what the texture would be like, because the recipe is eggless and I haven't done a whole lot of vegan baking since being gluten-free. Thanks to egg replacer and xanthan gum it actually holds together pretty well. It is beautiful when it comes out of the oven - It is golden in hue and the cranberries look like gems! I enjoyed it, and look forward to toasting a slice or two for breakfast in the morning. Do I lose points if I smear a little butter on your vegan recipe, Karina? Hehe.

The down-low on how I customized the recipe: I chose to use chopped hazelnuts as a mix-in in addition to cranberries, as they were on sale at the store (I initially wanted pecans, but they were twice as expensive). That was a good choice, because the ones I sprinkled on the top of the loaf before baking became lightly toasted which brought out their flavor and crunch. I used raw agave nectar instead of sugar (per Karina's suggested measurements). I would probably use a good bit more sweetener next time. I don't have a major sweet tooth but I think a little more sweetness would round out the flavor. I'd also cut down on the liquid a little bit more than I did, to compensate for the moisture from the agave. I baked it for 60+ minutes and it was still a bit too moist inside. The flours I used were 3/4 cup of millet flour, 1/2 cup sorghum flour, and 1/4 cup tapioca flour.

This bread has a really nice texture with little bursts of tart cranberry flavor. It is lightly sweet which is great for those of us who don't have huge sweet tooths or are trying to cut back on sugar. It has a subtle chai flavor and the pumpkin is present but not overly assertive so this might be a way to get some more veggies into your kids' tummies! It's easy to make successfully using mostly whole grains, which was a plus.

If you haven't checked out Karina's Kitchen, you've been missing out. It's worth subscribing to Karina's blog for the photographs alone! Stop by and congratulate her for just publishing Aftertaste in Exile, her book of paintings, poetry and photography.

Thursday, April 10, 2008

Adopt-A-Blogger: Gluten-Free Pita Bread Courtesy of Straight Into Bed Cakefree and Dried

For the Adopt-a-Gluten-Free-Blogger event, it was only natural that I'd choose to adopt Naomi Devlin of Straight Into Bed Cakefree and Dried. Naomi is a homeopath, mom, and baker from the UK. Her approach to cooking and baking feels familiar to me, because it's similar in many ways to mine. She is one of the bloggers whose recipes resonate with me the most, in her use of whole-grain gluten-free flours and nut meals, her adventurous exploration of new flavor combinations and textures, and her preference for natural sweeteners and nutritious ingredients. I love reading the blogs of cooks who are more likely to post an innovative and healthy recipe that introduces me to new flavors and textures than a recipe that's yet another nutritionally empty gluten-free clone of the usual standard American (or Western European) fare. I rarely bake these days for a variety of reasons, but Naomi's pita recipes were too tempting to pass up.

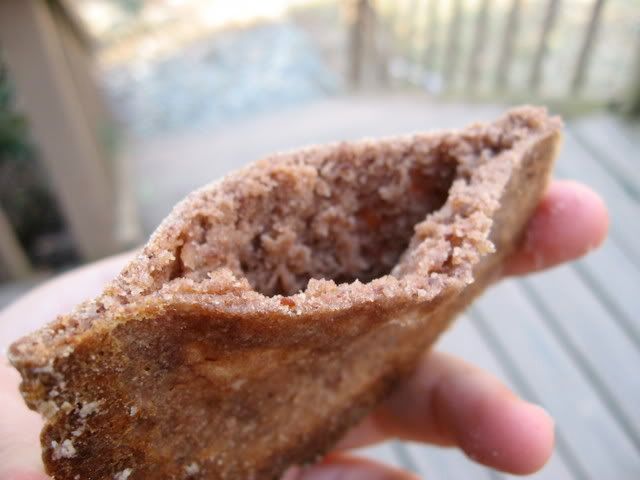
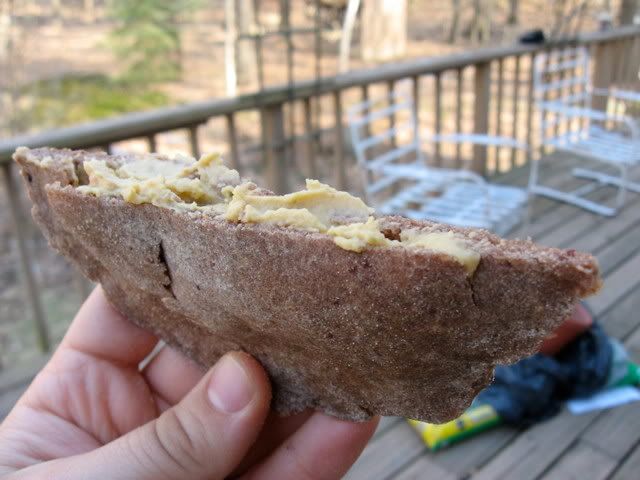
I made Naomi's recipe for Teff Pita Breads. Though I've had gluten-free falafel, I haven't had a pita bread since stopping eating gluten. It was such a thrill to take these out of the oven and see that they had, indeed, puffed up into pocket breads! (Well, about half of them did at least). They were tasty as can be, especially straight out of the oven. Over this past week I've eaten them stuffed them with hummus, with cheddar cheese, and with peanut butter, bananas and a drizzle of local honey. They were fantastic every which way.


I can't wait to try her other pitas. Here is a list of Naomi's gluten-free pita bread recipes:

Teff Pita Breads
Dark Coconut Pita Breads
Roasted Sweet Potato Pita Breads

Thanks for sharing your terrific recipes with the gluten-free blogosphere, Naomi!


Wednesday, March 19, 2008

New Source for Gluten-Free Oat Matzo


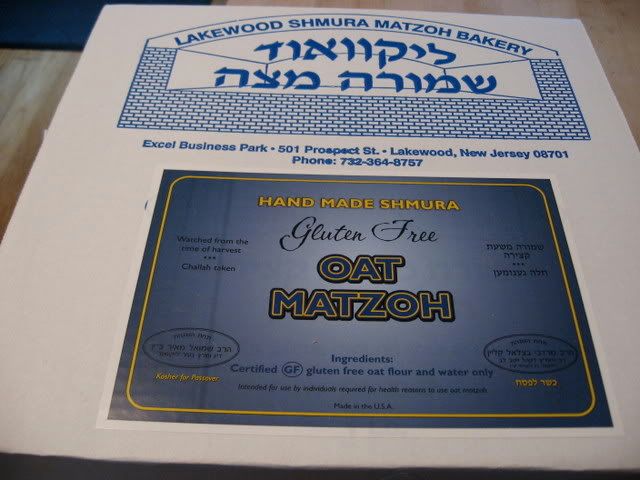
I couldn't have been more thrilled when I got an e-mail from a gentleman from Lakewood Shmura Matzo Bakery in Lakewood, NJ, telling me his bakery was now producing certified gluten-free oat matzos right here in the United States. He graciously sent me two boxes of matzos to try out.

The only source of gluten-free oat matzo I knew about before this was a company in the UK which makes a good product (and gluten-free matzo meal, too!) but is costly due to being imported. The Lakewood product is half the price of the British matzo ($20 for three matzot, as opposed to as much as $40 for three matzot). So this year I'll get to save my money for other Passover treats.

The matzo from Lakewood Shmura Matzo Bakery has a hechsher from Rabbis Katz and Klein, both of Lakewood. It is made of certified gluten-free oat flour. The final product was tested by the Food Allergy Research & Resource Program (FARRP) in Nebraska, and the bakery sent me a copy of the report from FARRP, which indicated that there is no detectable gluten in the product (the product was rated "BLD" or "below limit of detection") which means this product is reliably safe for celiacs. Please note, however, that there are some people with celiac disease who find they cannot digest oats at all.

If you're wondering why gluten-free matzo is so expensive, let me explain. First, the oats have to be grown segregated from wheat and other gluten-containing grains. They have to be harvested and milled with separate equipment. Shmura matzo is handmade rather than made with machines. This is especially remarkable given the fact that matzo must be made within 18 minutes to be considered unleavened. In addition, a dough made of only oat flour is difficult to work with as it contains no gluten nor gluten substitutes. Of course, the entire process must be supervised to ensure the product is kosher... and not only kosher, but kosher for Passover - A much higher standard of kashrut. This is why shmura matzo is always expensive, and gluten-free shmura matzo even more so.

The Lakewood matzo is good. The bakery suggests reheating the matzoh "in a very low oven for a few minutes before eating, it takes a lot of the moisture out." I second this recommendation, as the matzo can be a little stale coming right out of the box. It is definitely "the bread of oppression" - Probably not a cracker I'd nosh on just for the fun of it. However it is perfect for fulfilling the mitzvah of eating matzo on Passover and would taste fine heaped with charoset and maror (and you can grind up leftovers in a food processor to make matzo meal!) The matzos are thicker than a normal wheat matzo, which the bakery says is to make them less likely to break during shipping, so they're not as crisp as thinner matzos. There is something about the taste that definitely says "matzo" to me, which made me happy since it reminds me of when I could eat regular matzo. All in all, I can recommend these without reservation. I think they are certainly equal with the matzo from the UK.


The Lakewood Shmura Matzo Bakery doesn't have a website, but you can order by faxing (732) 364-4250 with shipping and billing information. The product is $20.00 per box of 3 matzos, plus a flat $10.00 for shipping (I believe this cost covers as many boxes as you order). If you have questions call (732) 364-8757.

The matzo is also available in many kosher grocery stores.

GLUTEN-FREE MATZO RESOURCES

TO ORDER MATZO:

Lakewood Shmura Matzo Bakery
Lakewood, NJ
Phone: (732) 364-8757
Fax: (732) 364-4250
Certified gluten-free oat shmura matzo. Available by mail order or in stores.

Gluten-Free Oat Matzos (U.K., distributed worldwide)
http://www.glutenfreeoatmatzos.com

Made in the United Kingdon but available at local distributors or from Kosher.com. Certified gluten-free oat shmura matzo, machine matzo and matzo meal available. No direct mail order on their website.

MATZO RECIPES:

Gluten-Free Mock "Matzo"
Gluten-Free "Matzo Balls" Recipe
Potato Kneidlach: A Matzo Ball Alternative

The mock matzo recipe above does not fulfill the mitzvah of eating matzo, as it is not made from one of the five grains specified by Jewish law. But it's still tasty!

Remember, the widely available spelt matzo is NOT gluten-free. Spelt is a form of wheat and contains gluten, thus is not safe for people who are gluten-intolerant or have celiac disease.

Wednesday, September 26, 2007

Gluten-Free Challah (Pareve / Dairy-Free): Version 1.0

gluten-free challah

gluten-free challah

gluten-free challah
Oh, my friends, this is the craziest of crazy times, this 4 week period of one Jewish holy day after another! A veritable Jewish spiritual marathon, really, and it's not over yet- Sukkot is nearly upon us and Simchat Torah is right around the corner. The cooking I've been doing has been under time constraints not to mention religious ones - The food has been wonderful and well-appreciated, but there's been little time for photographing and blogging. This fabulous insanity will continue for a while yet.

But you know, it's okay. There is some grace to be found in all this, and some joy in cooking for the sake of cooking rather than for the sake of blogging. And what better way to spend my cooking energy and celebrate the approach of autumn than on preparing a multi-course feast for friends and family on erev Rosh Hashanah? The Rosh Hashanah menu included a terrific beef tzimmes (basically my vegetarian tzimmes with big, tender chunks of beef cooked into it); Roasted Butternut Squash, Marcona Almond and Pomegranate Salad which is a spectacular celebration of fall; the Lacy Potato Kugel I've been making at every holiday since I fell in love with it; steamed green beans tossed with lemon oil; a pareve gluten-free Honey Cake drizzled with local honey and topped with slivers of toasted almonds; and ginger-poached pears (recipe forthcoming) which truly surprised me by stealing the show. Oh, and P.S. I also made gluten-free challah!

I based this recipe roughly upon Sara Nussbaum's gluten-free challah recipe, which Ellen posted her version of a while back. Is this the perfect gluten-free challah, that Jewish celiac equivalent of a holy grail which tastes just like what you remember from your childhood? No, it's not perfect - It's a work in progress. But is it delicious? Oh yes, it most certainly is. It turned out more challah-like than I expected, and it was delicious dipped in honey on Rosh Hashanah and made into the loveliest challah French toast in the days that followed.

To get the most challah-like texture without gluten, you need to have a dough with a high liquid content, which would be more like a batter than a dough and thus unable to be handled. This is why most gluten-free challah recipes can't be braided. Most gluten-free recipes that I've seen which create braid-able doughs use dough conditioners that are not easily available / kosher. Making a bread pareve further impacts the moisture. So, in order to make a bread I could shape into something vaguely resembling a traditional shape, I used far less liquid than your usual GF bread recipe would call for. The result is a dough that can be (very carefully) handled, perhaps even braided by a very skilled and well-greased hand - But this also resulted in a bread that was quite a bit less moist than what I'm used to. It was absolutely wonderful when it was still warm out of the oven, but after it cooled completely, I found it needed some light toasting to restore its texture.

I created it in a pull-apart challah style. You can see Bureka Boy's photographs of what a gluten-y pull-apart challah looks like here. It's obvious from my photos that the pull-apart idea didn't really work with this dough, but that forming the challah from balls of dough helped give the top of the bread the bumpy shape that looks similar to how braided round challahs appear. If you don't care how your challah looks, skip that step and just pour the dough into the cake pan at once, smooth the top, glaze it, and bake it.

I considered not sharing this recipe until I improved upon it, but I realized there is no reason to not let you in on my process. The journey that a recipe goes through as it is perfected is often a long one, and I will keep you posted as I improve upon this recipe in the coming months.

It was so nice to get to eat challah along with everyone else on Rosh Hashanah this year. It made me feel downright almost normal. (Yes, even weirdos can occasionally feel normal.)


GLUTEN-FREE CHALLAH

[ Gluten-Free / Dairy-Free / Soy-Free /
Vegetarian / Pareve ]

1 package active dry yeast
2 tsp sugar
1 cup warm water
1 1/2 cups cornstarch
3/4 cup brown rice flour
3/4 cup white rice flour
1/4 cup plus 3 Tbsp tapioca starch
1/4 cup Vance's Foods DariFree Original Powder (or other powdered non-dairy milk substitute)
1 Tbsp guar gum
1 1/2 tsp baking powder
1 tsp salt
1 Tbsp dry potato flakes
1/4 cup vegetable oil
1/4 cup honey
4 eggs + 1 extra egg yolk (at room temperature)
1 egg yolk beaten with 1 Tbsp water, for glaze
1/3 cup raisins (optional)
Poppy or sesame seeds (optional)
Baking spray / vegetable oil spray (non-dairy)

Turn oven on 200 F for 10 minutes, then turn oven off. Mix yeast and sugar with warm water in a small bowl. Cover with tin foil, and place in the oven for 10 minutes or until the top becomes bubbly.

In the bowl of a standing mixer, combine cornstarch, white and brown rice flours, tapioca starch, guar gum, salt, baking powder, powdered non-dairy milk and potato flakes. Add yeast mixture, oil, honey and eggs (except for reserved egg glaze). Blend thoroughly on high speed. If you are adding raisins, fold them in with the mixer set to a low setting until they are evenly dispersed throughout the dough.

Grease an 8- or 9-inch round cake pan (preferably silicone). Spray baking spray all over the palms of your hands, and place a ball of dough of about 3" diameter in the center of the cake pan. Continue to roll dough into balls, placing them in concentric circles around the center ball until they reach the edge of the cake pan. Do not pack them in too tightly, they should touch each other but some spaces should be visible. The dough is very sticky, so you will need to spray oil on your hands frequently in order to be able to handle the dough and roll it into balls (if you get too much dough sticking to your hands, wash them off, dry them, and re-oil them).

Using a pastry brush, brush half of the egg glaze over the top of the dough. Cover with a dish cloth and place in oven, which should still be warm but should not be on. Allow to rise for 1 hour. It should rise to the top of the cake pan or higher.

Remove the pan from the oven, and set oven to 350 F. Remove the towel from the pan, and brush the remaining egg glaze on the dough. Sprinkle with poppy or sesame seeds, if desired. Return pan to oven, uncovered. Bake for 20 minutes, then cover with foil and bake for another 25 minutes.

Allow bread to cool slightly before transferring it to a cooling rack. Eat while warm, or slice and toast it. Will keep for up to a week at room temperature in a ziploc storage bag, or you can slice and freeze it for longer storage.

Sunday, September 02, 2007

Baking for Bette: Sorghum Bread

When Seamaiden of Book of Yum announced a blogging event to pay tribute to the life of gluten-free baking pioneer Bette Hagman, I knew I wanted to participate. Bette passed away this month, after a long life as a successful gluten-free cookbook author who brought bread (and cake, and pizza, and cookies, and....) back into the life of many many people with celiac disease and gluten intolerance who thought they would never eat their favorite comfort foods again.

Confession: I own two of Bette's gluten-free cookbooks but I haven't cooked a single recipe from them. I figured now was a good time to finally try one of the recipes, but on the day I planned to pull them off the shelf and bake something, I discovered that - alas - the books were not on my bookshelf. They are apparently still in a box in my storage space, probably buried under many other boxes. So I scoured the internet to see if there were any of her recipes I could find online. The first one that I found called out to me: Sorghum Bread, a recipe Bette created for gluten-free sorghum flour purveyors Twin Valley Mills. Sorghum is by far my favorite GF flour - It is mild and finely ground and sweet, with no unusual flavor or grittiness. It is a whole grain, yet has the appearance and texture of one of the more refined flours. It works in nearly every recipe and I've been using it more and more as a replacement for white and brown rice flours. It is delicious! I served this bread with Shabbat dinner this week and all of the people at the table, several of whom have never tasted gluten-free bread, raved about it.
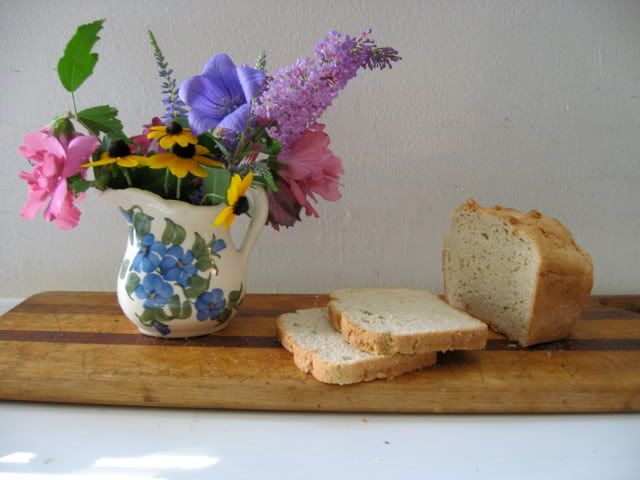
I changed some of the measurements and procedures for this recipe, adapting it to be kosher and pareve. I am posting my adapted version here, though I cannot take any credit for the recipe as a whole, as it's still definitely a Bette Hagman recipe. Because I rarely eat any refined sugar, the original recipe would have been far too sweet for me, so I reduced the amount of sugar. If you use a sweet non-dairy milk substitute such as Vance's DariFree Original Powder Beverage you should be able to get away with reducing the added sugar to 1 1/2 or even just 1 tablespoon. If you use unsweetened dairy milk powder or prefer a sweeter bread, you will want to use 2 tbsp of sugar.

The appearance and texture of this bread are just lovely. I can only imagine the work that Bette must have put into the chemistry experiment that is gluten-free baking in order to come up with just one recipe, let alone the hundreds she has published.

Bette, thank you for the contributions you made to the gluten-free world. Even though this is my first time preparing one of your recipes, I can feel the impact you have made on my life indirectly. If it weren't for you, I wouldn't have become gluten-free at a time when there were so many fabulous recipes available on the internet and in a plethora of cookbooks. If it weren't for you, I might not have had people to reassure me that I could still eat the foods I love. You were truly a pioneer, and every gluten-intolerant person's life is better for it. Rest in peace.


[We ate half of the loaf before I even got a chance to photograph it! Oops.]

PAREVE SORGHUM BREAD
An Adaptation of Bette Hagman's Recipe for Twin Valley Mills

[ Gluten-Free / Dairy-Free / Soy-Free / Pareve / Vegetarian Option ]


1 cup sweet sorghum flour
2/3 cup tapioca flour
2/3 cup cornstarch
1 3/4 tsp xanthan gum
1/3 cup Vance's Dari-Free or other powdered non-dairy milk substitute
1 tsp salt
1 tsp unflavored kosher fish gelatin or equivalent agar-agar (vegan gelatin substitute)
1 tsp gluten-free baking powder
1 1/2 Tbsp sugar
2 1/4 tsp dry quick-acting yeast granules
2 eggs
1/2 teaspoon distilled white vinegar
3 Tbsp vegetable oil
1 cup lukewarm water

Preheat oven to 375 F. Grease an 8 1/2" by 4 1/2" loaf pan with vegetable oil and dust with rice flour. When the oven gets to the right temperature, turn it OFF and do not open the door.

Combine all dry ingredients in a medium bowl. In a large bowl, or in the mixing bowl of a standing mixer, whisk the eggs, vinegar, and oil. You can use a sturdy electric hand-mixer, or a wooden spoon (if you have lots of elbow grease to spare) if you don't have a standing mixer. Add most of the water, saving a few tablespoons. Slowly fold in flour mixture a little at a time, with mixer on low setting. The mix should have the consistency of a thick cake batter. Add the remaining water to attain this texture. With the mixer on high, beat for several minutes or until the dough is smooth and well-blended.

Pour into the greased and floured pan, cover with a dishtowel and allow to rise in the warm oven for 30 minutes or until the dough reaches the top of the pan. Turn the oven back on to 375 F and bake for 10 minutes, then cover with tin foil and bake for another 40 to 45 minutes or until the crust is golden brown. Immediately remove from pan and allow to cool before slicing.

Sunday, August 26, 2007

Mission Possible: Jamaican-Style Spicy Turkey Patties

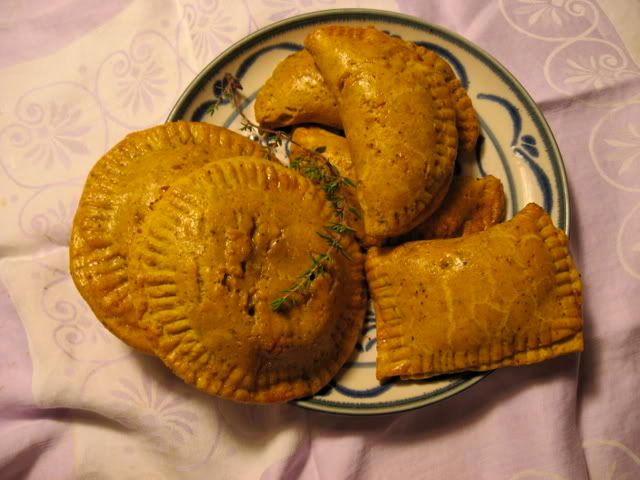
[Three different shapes!]

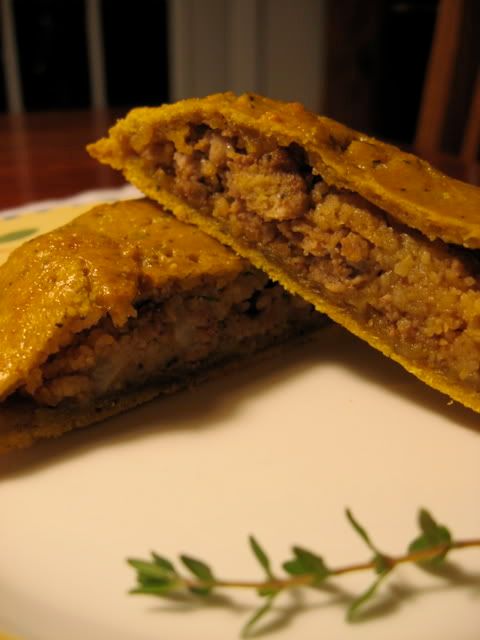
[Spicy meaty goodness!]

At the Ashby Flea Market in Berkeley, CA, there's a truck that sells Jamaican beef patties - Each patty a flaky, orange-hued pastry wrapped around moist, flavorful meat. A patty is a savory and convenient meal-in-a-pocket, a Jamaican knish, if you will. Though I haven't eaten them for years, walking by the truck at the flea market when I was living in the Bay Area always reminded me of the first time I tasted a beef patty as a kid. The flavors still stand out in my mind, so I knew that I wanted to try my hand at creating a kosher and gluten-free version of this Caribbean delicacy. I love how they turned out. They are definitely less greasy than the original, and with a dough that is chewy and full of flavor, rather than flaky and greasy. They were a big hit in my household.

Having an impossible time finding kosher beef around these parts, I opted for kosher ground turkey instead. If you use non-kosher meat keep in mind you may need to use more salt and will likely find that the meat gives off more moisture (which you can sop up with more bread crumbs, if necessary). Since kashrut precludes the use of the traditional lard in the dough, as well as the mixing of butter with meat, I chose solidified Spectrum Naturals coconut oil instead. Feel free to use margarine if you prefer. The crust is a simple Chebe mix prepared without the usual added cheese, and with some different ingredients mixed in for flavor, texture and color. I used Chebe Gluten-Free Pizza Crust Mix because it's what I had on hand, but you might try using the Chebe All-Purpose Gluten-Free Bread Mix adjusting liquid ingredients accordingly. [The Orthodox Union page has only four of their mixes listed, whereas on the Chebe site they have posted a copy of the letter certifying 6 of their products (all but one are pareve) but expiring in March, so if you only use hechshered kosher products, do make sure to check with them about which products actually are currently certified!]
For dry gluten-free bread crumbs, you can make your own by baking left-over bread slices on low-heat until they become completely dry and crumbly (I collect the ends of all my loaves in a ziploc bag in the freezer for this purpose) and then pulsing them in a food processor. Or make it easier on yourself and just purchase some pre-made gluten-free bread crumbs.

This recipe will leave you with a lot of the flavorful meat mixture left over - You may want to save it, as I did (try mixing it with rice, or turning it into a flavorful Shepherd's pie, or mixing it with your favorite soup) or you might choose to make a double-batch of the dough for twice the patties. Double the patties, double the fun! They will last a few days in the refrigerator, and heat up very well in the toaster oven or a regular oven. I do not recommend microwaving them.

Public service announcement: Don't forget to wear surgical gloves when you handle habanero or scotch bonnet peppers - Washing with soap is often not enough to remove the infernally hot oils from your skin. Be sure not to touch your eyes (or anywhere else sensitive), and immediately wash your cutting board thoroughly to avoid a spicy surprise at a later date. Not a fan of spicy foods? Use a little bit of dried cayenne or a minced jalapeno instead.

JAMAICAN-STYLE SPICY TURKEY PATTIES
[ Gluten-Free / Soy-Free / Dairy-Free / Fleischig]

DOUGH:
1 packet Chebe Pizza Mix (7.5 oz)
3 tbsp coconut oil
3 tbsp coconut milk/coconut cream (full-fat, not low-fat)
1/4 tsp turmeric
1/2 tsp paprika
1 1/2 tsp curry powder
1 egg
Dash of salt
For glaze: 1 egg, well beaten and set aside

MEAT FILLING:
2 tbsp coconut oil or margarine
1 small onion, diced finely
3 cloves garlic
2 tbsp finely minced carrot
1/2 tsp finely minced habanero or scotch bonnet peppers
1 tsp thyme (preferably fresh)
1 lb ground turkey
1 tsp curry powder
1/2 tsp allspice
1 tsp paprika
1 tsp salt
1 tsp ground black pepper
1/2 cup vegetable, turkey or chicken broth
1/2 cup dry gluten-free bread crumbs
Optional: Cayenne powder to taste

Preheat oven to 375 F (190 C).

In a food processor or standing mixer, combine all dry ingredients, pulse until fully blended. Add 3 tbsp coconut oil, egg and coconut milk. Blend until well-combined. Dough should be easily formed into a ball. Wrap ball in saran wrap and refrigerate while you prepare the filling.

Add 2 tbsp coconut oil or margarine to a heavy skillet over medium heat. When the oil is heated, add onions and sautee until translucent. Add garlic, thyme, carrot and minced peppers. Sautee until carrots are slightly tender but garlic has not yet started browning. Add ground turkey and all spices. Using spatula to break meat up into small pieces, allow turkey to brown slightly but not cook through fully. Add breadcrumbs and broth. Stir well, turn heat to low, cover skillet, and simmer for 3-5 minutes while the breadcrumbs soften and absorb moisture and the turkey finishes cooking. If there is still a lot of liquid in the skillet, add a small additional amount of bread crumbs to absorb it. Taste and adjust spices accordingly. Remove from heat.

Unwrap refrigerated ball of dough. Use a rolling pin to roll it out to about 1/8 inch. Fold it over itself and roll again. Repeat this process several times, folding the dough up into layers and then rolling. Finally, roll dough out until it is 1/8 inch in thickness. Cut dough to desired size - A 6" diameter bowl will work if you want to make empanada-shaped half-crescents (or double them up on top of each other to make circular patties). A dough cutter works for cutting out rectangles that can be folded over to make smaller rectangular patties. Using a pastry scraper, move dough shapes carefully to a greased baking sheet. Remove 2 tablespoons of meat from skillet at a time, compressing with your fingers to create a dense "patty". Place meat slightly off-center in the dough shapes, making sure none of the filling reaches the edges of the dough. Fold edge of dough over and use a fork to seal the edges thoroughly. Make sure there are no holes in the dough - If there are, use a moistened finger or small bits of dough to repair them. Brush each patty lightly with beaten egg you've set aside.

Bake at 375 for 20 minutes or until each patty is golden-brown. Serve while hot. Patties can be refrigerated for several days, and warmed in a toaster oven or conventional oven at 200 F.

Sunday, July 29, 2007

Low-Fat Sugar-Free Sesame Banana Muffins / Sesame Banana Bread


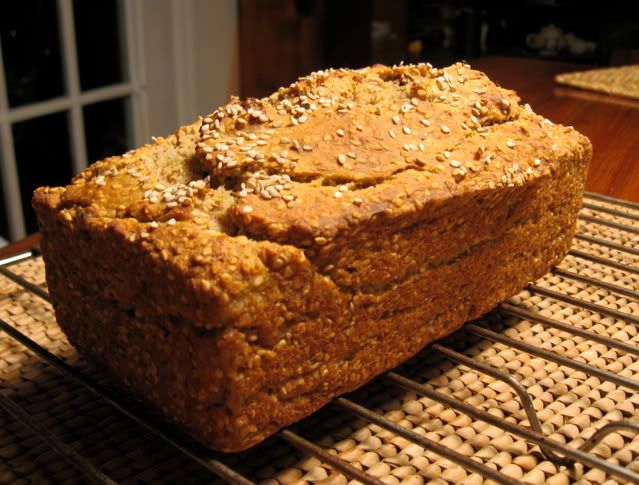
gluten-free sesame banana loaf
I baked up an adapted version of the Sesame Banana Mini-Muffins my parents ate while staying at Poetry Ridge Bed and Breakfast in Greenfield, MA. They came back from their stay with the recipe, written in pencil on an index card. The muffins had apparently been made by the proprietors for another guest, who had multiple food allergies. They both raved about them, so I told them I'd give the recipe a shot despite my skepticism.

The original recipe called for Splenda. Those of you who've been reading this blog for a while know that I don't usually go for artificial sweeteners. Don't kid yourself into thinking that Splenda is any more natural than any other artificial sweetener - It's not. But since I wanted to duplicate the recipe my parents had eaten as closely as possible, I decided to give Splenda a shot. The verdict? The muffins were good, and the loaf was even better, but I won't be baking with Splenda again. Unlike some people, I can detect quite an unpleasant aftertaste. I'll stick to agave nectar and its ilk - Natural sweeteners that are not sugar-free but are lower-glycemic than cane sugar and not over-processed. However, no one else who ate them complained about the Splenda taste so I think I must just have freakish taste buds.

The sesame seeds in this recipe give a delightfully unusual texture to what would otherwise be banana bread (or banana muffins). I used untoasted sesame seeds - But I have called for toasted sesame seeds in the recipe since I believe that lightly toasted sesame seeds would improve the flavor and texture. For the gluten-free flour the recipe calls for, any mix that contains xanthan or guar gum will work, such as Pamela's Ultimate Pancake & Baking Mix or Bob's Red Mill Wheat Free Biscuit & Baking Mix or my cake flour mix recipe.

These muffins have a wonderfully moist texture - Yet they are also low-fat in addition to being sugar-free, which make them a good option for people who are on restricted diets. The quinoa flakes also increase the protein content quite a bit. You can easily replace the sour cream with Tofutti soy sour cream and the milk with soy or rice milk if you'd like to make these muffins dairy-free / pareve. They taste great at room temperature for several days, too. I poured the batter in both a silicone mini-muffin pan and a standard-sized tin bread pan. I enjoyed the cuteness and convenience factor of the mini-muffins, but the loaf took a slight lead when it came to taste and texture. This recipe makes enough batter to fill one mini-muffin pan and one bread pan, so you don't have to choose between the two!

LOW-FAT SUGAR-FREE SESAME BANANA MUFFINS / SESAME BANANA BREAD

[ Gluten-Free / Nut-Free / Soy-Free or Dairy-Free / Milchig or Pareve]

3/4 cups low-fat sour cream or Tofutti soy sour cream
1/2 cup Splenda
2 egg whites
2 bananas, thoroughly mashed
1 tsp vanilla
1 cup Ancient Harvest Quinoa Flakes Hot Cereal
1 cup gluten-free flour mix
1 tsp baking soda
1 cup toasted sesame seeds
1/2 tsp pumpkin pie spice (or 1/2 tsp cinnamon and a pinch of nutmeg)
3/4 tsp salt
1/3 cup low-fat milk or soy / rice milk

Cream Splenda and sour cream with electric hand-mixer. Mix in egg whites, bananas, vanilla. In a separate bowl mix together flour, quinoa flakes, sesame seeds, baking soda and salt. Add to batter and mix well. Pour into greased mini-muffin tins, filling each cup to the top, and/or pour into well-greased bread pan, filling to 1 inch below top. Bake muffins for 15-20 minutes and bake loaf for 35-45 minutes, or until toothpick comes out clean.

Tuesday, April 24, 2007

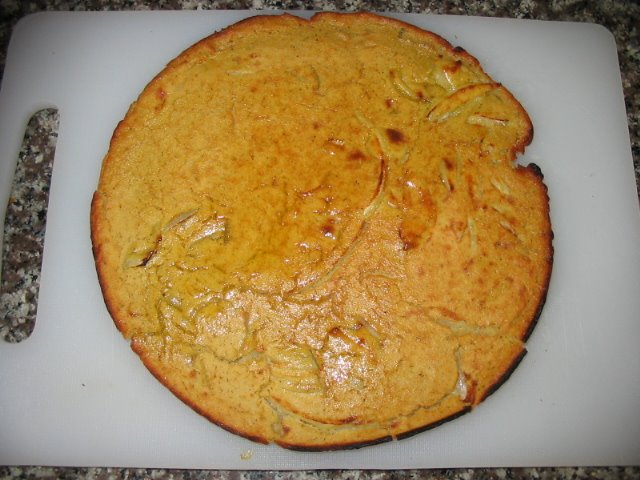
Socca to me now.

A simple recipe for taking a break from packing to refuel and procrastinate:

Take one Socca...


...and slather it with Kalamata Olive Tapenade.


Eat until full, then heat up the rest for breakfast the following morning.

Monday, March 19, 2007

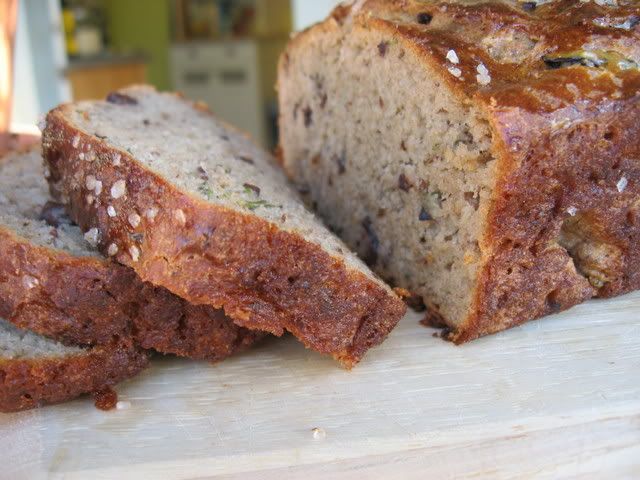
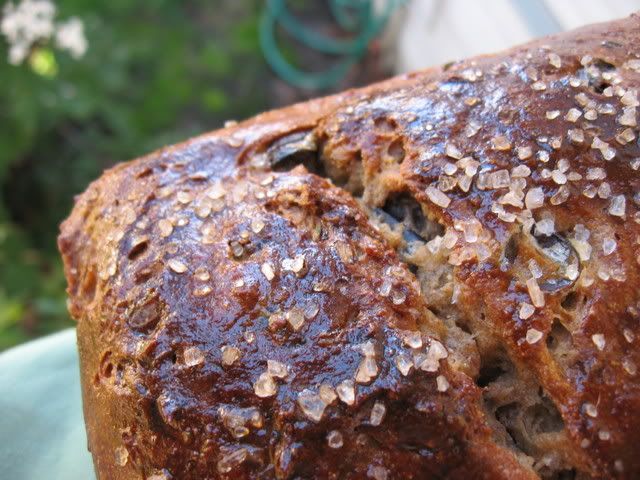
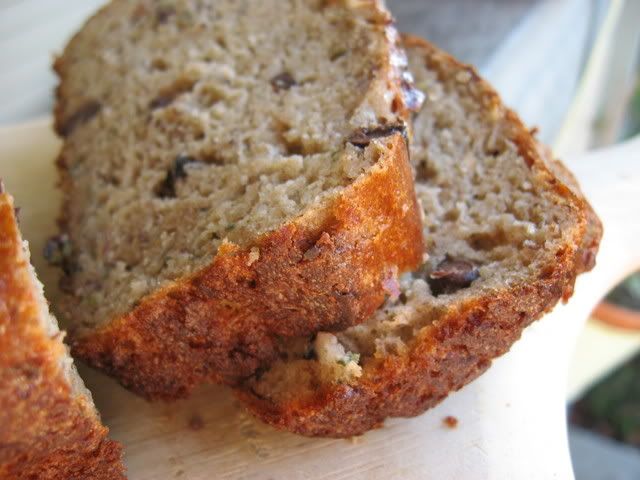
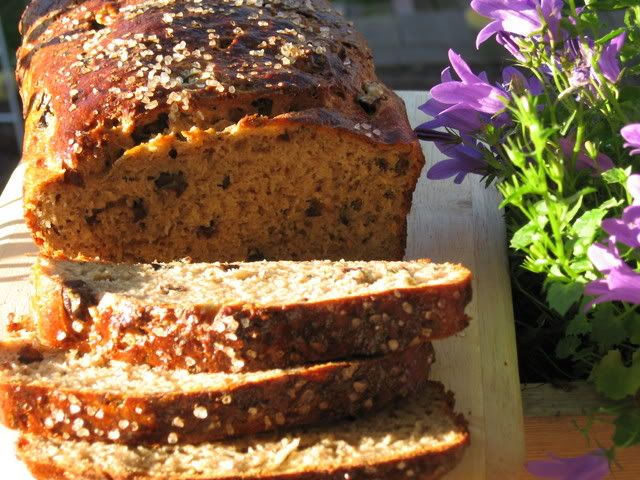
Kalamata Olive & Rosemary Bread: The Search for a Gluten-Free Rustic Loaf


The only thing more comforting than a warm slice of home-baked bread, fresh from the oven? A warm slice of home-baked bread, fresh from the oven, that is infused with rosemary and olive oil and speckled throughout with kalamata olives!

I have been craving a hearty, rustic-style olive bread. Though this recipe did not turn out to be anywhere near as crusty or rustic as the loaves I enjoyed in my gluten-eating artisan-bread-buying days, it certainly turned out wonderfully flavorful. It has the soft, pliable, no-toasting-necessary sandwich bread texture of the Gluten-Free Multigrain Miracle Bread I posted about a few weeks ago, but with a palette of complimentary, savory flavors. Judging by the looks on the faces of the gluten eaters I fed the olive-rosemary bread to, this recipe is a success.

Try this bread with butter on it, or as an accompaniment to Southern European and Mediterranean dishes, or try it with any soup or stew. As for me, I ate the entire loaf (not at once, of course) with hummus on top because I loved how the flavors went together. It would also make a killer grilled cheese sandwich with sharp cheddar.

As for crusty, rustic-style breads - The search continues. I've yet to find a gluten-free recipe that's quite what I'm looking for, but I'll keep working on creating one in my own kitchen. I'm not sure how to describe what I think of as "rustic" bread. I suppose I think of it as heavier, drier, and less glutinous than the breads I usually make. Perhaps cutting down on the xanthan or guar gum (GF gluten replacements) would help. A satisfyingly chewy crust is another element missing from every gluten-free bread I've tasted, no matter how wonderful the taste or texture. So, my esteemed readers, go ahead and enjoy this delicious loaf - but also answer these two questions for me, while you're at it:

1) Do you have any gluten-free bread recipes that yield a "rustic" loaf with a thick or chewy crust?

2) What makes a bread rustic, anyway?

The search continues...


KALAMATA OLIVE AND ROSEMARY BREAD

1/2 cup amaranth flour
1/4 cup garbanzo flour
1/4 cup plus 2 Tbsp white rice flour
5 Tbsp teff flour
1/4 cup tapioca starch
1/4 cup arrowroot powder
2 Tbsp flax seed meal (ground flax seeds)
3 tsp xanthan gum
1 1/2 Tbsp fresh rosemary, finely minced
1/2 cup pitted kalamata olives, chopped roughly
2 tsp active dry yeast
1 tsp salt
2 whole eggs
2 eggs, whites separated from yolks
3/4 cup water, room temperature
5 Tbsp extra virgin olive oil
1 1/2 Tbsp honey
2 tsp apple cider vinegar
Optional: Coarse sea salt crystals for crust

Preheat the oven to 200°F.

Sift the flours, yeast and all other dry ingredients (except coarse sea salt) into a medium bowl. Stir in flax meal and rosemary, and combine.

Combine wet ingredients, including the two whole eggs and the two separated egg whites in a large bowl, using a hand-mixer on low or medium speed. [The two separated egg yolks should be set aside in a small bowl for later use as a glaze]. When fully combined, add kalamata olives. Slowly add dry ingredient mixture and mix with a wooden spoon until fully blended, with no lumps. Scrape the sides regularly.

Grease a 9x5" bread pan, and pour the dough into the pan. Use a spatula or knife to evenly shape the top of the loaf. Cut two diagonal slashes in the top of the loaf. Beat the two separated egg yolks that have been set aside and brush the top of the loaf very lightly with them. Optional: Sprinkle coarse sea salt crystals very sparsely to embellish the loaf.

Turn off the oven and immediately place the pan in it. Do not open the door again, if possible. Allow the dough to rise for 90 minutes. It should rise to the very top of the pan.

Increase heat to 350F and bake for approximately 40 minutes. The crust should be golden-brown. Allow to cool slightly before removing it from the pan to finish cooling. Do not slice until the bread is no longer hot.

This loaf does not need to be frozen, but if there are leftovers after a few days, place slices in airtight bags and freeze.

Wednesday, March 07, 2007

Mission: Possible - Gluten-Free (Mock) Matzo


In Jewish law, only five grains are suitable for making matzo: wheat, barley, spelt, rye and oats. The only one of these grains that can be digested by celiacs and gluten intolerant people is oats, and there are quite a few celiacs who cannot digest oats at all. Even those who can can are only able to eat oats if they were produced in such a way that they were not cross-contaminated with wheat.

To make matzo matters more complicated for gluten-free folks, matzah shmura must also be properly supervised during the manufacturing process. Gluten-free shmura matzo, which some rabbis accept as fulfilling the mitzvah of eating matzo at Passover, is available online from Rabbi Kestenbaum's Shemura Oat Matzos. The website lists local vendors in the United States, or you can order them before March 11 from Kosher.com (which also sells gluten-free matzo meal from the same company).

There is another option for people who are not as stringent about halacha, or who are looking for a gluten-free matzo replacement for Pesach for a purpose other than saying the matzo blessing... Homemade gluten-free mock matzo!

I combined recipes from Living Without Magazine and Celiac.com and was surprised to find that my "matzot" were not only edible - They actually had a pretty nice flavor. I can definitely see myself snacking on these, especially with haroset and maror. While not a deadringer for matzo, they do have a good, crisp texture. They are made of kosher for Passover ingredients, and you can press them out to be just as thin as a mass-produced matzo.

You can use pre-ground almond meal as I did, but one recipe I saw recommended using coarser-ground almond meal made at home of unblanched almonds because they found the larger chunks of almond made a good texture.

GLUTEN-FREE MOCK MATZO

1/3 cup potato starch
1/3 cup almond meal
1 Tbsp flaxseed meal
2 Tbsp shortening or solid coconut oil
3 Tbsp warm water
1/4 tsp salt

Preheat oven to 450 F. Cover a cookie sheet with aluminum foil. In a medium bowl, combine the dry ingredients. Mix shortening or coconut oil into the dry ingredients using your hands. Add water just a little bit at a time until the dough makes a ball and isn't too sticky. Knead well, making sure there are no big chunks of shortening. If the dough is sticky, add additional potato starch. Take walnut size pieces and press with your fingers onto the foil-covered baking sheet until flat and thin. Smooth out edges, if desired, and use a fork to prick rows of holes. Cook for 10 minutes, watching carefully to make sure they don't get overdone. You should underbake them slightly, rather than overbaking. Remove from oven as soon as the edges become slightly brown - The top should still be white.

Sunday, February 25, 2007

Gluten-Free Bread That Just Might Make You Cry [For Joy]


It is hard to believe that something as ordinary as a loaf of bread could nearly bring tears to my eyes - But that is what happened the other night when I sliced into the loaf of fresh-baked bread I had just pulled from the oven.

I had adapted a recipe that was shared on the Celiac.com forums by a woman named Laurie. I certainly won't take full credit for it, as the basic structure was her creation. I owe her many thanks.

I didn't want to get my expectations up about this bread. I figured it couldn't possibly be anything more than satisfactory, at least by the standards of someone who still remembers the taste and mouthfeel of real, gluten-loaded bread. The first thing I noticed when I sliced it was that the slices were pliable. I was certain that I was hallucinating. You know what I'm talking about - Lacking the rubbery properties of gluten, even good gluten-free bread will usually break if you try to bend one of the slices. But this slice was like an acrobat, gracefully bending nearly in half without any crumbling whatsoever. It had the appearance of wheat bread. I poked at it tentatively with a finger... It gave, and bounced gently back. It was soft as a pillow. When I bit into it, all I could think was "Holy sh*t!" I got a little farklempt. At that moment I realized what I had been missing since gluten began making me ill.

There is not a single thing about this bread that tastes or feels different than a wheat loaf. This is bread I could serve to a gluten-eating guest without shame, and feel confident they would never guess that it is gluten-free.

So, about those flaxseeds: I am not a big fan, generally, but I truly could not taste them in this bread. They play a big part of giving it the wonderful texture it has, as well as the high fiber content, but thankfully they do not contribute to the flavor. It is dairy-free, which makes it a good choice for all you GFCF (gluten-free casein-free) folks. It has more protein, more fiber, less sugar, and more whole grains than most breads which makes it a perfect fit for my increasingly healthy diet.

The next morning I woke up for work, and stumbled to the kitchen. I accepted that the rest of the slices, which I'd left in a ziploc bag on the counter, would have become dry or gummy (or that special combination of both that is apparently unique to gluten-free bread). I was blown away by the fact that the bread had the same exact texture as it had the night before. This is bread that you can make a sandwich on without toasting it first. Bread that you can take to work or pack for your kid's school lunch. Best of all, it's not one of those breads that has a mediocre flavor or texture that needs to be obscured by peanut butter and jelly in order to be edible. It isn't just good - It's wonderful. This is a loaf that stands alone.


GLUTEN-FREE MULTIGRAIN MIRACLE BREAD

1/2 cup brown rice flour
1/2 cup sorghum flour
1/4 cup amaranth flour
1/4 cup tapioca starch
1/4 cup cornstarch or arrowroot starch
1/4 cup flax seed meal (ground flax seeds)
3 teaspoons xanthan gum
2 teaspoons active dry yeast
1 teaspoon salt
2 eggs
2 additional egg whites
1 cup water, room temperature
2 tablespoons vegetable oil
2 tablespoons honey
2 teaspoons apple cider vinegar

Preheat the oven to 200F.

Sift the flours, yeast and all other dry ingredients together into a medium bowl. Stir in flax meal and combine.

Combine the wet ingredients in a separate large bowl using a hand-mixer on low or medium speed. When fully combined, slowly add dry ingredient mixture and mix until fully blended, with no lumps. Scrape the sides regularly.

Grease a 9x5" bread pan, and pour the dough into the pan. Turn off the oven and immediately place the pan in it. Do not open the door again, if possible. Allow the dough to rise for 90 minutes. It should rise to the very top of the pan.

Increase heat to 350F and bake for approximately 40 minutes. The crust should be golden-brown. Allow to cool slightly before removing it from the pan to finish cooling. Do not slice until the bread is no longer hot.

This loaf does not need to be frozen, but if there are leftovers after a few days, place slices in airtight bags and freeze.

Friday, February 09, 2007

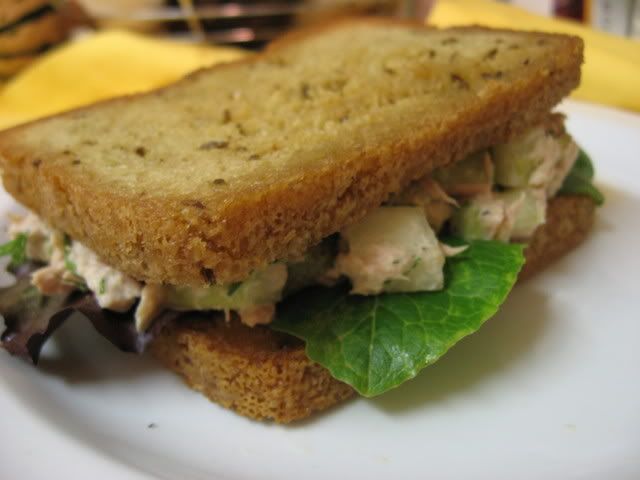
Tuna on Gluten-Free "Rye" Bread

gluten-free rye-less rye bread from enjoy lifeLast Friday I came home to a FedEx package from Enjoy Life Foods waiting on the porch. That sure was a great way to start shabbos! The company made a very smart PR move by sending product samples to a couple of us gluten-free bloggers.

I was skeptical about Enjoy Life Foods Rye-less Rye Gluten-Free Sandwich Bread because I have had mostly negative experiences with Enjoy Life products in the past. I find their chocolate chips to be undersized, chalky, and practically unmeltable... And in my opinion, their cookies do not deserve to be called "cookies." I was also skeptical because of my high standards for rye bread. As a New York Jew I grew up eating a lot of Jewish rye bread. My favorite sandwiches in high school were melted cheddar cheese on Jewish rye, hummus on Jewish rye, or tuna salad on Jewish rye. It was a sad day when I learned that rye contained gluten, and therefore was one more grain I could no longer eat. Back when I was eating gluten I liked my rye bread to have a chewy crust and a soft, squishy center. Most importantly, it must be full of whole caraway seeds. Since becoming gluten-free, my standards for bread have certainly become less strict. But I was pleasantly surprised! Though certainly not the "real thing," the Rye-less "Rye" Bread came a heck of a lot closer to what I remembered than I ever would have expected or imagined. It had the perfect amount of caraway seeds. When well-toasted (careful, because it goes from well-toasted to charred very quickly!) it had a really nice texture and is actually one of the better gluten-free storebought breads I've tasted. It unfortunately does not have the chewy, shiny crust that I associate with rye bread, but I really enjoyed the taste. I can't begin to tell you the joy I felt eating my first tuna on "rye" sandwich in eons.

I'll write about some of Enjoy Life's other allergen-free products (which can be purchased here) at a later date. For now, let me leave you with a recipe for my favorite tuna salad. This is a reduced-fat tuna salad that tastes wonderful on rye bread, real or fake. My favorite way to serve this sandwich is on toasted bread with a slice of tomato, a slice of avocado and some lettuce. A pickle on the side, of course. The chopped pickles and dill are key to the fabulous taste - The more sour the pickles the better (cornichons are great for this). You can try substiting a smaller amount of dried dill if you don't have access to fresh herbs.


TASTY REDUCED-FAT TUNA SALAD


1 (6 ounce) can solid albacore tuna in water
1 stalk celery
2 tablespoons finely diced sour dill pickles
1 1/2 tablespoons mayonnaise (real mayo, preferably Hellman's)
1 tablespoon lemon juice
1 teaspoon Dijon mustard
2 teaspoons fresh dill, minced
fresh ground black pepper (generous amount)

Drain tuna. With a fork, break it up in a bowl into the size and texture you prefer (I like to leave some chunks - others prefer it totally mashed). Add all the other ingredients and stir until fully combined. Serve cold in a sandwich or over a green salad.


Friday, February 02, 2007

Gluten-Free Italian Breadcrumbs

I've been saving the ends of all my loaves of gluten-free bread in a ziploc bag in the freezer, and adding to the stash any remaining slices of loaves of bread that become stale as well as storebought bread I brought home only to find inedible. When I had enough saved up, I finally got to put them to use. These breadcrumbs are wonderful for breading meat or vegetables, stuffing mushrooms, topping casseroles and more. Leave the spices out for "neutral" crumbs that can be used in any recipe - Or follow my instructions for flavorful Italian breadcrumbs that are perfect in most Mediterranean and American recipes.

ITALIAN GLUTEN-FREE BREADCRUMBS

12 slices gluten-free bread (stale bread and ends are good)
2 teaspoons salt
2 teaspoons dried parsley flakes
2 teaspoons ground black pepper
2 teaspoons garlic powder
1 teaspoons onion powder
1 teaspoons dried oregano
1 teaspoons dried basil

For fresh breadcrumbs:

Lay bread slices in a single layer on a baking sheet. Place in oven on 200 F for 10-15 minutes or until the edges have become a little hard and the bread has become dry to the touch but it has not become thoroughly toasted. Pulse in food processor until it reaches desired texture (crumbs should be distinct but not too large). Combine ingredients in a bowl.

For dry breadcrumbs:

Cube bread slices and lay in a single layer on a baking sheet. Place in a 325 F oven and bake until lightly browned, crisp, and very dry. Allow to cool. Blend in the food processor until it has a fine texture not much coarser than sand. Combine all ingredients in a bowl.

Bread crumbs can be stored in an airtight container or ziploc bag in the refrigerator for about a week for fresh breadcrumbs or 2-3 weeks for dry breadcrumbs. They can be stored in the freezer for up to 6 months.

Friday, January 26, 2007

The Day My House Became a Pupuseria


The first time I ate a pupusa I was living in San Francisco's Mission District. I discovered that just one block away (at 1142 Valencia Street) was El Majahual Restaurant, a tiny Salvadorean and Colombian restaurant and pupuseria. I was living on a tight budget and at just $1.65 each, pupusas were just about the cheapest and most filling healthy meal I could find. I recall reading an article that said the rule for making a meal of pupusas is "one for a snack, two for lunch, three for dinner." Sounds about right to me. It was easy to fall in love with these thick El Salvadoreño corn tortillas crafted out of masa harina, stuffed with cheese, beans or meat and topped with a spicy cabbage salad known as curtido.

This weekend my house became a pupusa factory. My friend Melanie came over for dinner, and we ate stacks upon stacks of pupusas con curtido de repollo. I filled some with a combination of goat jack cheese and cotija*, while others were stuffed with both cheese and refried beans. We ate them with salsa, curtido, and slices of ripe avocado. I had so much masa (dough) left over that I made more for my breakfast guest the next day... and yet another batch when my aunt and uncle paid me a surprise visit later that afternoon. I made extras for my own dinner the following day, plus a batch for some dear friends. There were pupusas coming out my ears!

Masa harina is the extremely finely ground corn flour that makes a silky dough that can be used for corn tortillas, pupusas, and other Central American delicacies. The manufacturer of Maseca brand masa harina has verified that it is gluten-free and was made in a facility that does not process wheat. Maseca is widely available in the US and is inexpensive. For more information on Central American products that are gluten-free, check out the Celíacos de México blog (it's in Spanish). There are no good substitutes for masa harina - Corn flour is the closest in texture but not a match, and corn meal will give you mealy, greasy, tough results. So stick to the real thing.

Folks who are vegan, lactose intolerant, or casein-free, can omit the cheese and just stuff the pupusas with refried beans. You can serve an army with these recipes, so cut them in half if you're cooking for one or don't want leftovers!


PUPUSAS DE QUESO Y FRIJOLES REFRITOS

5 cups masa harina flour
4 cups water
1 cup canned gluten-free, vegetarian refried beans
1 1/2 cups cotija, grated (or other hard, mild white cheese)
1 1/2 cups monterey jack or other meltable white cheese, grated
Vegetable oil

In a medium bowl, mix the two cheeses together and set aside. Pour masa harina into a large mixing bowl. Pour the water in slowly, kneading with your hands. Add water a tablespoon at a time until the dough forms a cohesive ball. The dough should be dry enough to handle but moist enough that it doesn't crack at the edges when you press down on it. Allow dough to rest for 10 minutes.

Take a small handful of dough and roll it into a ball about the size of an egg or a little smaller. Flatten it between your palms until it is about 1/3 inch thick. For cheese and bean pupusas, put a generous pinch of cheese and a heaping 1/2 teaspoon of refried beans at the center of the disk of dough. For cheese-only pupusas, use more of the cheese. Beans-only pupusas can take about a teaspoon of beans. After placing the filling at the center of the pupusa, fold the edges in carefully until they meet at the top and the filling is completely covered. Roll carefully into a ball again, this time with the filling hidden inside. Now flatten again between your hands until the ball becomes as flat and thin as possible without the filling seeping out (you can perform this step with a tortilla press if you have one). Ideally they should be about 1/4" to 1/2" thick. Repair any holes to make sure no filling is visible.

Brush a griddle or heavy skillet lightly with vegetable oil and place over medium-high heat. Place each pupusa carefully on the hot griddle. Cook 3-4 minutes on each side or until lightly browned and beginning to blister. Serve hot, topped with curtido or salsa. Leftovers can be refrigerated and heated up at 300 degrees in an oven or toaster oven.


CURTIDO DE REPOLLO

1 head green cabbage
1 cup apple cider vinegar or distilled white vinegar
1/2 cup water
1 medium onion
2 large carrots
1 teaspoon salt
2 teaspoons olive oil
1 1/2 teaspoons oregano
1 teaspoon cayenne pepper
1 teaspoon cumin
1 teaspoon brown sugar (optional)

Using a hand-grater or the grater attachment of your food processor, shred cabbage, carrots and onion. Combine all ingredients in a large mixing bowl. Use the back of a wooden spoon to press all the ingredients down so they are submerged in liquid. Allow to rest at room temperature or in the refrigerator for at least 4-6 hours before serving. Serve with pupusas, or as a topping for fish, quesadillas, or black beans. Makes 10-12 servings.

*Edited 3/09 to add: Because I keep kosher more strictly than I did when I originally wrote this post, and I have yet to find cotija or any similar cheese that is hekshered with a reliable kosher certification, I have been making this with just jack cheese now, and it's great. In fact, I think any mild, hard white, meltable cheese will work well.

Saturday, January 06, 2007

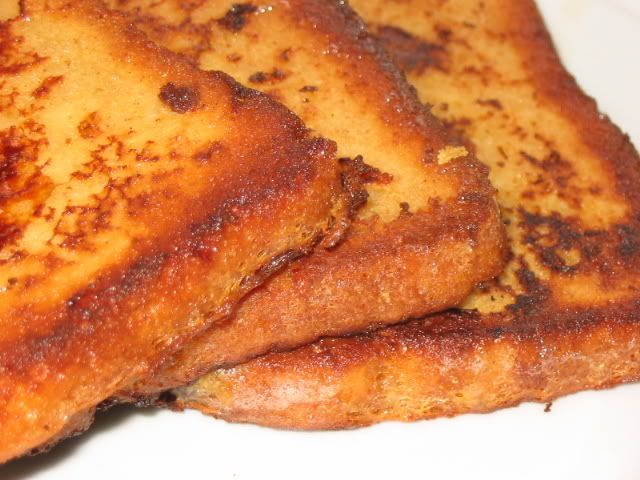
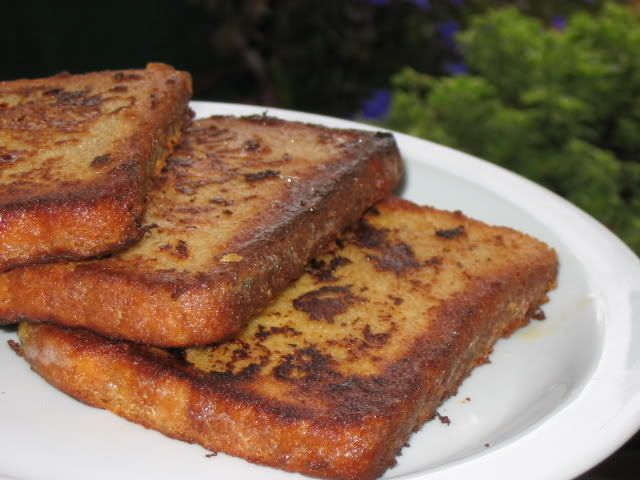
My Favorite French Toast [Gluten-Free, Lactose-Free & Casein-Free]


Do you have a loaf of gluten-free bread that is stale? No problem. Gummy? No worries. Dry? Great. Hard as a rock? Perfect! Believe it or not, some of those subpar store-bought gluten-free breads work perfectly for french toast. They sop up the eggy mixture and transform into a breakfast delicacy you can top with fruit preserves, fresh fruit, or maple syrup. The french toast pictured above is prepared with Food for Life's Brown Rice Bread, which I bought at the Trader Joe's. It tastes fabulous when prepared with ghee (which is Indian clarified butter that has all the lactose and casein removed). The ghee imparts a rich, nutty flavor. Extra egg mixture will store for several days. Bon appetit!

GLUTEN-FREE FRENCH TOAST (Casein & Lactose Free)

4 slices gluten free bread
2 medium eggs
2 tablespoons orange juice
1/4 cup almond milk or rice milk or soy milk (plain or vanilla)
1/4 teaspoon cinnamon
1/8 teaspoon nutmeg
1/4 teaspoon salt
1/4 teaspoon vanilla extract
1 tablespoon ghee, clarified butter or margarine
Optional: 2 teaspoons honey

In a pie pan or small baking dish, whisk together all ingredients except ghee/butter/margarine and bread. Heat ghee, butter or margarine in non-stick pan or griddle over medium-high heat. If you're using a dense bread, such as those from Food for Life, Soak for 4-5 minutes on each side. If you're using a homemade bread or a softer or more crumbly bread, soak for only 1-2 minutes on each side. Using a fork or tongs, remove each slice of bread from the liquid and allow excess liquid to drip off. Place in hot ghee/butter/margarine and cook on each side until browned. Serve immediately with maple syrup, jam and/or fresh fruit.

Sunday, October 08, 2006

The joy of the socca

Oh, the joy of the socca! Much as I love coming up with creative gluten-free substitutions for gluten-containing foods... There's always a certain pleasure discovering foods that were meant to be gluten-free, that were originally designed around non-gluten ingredients. Such is the case of the socca, a savory pizza-like flatbread from Southeastern France. This Provencal pancake is made from garbanzo bean flour and is so easy to make. It can be eaten alone or topped with any number of ingredients. Serve soccas with any kind of savory topping you like - Try them with tapenade, ratatouille, or sauteed vegetables and herbs.

I figured it was time to make my own, so I did. It was remarkably simple and required very few ingredients. It started out looking like this:

socca
A plain socca = a blank palette!

socca
The finished product.


I couldn't wait to eat it up so I cut it in quarters with a pizza cutter.

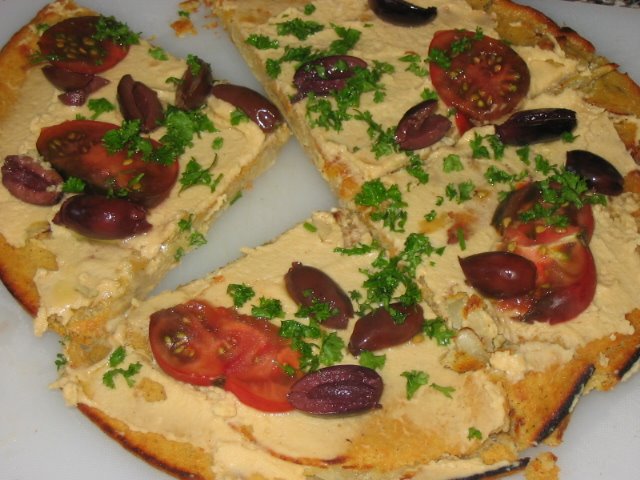
As you can see I topped this baby with home-made hummus, kalamata olives and heirloom tomatoes and parsley from my garden. Eventually I hope to attempt to try variations with fish and tapenade. A sauteed vegetable topping is also in order. Try this recipe with similar toppings, and then riff of it to create your own variations.


Socca [Provencal Savory Chickpea Pancake]

Adapted from a recipe by Mark Bittman of the New York Times.

1 cup chickpea flour
1/2 teaspoon salt
1/2 teaspoon pepper
1 cup warm water
3 tabelspoons olive oil
1/2 medium onion, thinly sliced
1/2 tablespoon minced fresh rosemary leaves

  1. Place heavy (preferably cast-iron) skillet in oven and preheat to 450 F.
  2. In a large bowl, sift chickpea flour, pepper and salt together. After sifting, add rosemary leaves if desired.
  3. Whisk in warm water and 2 tbsp olive oil.
  4. Cover the bowl and allow the batter set for at least 30 minutes, add sliced onion to the batter, which should have the consistency of thick cream.
  5. Remove skillet from oven. Add 1/2 tbsp olive oil to the hot pan, pour batter into pan and bake for 12-15 minutes or until the pancake is firm and the edges are set.
  6. Set socca a few inches below your broiler for a few minutes, just long enough to brown it in spots. Cut into wedges and serve hot, with toppings of your choice.