KOSHER RECIPES FOR GLUTEN-FREE LIVING


Showing posts with label recipes. Show all posts

Friday, February 26, 2010

A New Gluten-Free Hamantaschen Recipe for Purim 2010! (Plus bonus cookies)

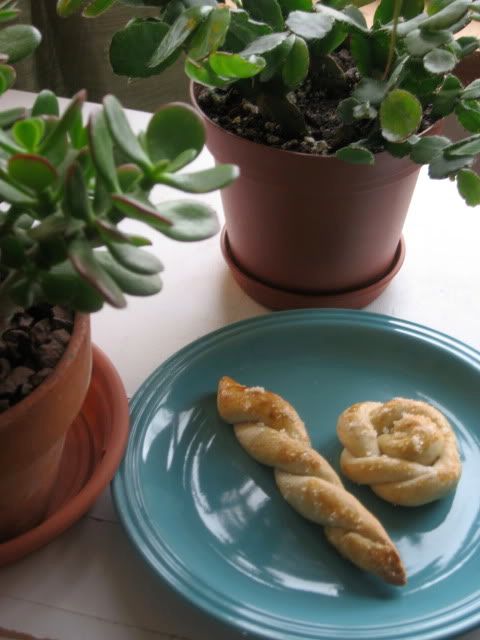
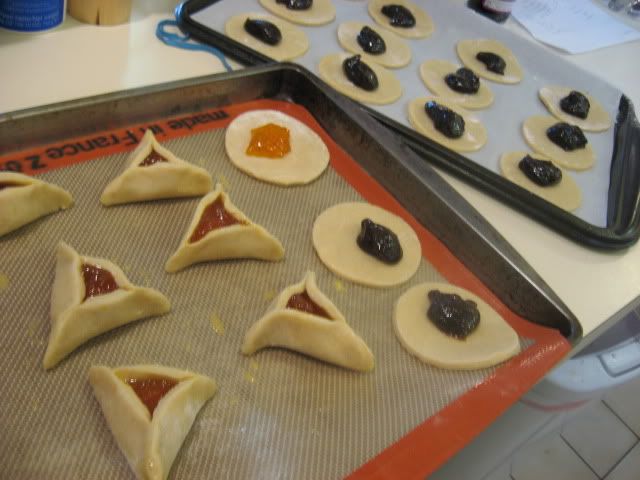
Purim just isn't complete without the delicious triangular purim cookies we call hamantaschen. I love my original gluten-free hamantaschen recipe, which is made with agave nectar instead of refined sugar, but it's a little too cakey for some people. Today I tried my hand at revising the recipe to make the cookie a bit more crisp, more like a sugar cookie in its consistency. Did it work? Well, these are certainly more crisp than the original recipe. They're still more cakey than the crisp style some people prefer, so I'll try again next year... but I think they're tasty and I hope you do, too. I used apricot jam in some and lekvar (a/k/a prune butter or prune pastry filling) in others. They use regular sugar. They're also nut-free, and if you want to make them dairy-free I am guessing they'd be quite fine with margarine instead of butter. One perk of this recipe is that the dough is very, very easy to handle. When I had a little dough left over, I twisted it up into various shapes which you can see in the photo below the recipe.

Chag sameach! Happy purim!

BEFORE:


AFTER:


HAMANTASCHEN - VERSION #2

[Gluten-Free / Nut-Free / Soy-Free ]


1 stick (8 tbsp) salted butter, softened
3/4 cup sugar
1 large egg
2 Tbsp lemon juice
1 heaping tsp lemon zest
1 tsp vanilla extract
1/2 tsp salt
1 cup sorghum flour
1 cup white rice flour (finely milled)
1/4 cup tapioca starch
3/4 cup potato starch
2 Tbsp corn starch
1 1/2 tsp xanthan gum
1 additional egg, beaten well and set aside

With an electric hand mixer, or in the bowl of a standing mixer, cream the butter with the sugar.
Add the unbeaten egg, lemon juice, lemon zest and vanilla and continue combining.

In a separate bowl, combine all dry ingredients. Slowly add the dry mixture into the liquid mixture. Mix until combined into a cohesive ball of dough. Refrigerate for 2 hours or overnight.

Preheat oven to 350 F. Line two cookie sheets with parchment paper. Flour a counter or other surface thoroughly. Remove dough from refrigerator and immediately roll into a ball and roll the ball in flour before placing it on the floured counter. Roll out until 1/4" to 1/8" thickness.

Using a juice glass or biscuit cutter, cut into 3-4" circles. Immediately move dough circles to parchment-lined cookie sheets. Use a pastry scraper to gently transfer the disks of dough. Place approximately 1 teaspoon of filling (apricot preserves, lekvar, poppyseed filling, raspberry jam, etc) in the center of each circle.

Using a pastry brush, apply well-beaten egg to the perimeter of each dough circle and immediately fold 3 sides of circle together so that the cookie becomes a triangle, and pinch corners to seal. Seal completely and firmly, using beaten egg so they do not come apart in baking. The final cookie should look like a triangle with the filling showing through only at the center. Use the remaining beaten egg to lightly brush the top of each pastry.

Bake at 350 F for 22-28 minutes or until golden on top with some slightly browned areas (the more browned, the crisper the cookie - but be careful not to burn!) Allow to cool slightly before serving or transferring to cooling rack.

Makes approximately 24-28 cookies.


GOT LEFTOVER DOUGH? HERE'S AN IDEA:

Tuesday, January 12, 2010

Mushroom & Leek Risotto


I am in love with this new recipe I made on Friday night by combining and adapting two different recipes. It's terrific! So filling, too.

Six things that surprised me about this risotto:

1) It tastes like it was made with chicken stock, even though it's totally vegetarian
2) It tastes like it's made with heavy cream, even though there's no milk in it at all (the only dairy is cheese, and that's optional). It really tastes like there's massive amounts of milk and cheese, but there's not.
3) It is really good cold! I ate it for breakfast this morning and it was wonderful.
4) I realized while cooking and eating it that it could easily be made without the cheese and would be almost as good, so with a few changes (noted in the ingredient list) it could be a great dish for vegans, dairy-allergic folks and anyone who needs a pareve dish.
5) It doesn't need to be a side dish - It makes a great main dish, too! We had it as the main part of our meal.
6) Making the rice itself was quick. It took no more than 20 or 25 minutes. I had imagined it would take forever, but it didn't.

Some tips: I call for you to saute the mushrooms and leeks in a separate pan but if you want you can saute them in the pot you'll be making the risotto in, and just remove them and set them aside in a bowl while you saute the onion and make the rice. This will save you a dirty pot, but it'll create a dirty bowl... Your choice!

Use the most flavorful vegetable stock you can get your hands on. I used Imagine Foods Vegetable Cooking Stock because it's richer than the regular boxed vegetable stock. You could also use homemade vegetable stock (if you don't have your own recipe, try my VictoriousVegetable Stock). For white wine, I used Kedem White Cooking Wine since it's so much cheaper than buying a bottle of real white wine. But skip that shaker of dried-up parmesan cheese! Stick to the real shredded stuff, or just do without.


MUSHROOM & LEEK RISOTTO

[Gluten-Free / Vegetarian / Vegan & Dairy-Free Option ]

4 Tbsp butter or dairy-free margarine
1 large or 2 small leeks, sliced (only white & light green sections)
1 lbs crimini ("baby bella") mushrooms, sliced
2 Tbsp extra virgin olive oil
1/2 small yellow onion, diced finely
4 garlic cloves, minced
Salt & fresh ground black pepper, to taste
1 cup arborio rice
3 cups rich vegetable stock
1/2 cup white wine
1/2 cup water
Optional: 1/2 cup freshly shredded parmesan (plus additional to garnish)

In a saute pan, melt butter (or margarine if you want it to be dairy-free) over medium heat. Add leeks, and saute until they begin to become tender. Add mushrooms. Continue to sautee until both mushrooms and leeks are tender and leeks begin to brown just slightly. Remove from heat and set aside.

In a small pot or saucepan, combine vegetable stock, water and white wine and cook until they simmer. Cover and keep over low heat so the mixture stays hot.

In a medium pot, heat the olive oil over medium heat. Add the onion and garlic and saute until soft. Add salt and fresh ground black pepper. Stir in the arborio rice and cook for 1-2 minutes, stirring to make sure the rice becomes coated in the oil. Stir in the rice and cook 1 minute, coating rice with the oil.

Add one cup of the hot stock-wine-water mixture and allow to simmer until the liquid is mostly absorbed (there will still be some visible but when you stir it you should see that it's very thick and most has been absorbed by the rice). Stir very frequently to avoid sticking.

Add the rest of the liquid, a cup at a time, waiting each time until the liquid is absorbed by the rice.

Taste regularly to gauge doneness, as the risotto should have a creamy consistency but each grain of rice should remain a bit chewy at the center. The rice grains should not themselves be mushy. If the last of the liquid's been absorbed and the rice is still undercooked you may add additional hot water, stock or wine. Stir in the cheese and the mushroom-leek mixture, and adjust salt and pepper to taste. Serve immediately, garnished with additional shredded cheese if desired.

Sunday, October 25, 2009

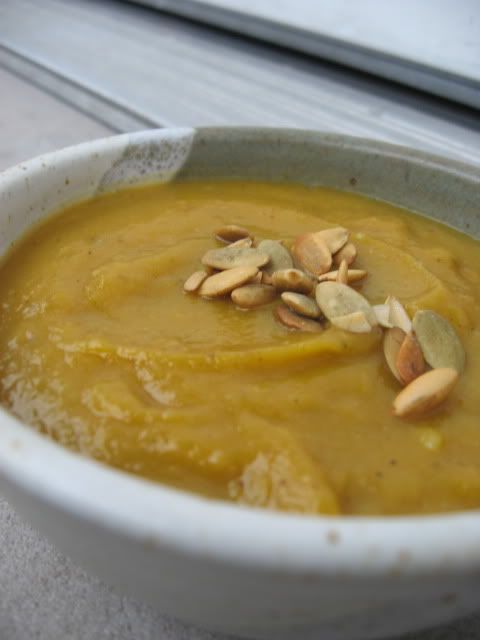
Creamy Butternut Squash and Parsnip Soup [Vegan & Pareve]

Here I am to apologize for yet another long absence from blogging, dear loyal readers. Being a full-time dietetics student is taking a lot out of me, combined with chronic health issues that have been wearing me down. I miss blogging regularly, I really do. I miss having a real back-and-forth with my readers and the excitement of trying and posting new recipes and photos all the time. Fortunately, I'm finally starting to feel way better. It's also autumn, which always makes me want to cook and bake. I made an amibitious and wonderful feast for Shabbos last week. I was recovering from a root canal (what fun) so I focused on soft, easy-to-chew foods. We had butter beans sauteed with fresh rosemary, white wine, red pepper flakes and onions (a perennial favorite of ours)... mashed potatoes... spinach sauteed with lemon zest and garlic... and though I rarely make dessert, I actually made two! We had baked apples... and a crumb cake made from Gluten-Free Pantry's Coffee Cake Mix, which was out of this world!

But the highlight of the meal wasn't the decadent dessert, it was the homeade Creamy Butternut Squash & Parsnip Soup. We are both big fans of Pacific Natural Foods' Organic Creamy Butternut Squash Soup and Imagine Foods' Organic Creamy Butternut Squash Soup, which are both kosher (pareve), vegan and gluten-free. We always keep a few containers in the house and eat this otherwise dairy-free soup with a little low-fat sour cream (or my vegan cashew sour cream) and some spicy toasted pumpkin seeds on top - I find it's a healthy and easy way to make a salad or other light fare into a real meal. Soup is also great to fill up on when you're watching your caloric intake, as it's very filling. It is often low in calories, especially if you avoid cream-based or meat-based soups.

I decided to try making butternut squash from scratch for the first time ever, this time around. I wanted to do something a little different, and at the market the parsnips looked fat and wonderful so I decided to give them a shot. The soup turned out to be fantastic, with a perfect swirl of sweet and savory flavors, and I hope some of you will try it out and let me know if you agree. It's got a little kick to it, so reduce the cayenne if you're not into that. It would be perfect for Thanksgiving. It has a thick and creamy consistency but if you like yours a bit thinner, just add more broth, rice milk or water. I haven't frozen it yet but from my experience freezing soups, this one should freeze quite nicely.

Though homemade is always the best, there are times when we can't cook soup from scratch. For those occasions, there happens to be a promotion right now where if you order Imagine Foods' Creamy Butternut Squash Soup through the link I provided you can save 15% if you enter the code HAINGF25 at checkout. [Plus, save an additional 15% when you combine the instant rebate with your Subscribe & Save order--bringing your total savings to 30%. Offer valid through October 31, 2009].

Happy fall!


CREAMY BUTTERNUT SQUASH & PARSNIP SOUP
[Gluten-Free / Dairy-Free / Soy-Free / Vegan / Pareve ]

Yield: About 10 servings


3 Tbsp extra virgin olive oil
3 lbs of cleaned, trimmed butternut squash (approx. 2 medium squash)
2 large parsnips, peeled
2 medium onions, peeled & roughly chopped
5 cloves garlic, peeled & minced
1-3 sprigs of fresh thyme
4 cups vegetable broth (if I don't have homemade I use this kind)
2" piece of fresh ginger root, peeled and sliced
1/2 tsp ground cinnamon
1/4 tsp ground nutmeg
A pinch of ground cloves
1 tsp onion powder
1 tsp garlic powder
1/2 tsp cayenne (optional)
1/4 cup amber agave nectar (or other sweetener)
2 tsp sea salt
2 tsp ground black pepper
1 tsp rubbed sage
1 1/2 cup rice milk

Cut cleaned, trimmed butternut squash into chunks or slices (about 1 1/2" in size, maximum). Slice peeled parsnips into 1/2" slices. Remove thyme leaves from woody stalks. Discard all but the leaves.

Heat large soup pot over medium-high heat. Add olive oil. When the olive oil is hot, add onion and sautee until it begins to brown. Add garlic, squash, parsnip and thyme. Stir and sautee for 2-3 minutes. Add vegetable broth, ginger and all spices and herbs. Vegetables should be almost covered by vegetable broth, but it's fine if they're not completely covered. Bring to a boil, cover and cook on medium heat until the squash and parsnips are soft.

Once the vegetables are soft, turn off heat, mix in rice milk, and allow to cool a bit (I transfered the soup to a bowl to allow it to cool more quickly). Once it's cool enough to blend safely, either use an immersion blender to puree or carefully blend in a regular blender. If you use a regular blender and the soup is still warm or hot, do not fill more than half way - Blend in batches, and as you blend each batch return it to the pot on the stove. You can reheat the soup over low or medium-low heat before serving, if necessary. Add more rice milk or vegetable broth if you prefer a thinner consistency.
This soup reheats well after freezing or refrigeration. Using a double-boiler or a heat diffuser, or adding a little extra liquid, will help avoid scorching when you reheat.

Serve plain or garnish with sour cream, vegan sour cream substitute and/or toasted pumpkin seeds.

Thursday, June 11, 2009

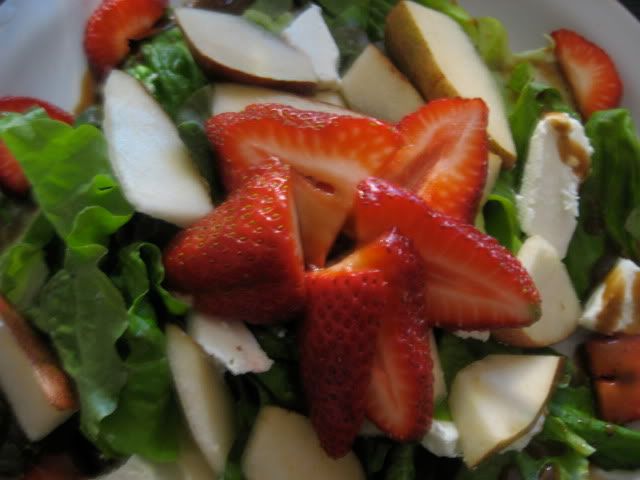
Un-Cooking: Strawberry-Pear Salad with Goat Cheese


I just posted one of my partner Rochel's recipes and I thought I'd share another. I feel silly posting this as a recipe because it is is less of a recipe than a list of ingredients, but it's so addictively tasty that I wanted to share it with you all. We make this with inexpensive kosher goat cheese we buy a huge log of for around $4 at Costco.

STRAWBERRY-PEAR SALAD WITH GOAT CHEESE


[ Gluten-Free / Vegetarian / Soy-Free ]


Romaine lettuce, chopped or Boston lettuce, torn
Ripe pear, sliced
Strawberries, sliced
Goat cheese
Balsamic vinaigrette (balsamic vinegar, extra-virgin olive oil, black pepper, a little dijon mustard and some raspberry jam or pomegranate juice to sweeten it a bit)
Optional: Pecans

On each plate put a generous amount of romaine lettuce, then arrange strawberries, pear slices and slices of goat cheese in an attractive way. Sprinkle with pecans (optional) and drizzle with dressing right before serving.

Wednesday, December 31, 2008

Moroccan Cauliflower Recipe + A "Specific Carbohydrate Diet" Cookbook Review


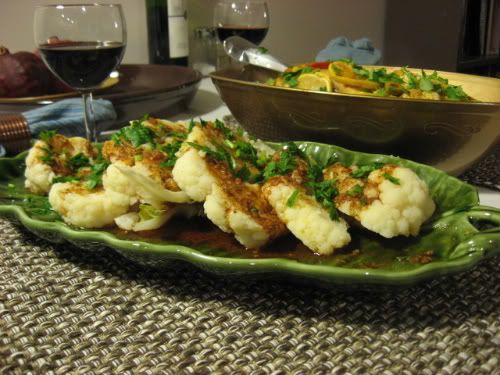
[Photo: My New Year's Eve Dinner Table]

We decided to spend a relaxed New Year's Eve at home, with a movie, a bottle of wine, and a home-cooked Moroccan feast for two. What better opportunity to crack open some cookbooks I haven't yet used? Seeing as my partner has re-started the South Beach Diet and I'm doing my own low-glycemic food thang, the first book I went to was Eat Well Feel Well by Kendall Conrad. This is a book of recipes that comply with the Specific Carbohydrate Diet.

One of the perks of being a food blogger is having publishers send you new cookbooks to look at. Unfortunately I am way behind on cookbook reviews, so many months after receiving this book from Clarkson Potter Publishers, I'm finally getting around to using it, perusing it, and sharing my feedback here. I was won over by the beautiful color photographs in the center of the book. I must admit I have a serious aversion to cookbooks that don't have full-color photos, so the photo section of this book was a real plus. The Specific Carbohydrate Diet is used to treat sensitive tummies as well as guts that have been damaged by Crohn's disease, ulcerative colitis, celiac disease, irritable bowel syndrome, diverticulities, etc. Celiacs and gluten intolerant folks who eat a strictly gluten-free diet usually find that their guts eventually heal and are generally able to tolerate any non-gluten foods after the healing period is over. However, many of us have multiple food allergies or other digestive disorders. Others find that they continue to be sensitive to a variety of foods and have trouble with digestion long after they are gluten-free, due to damage to their digestive tract. A small number of people find that they simply cannot digest grains at all, and that non-gluten grains make them almost as ill as gluten-containing grains. This cookbook is based on the diet described in the book Breaking the Vicious Cycle: Intestinal Healing Through Diet by Elaine Gottschall, which is the bible of the Specific Carbohydrate Diet (SCD). The diet eliminates "virtually all starch and complex sugars" and features a balance of "smart carbohydrates, good proteins and fats, and essential vitamins and minerals." It is grain-free. No unfermented / un-aged dairy products are allowed so the diet is lighter on dairy than most. This way of eating has helped many people recover from life-threatening digestive disorders.

The difficulty of digesting grains has been explored in other books over the years, such as Against the Grain by Melissa Smith. I don't personally feel a need to eat this way, but many if not most of these recipes are also low-glycemic and low-carbohydrate and therefore fit well into my household's meal plans. Best of all they don't reflect deprivation, but rather an enjoyment of the plentiful healthy gut-friendly foods available at the farmer's market or grocery store. There are grain-free recipes for everything from grain-free Cashew Butter Tortillas to Peach Pocket Pies, and from Shepherd's Pie with Mashed Cauliflower to Tom Yum Kai with Coconut Milk & Lemongrass Infusion.

Tonight I tried my first recipe from the book, which was Moroccan Cauliflower. While it was the photo that first caught my eye, I was also intrigued by the unusual (or at least new to me) method used for cooking cauliflower. Although my favorite method for cooking cauliflower is roasting it, I think this will be my new cauliflower technique for when times is short or I'm trying to reduce the fat in a dish. By steaming the entire head of cauliflower without cutting it first, it avoids all the wasted little cauliflower bits that litter the cutting board when you try to cut a raw cauliflower into florets, because it's far easier and neater to slice a whole head of cauliflower when it's cooked. The presentation of this dish is lovely, and it might even convince one of those notorious cauliflower haters to reconsider.

Here is my adaptation of the recipe from Eat Well Feel Well. I hope you enjoy it, and have a fabulous, healthy and safe New Year!


MOROCCAN CAULIFLOWER

Adapted from Eat Well Feel Well by Kendall Conrad.


[ Gluten-Free / Dairy-Free / Pareve / Vegan / Soy-Free ]

1 medium head cauliflower
1 tsp paprika
1 tsp ground cumin
1/8 tsp ground cinnamon
1/4 tsp ground ginger
1/4 cup extra-virgin olive oil
2 Tbsp freshly squeezed lemon juice
2 cloves garlic, crushed (use frozen garlic if raw garlic is too sharp for you)
1 tsp fine sea salt or table salt
1 tsp freshly ground black pepper
1/4 cup chopped flat-leaf parsley

Trim the stalk of the cauliflower to the base, removing all leaves except the smaller green leaves closest to the head. Fill a pot with half an inch of water, place whole head of cauliflower in it (stem side down), and cover with a lid. Simmer on medium heat for 10-20 minutes (will vary depending on size of head, I had to simmer a medium head for about 15) until the desired tenderness. Remove from pot immediately, transferring to a cutting board or serving platter.

While cooking the cauliflower, whisk together the oil, lemon juice, garlic, salt and pepper. Lightly toast the ginger, paprika, cumin and cinnamon over medium-low heat in a small pan for 3-5 minutes or until fragrant. Remove from heat and whisk into the liquid mixture, combining thoroughly.

Cut the cauliflower in 1/2-inch thick slices, transfer to a serving platter and drizzle all of the spiced oil over the slices. Sprinkle with the chopped parsley and serve hot or warm.

OTHER CAULIFLOWER RECIPES:

NOTE: Some of the links in this post are affiliate links, which means if you click through the link and purchase something from the site I will receive a small commission that helps me pay for the costs incurred from running this website.

Sunday, September 14, 2008

The Quest for the Best Gluten-Free Cholent

rival crock-pot versaware pro crockpot slow-cooker

This shabbos, I finally found one of the holy grails of kosher gluten-free cooking - A fantastic gluten-free cholent. I crafted this Ashkenazi/Sephardi fusion cholent by accident, really. Cholent is a stew that cooks slowly in a crockpot during Shabbos (the Jewish sabbath, during which observant Jews do not light or extinguish fires or electricity) without being stirred or having the heat adjusted in any way. It's the ultimate in low-maintenance cooking, since you just add a bunch of ingredients to the crockpot and let them cook overnight with no interference. People who've never tried slow cooking in a crockpot might think that all the ingredients would be mush after so much cooking - Strangely enough, vegetables tend to retain their shape and stay fairly firm during crockpot cooking. The meat, which should preferably be from a tougher cut (tough cuts do best with slow cooking in liquid), will become deliciously tender and fall apart when you stick your fork into it. Ashkenazi cholent is usually made with barley or wheat berries, neither of which people with celiac disease or gluten intolerance can eat. But you won't miss the grains with this cholent, as it's unbelievably flavorful and has a variety of textures.

The Sephardi influence on this dish is the use of spices and flavorings that you wouldn't normally find in an Ashkenazi cholent (paprika, lots of garlic, turmeric), as well as the optional addition of whole in-the-shell eggs which become hardboiled over the course of the slow-cooking process. This is a little more decadent and a little more healthy than your average cholent. It wouldn't be an exaggeration to say that this dish has completely changed my conception of cholent. It's heavy but doesn't sit in your stomach like a rock, as some cholent does. My partner is a cholent-eating afficionado and she gave this one two thumbs up.

I sauteed the meat to brown it about 1/2 hour before candlelighting on Friday (a little before 7) and then transferred it, along with all the other ingredients, to the crockpot. My crockpot (pictured above) automatically switches to its warm setting as soon as the cooking time you set it for is done - So at about 7 in the morning on Saturday it switched over, and we ate it at 12:30 PM. It was hot, and perfectly cooked. We ate the leftovers for lunch today and my partner mentioned that this was the first time she'd had the desire to eat leftover cholent. But then again, this is no ordinary cholent!

A little disclaimer: I call for "powdered gluten-free onion soup, vegetable or chicken soup mix." Most kosher soup mixes have MSG in them. That's part of what makes them so tasty. I generally refuse to purchase or consume anything with MSG. But this is my exception. It's my little vice, I guess. If you must avoid MSG at all costs, you can use a couple of gluten-free MSG-free bouillon cubes instead. I've found a kosher, gluten-free brand called Bloch's Best that has no MSG. It's imported from Europe - I found it at Natural Spot in Teaneck. They won't be quite as flavorful as the mixes with MSG, so if you like you can use more salt and more spices and a little more white wine to make up for it.

If you don't have a slow-cooker you can still make this dish - Bring the ingredients to a boil, reduce to a simmer, then right before shabbos cover the pot very tightly and either simmer over a low flame all night, or have it cook in the oven on a low setting.

I will be happy if thise recipe helps just one other gluten-free Jew have more joyful and delicious shabbos... and even happier if some non-Jews and/or non-celiacs will discover this as a new way to prepare a filling one-pot meal.

GLUTEN-FREE CROCKPOT
CHOLENT / HAMIN


A Slow-Cooked Meat & Bean Stew for Shabbos and Every Day

[ Gluten-Free / Dairy-Free / Soy-Free ]

1 Tbsp vegetable oil
1 lb to 1 1/2 lbs cholent meat / stew beef
1 onion cut into chunks
2 cups dry cholent bean mix or any combination of pinto beans, cranberry beans, white beans and/or kidney beans
3 Tbsp powdered gluten-free onion soup, vegetable or chicken soup mix*
1 or 2 carrots cut into 1" slices
5 medium yukon gold potatoes, unpeeled, cut in half
2 large sweet potatoes, peeled, cut in quarters
1 cup sliced white mushrooms
5-10 cloves of garlic, chopped roughly or sliced
1 tsp turmeric
2 tsp smoked paprika
2 bay leaves
1 tsp salt
1 tsp ground black pepper
Optional: Generous dash of white wine
Optional: 2-4 uncooked eggs in their shells

[*I use Osem's pareve, vegetarian, kosher-for-Passover "Chicken Style Consomme Instant Soup & Seasoning Mix" which is gluten-free. I purchase it at Passover to last me year-round since the rest of the year their formula includes gluten.]


In a pan, or in the ceramic liner of your crockpot (if it's the type that can be removed from the element and used like a pot on the stove) heat 1 Tbsp vegetable oil over medium heat. Add onions and sautee for 2-3 minutes. Add meat and cook only until browned on the outside. Move onion and meat mixture into the crockpot (or move your ceramic liner back onto the heating element of the crockpot). Set it so that it will cook on low for 12 hours and then switch to its warm setting.

Add dry (unsoaked) beans, then potatoes. Add all of the rest of the ingredients except for the eggs, distributing ingredients as evenly as possible. Make sure the meat won't touch the lid of the crockpot. Nestle eggs carefully on top of other ingredients. Pour water into the crockpot until it covers everything. Put the lid on, making sure it fits securely so that steam doesn't escape (use a layer of tin foil underneath if necessary).

Do not stir the cholent until you are ready to eat it, at which point you can remove the eggs so that you don't crack their shells, and stir it VERY gently.

Serve in bowls, topped with the now-hardboiled eggs (if you included them). If you've warmed your favorite gluten-free bread or challah on the top of the crockpot you can use it to sop up the stew.

NOTE: This recipe is for a 6-quart crockpot. For a smaller crockpot, reduce all the quantities slightly. No exact measurements are necessary for this recipe.

Friday, July 18, 2008

Cabbage Salad with Lime and Fresh Oregano, and a side of Big News!


Our new apartment is coming together slowly but surely. Merging two people and all their respective stuff into one apartment and a shared life is quite a project. I am loving living in a spacious apartment with hardwood floors and walls painted lovely colors. I am also really digging the endless cabinet and counter space in our new kitchen (still unpainted and far from ready for a photo op!) New Jersey life is treating me pretty well, considering how ill-suited I am to suburbia.

I have a piece of news that I am sharing with some butterflies in my stomach:

I got accepted to the school I applied to, to become a Nutrition & Food Science major with a concentration in Dietetics! It's an ADA-approved program to set me on track to becoming, G-d willing, a Registered Dietitian. I am pretty darn scared but also very excited. Gonna be a full-time student for the first time in many years. It'll be an intense few years 'til I finish my degree, let me tell you. Anatomy & physiology, organic chemistry and microbiology, oh my.

It was 96 degrees today and our air conditioner is/was broken. It's been repaired but is taking a long time to get our second-floor-and-right-above-a-pizza-place apartment back to a bearable temperature. So I decided to do minimal cooking.

It's hot, my back hurts, and my partner is on the South Beach Diet. So this is tonight's menu for a laid-back shabbos (sabbath) for just the two of us:
  • Ground turkey tacos on corn tortillas, with black beans, homemade salsa fresca, fresh guacamole and dairy-free/pareve sour cream (Tofutti, since there's no time to make it from scratch).
  • A delicious looking Rioja wine from the fantastic kosher wine section at the ShopRite liquor store in Englewood.
  • Cabbage salad made from the hugest cabbage I've ever seen.
  • Sugar-free ice pops.
Nothing fancy. For tomorrow's lunch we'll have salad with quinoa topped with roasted beets and carrots, and some feta cheese.

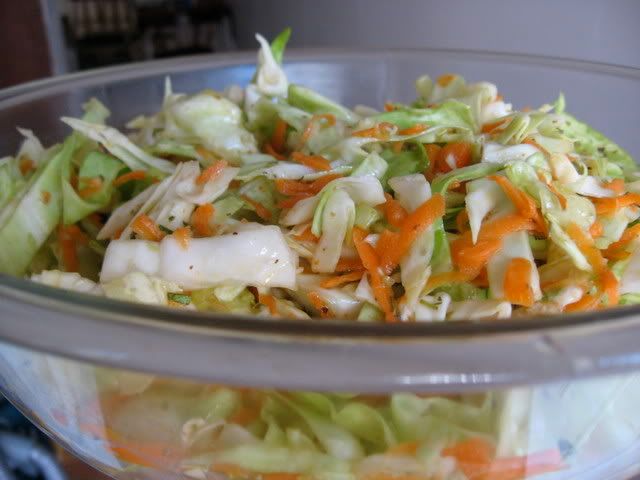
Here's a recipe for the cabbage salad I made. It's a quick, light, no-cooking recipe with lots of flavor. A great crunchy topping for tacos or a side dish for any meal, especially a spicy summer meal. It's not so different from the curtido de repollo I posted as a topping for homemade pupusas, but I made some alterations that give it its own crunchy identity. Like most cabbage salads, it should get tastier by the day so I made enough that my partner will be able to take some with her to work on Monday for lunch.


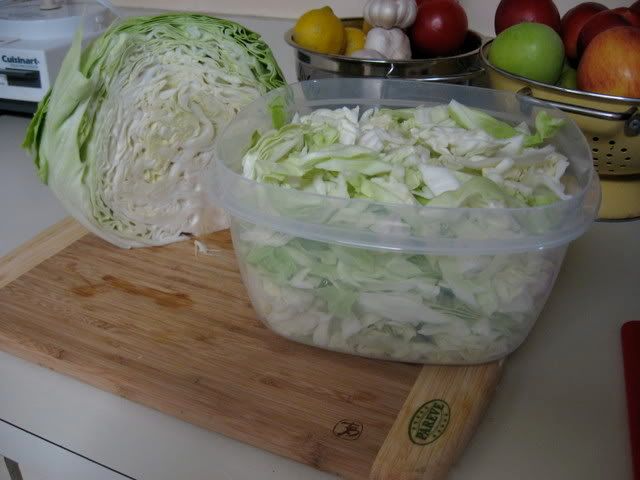
The picture above is of the cabbage I used, which is the biggest cabbage I've ever seen. I picked up for $1.50 at the Englewood Farmer's Market today from a local farmer. Good grief, this thing is huge! I don't know if the picture really conveys its hugeness, but I took this pic to show how half the cabbage filled up the biggest, gigantic-est tupperware we have. It was about twice the size of my head, and will easily feed us for two weeks. To be realistic, I've called for one medium cabbage in this recipe, even though in my case it was really 1/2 a mutant cabbage.


Enjoy! Gut shabbos.

CABBAGE SALAD WITH LIME AND FRESH OREGANO

[Gluten-Free / Dairy-Free / Pareve / Vegan / Soy-Free ]

1 medium cabbage, shredded or chopped into small pieces
3-4 carrots, shredded
2-3 Tbsp fresh oregano leaves
1/2 tsp salt
1/2 tsp cumin
1/4 tsp cayenne
1/4 tsp ground coriander
1/4 cup extra virgin olive oil
1/4 cup apple cider vinegar
2 limes, juiced
2 tsp agave nectar or honey

Mix all liquid ingredients and spices (except fresh oregano) in a small container. In a large bowl, combine cabbage, carrots, and oregano. Drizzle the liquid/spice combination on top of the vegetables, mixing frequently. Cover and refrigerate for 2-4 hours before serving cold or at room temperature.

Wednesday, April 16, 2008

Gluten-Free Passover Links for 2008

Dear friends, I am so very sorry that I have not had the time to do a real 2008 redux of the Great Gluten-Free Passover Roundup of 2007. Though I'm happy to say, last year's post is still every bit as relevant this year. Recipes don't age into oblivion like so many things in our world do, gratefully. Since I don't want to let the days slip into Passover without pointing new visitors in the direction of some gluten-free Pesach resources, I thought I'd quickly throw together a list of links that I hope will be helpful to new and old readers alike.

If you are not Jewish and are gluten-free... Good grief, people, what are you waiting for? Get thee to a kosher grocery store! This is the time of year to stock up on gluten-free delicacies, from blintzes (I have two packages in my freezer and can't wait to try them) to croutons to seven-layer cakes. Specifically, look for the label "non-gebrokts" to find products not made with matzo meal, and if a non-gebrokts product isn't also marked gluten-free (or even if it is) contact the company to verify gluten-free status to avoid potential cross-contamination from products made with matzo on the same line. The days after Passover are often a good time to get these items on sale, too.

I hope next year I will have more time and less stress around the holidays and be able to wow you with some new recipes, but for the time being, have a healthy and happy Passover.

Chag sameach!

GLUTEN-FREE PASSOVER LINKS

RECIPES

INFORMATION, PRODUCTS AND MORE

Thursday, April 10, 2008

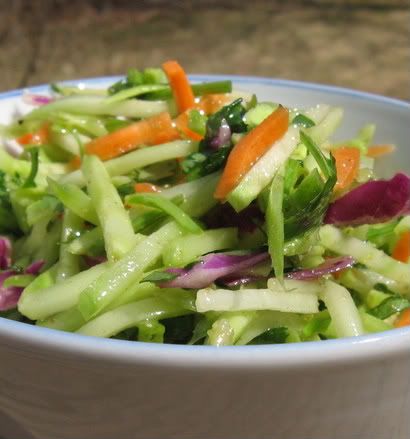
Quick & Easy Cilantro-Lime Broccoli Slaw


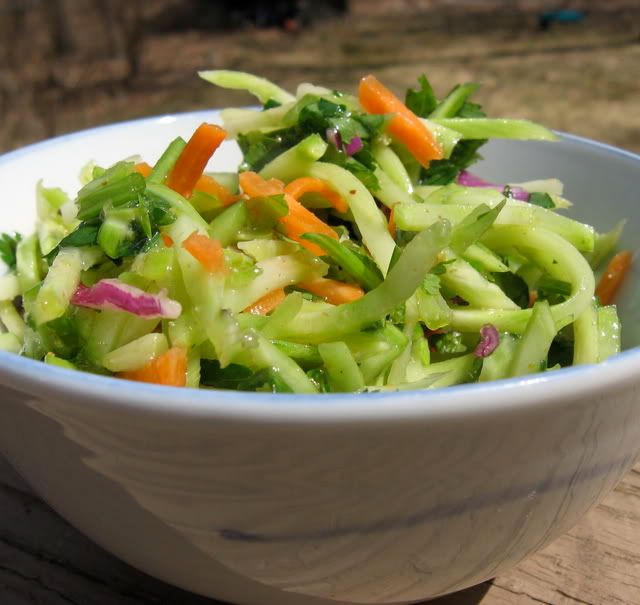
Mmm... Nothing like a brightly colored, fresh, raw vegetable salad to celebrate the first daffodils popping up in the garden. I plan to make this recipe for Passover, since it's so incredibly fast to whip up large amounts of and is good with nearly every meal. It's also a welcome burst of color and flavor in a holiday that (in many houses but not mine!) tends to be dominated by dense, heavy, potato-focused Ashkenazi fare. This is a super-quick, no-cook, minimal-chopping dish that can be served as a side for Mexican or other Central American cuisines, as a topping on a green salad, or alongside fish or grilled chicken. It's perfect for warm weather, when cooking is the last thing you want to do. I think this will also be a good stand-by for shabbat.

This is hardly a coleslaw (yuck, I hate coleslaw) but it's made with what is often called "broccoli coleslaw mix". You can find it in most American supermarkets I've been in, with the bags of salad and shredded cabbage. It usually contains shredded broccoli and carrots, and sometimes cabbage as well. If you can't find the kind with cabbage in it, try shredding a little purple cabbage in yourself - It's worth it for the color alone.

I don't bother putting in the measurements for this recipe, which I am usually fairly consistent in doing, because it's really an intuitive recipe that's best done by seasoning it to suit your own tastes. Add ingredients little by little, mix well, and taste before further seasoning. Remember that overnight while it sits in the fridge, the vegetables will absorb the flavors fully. So dress it lightly, and don't overdo it on the spices or the lime juice - Subtlety works well with for this salad. It's a perfect showcase for that bottle of very high quality extra-virgin olive oil you've been saving in the back of your pantry... or is it just me who saves such things for "a special occasion" that never comes?


CILANTRO-LIME BROCCOLI SLAW

[Gluten-Free / Dairy-Free / Pareve / Vegan / Soy-Free ]

1 bag broccoli coleslaw mix
Fresh cilantro, chopped
Lime juice, fresh or bottled
A generous amount of high quality extra virgin olive oil
Cayenne pepper, to taste
Ground coriander, to taste
Cumin, to taste
A dash of agave nectar or honey

Mix all ingredients in a large bowl. Taste and adjust seasonings. Allow to sit overnight before serving, for optimal flavor. Can stay in refrigerator for several days.

Wednesday, April 02, 2008

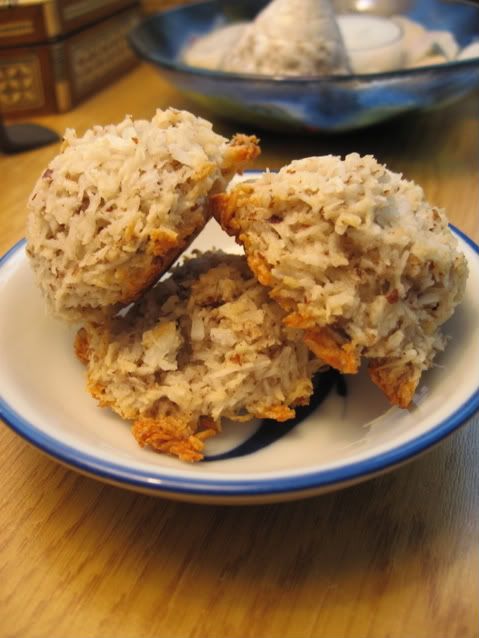
Sugar-Free Pecan Coconut Macaroons - A Gluten-Free Treat for Passover and Year-Round

When the Mid-Hudson Valley Gluten-Free Outings Group had our Valentine's Day Gluten-Free Cookie Swap back in February, I encouraged members to consider making a recipe that would accommodate people with food restrictions beyond just celiac disease or gluten intolerance. So I decided to take upon myself the project of creating a gluten-free sugar-free cookie. I'm not usually a big fan of Splenda but I figured I'd give it another shot - At least my mother, who was doing the South Beach Diet, would eat the cookies, right? My other hope was that I'd figure out a way to finally make a macaroon that I'd like and that I could make with little to no sugar for when Passover rolled around.

Well Passover is nearly here. Splenda is NOT kosher for Passover except in its industrial version. However, I think these cookies would taste just fine with another dry alternative sweetener such as granulated fructose, artifical sweetener (not my preference), certain sugar alcohols, maple sugar... whatever you can find that's kosher for Passover -- I'm not sure what's on the market because I don't plan on eating many sweets this Passover. Of course, if you eat sugar, you can save yourself the trouble by making this recipe with plain old white sugar.

I have cut the Splenda amount in this recipe from the amount I used when I originally baked these, since I found them too sweet. Coconut and pecans have their own sweetness to them and I wanted their flavor stand out in all its glory. In fact, I'm even considering making these for Passover without any sweetener at all!

This was my first time trying pecan and coconut flavors combined, and I discovered I love this duo! Better, in fact, than the traditional almond-coconut macaroon combo. I'm not sure if there is a kosher l'pesach brand of ground pecans, but you can always buy some pecans and pulse them in a food processor (or little by little in a coffee grinder) until they have a relatively fine, sandy consistency. Voila, pecan flour!


PECAN COCONUT MACAROONS

[ Gluten-Free / Dairy-Free / Pareve / Soy-Free ]

Adapted from Low-Carb Dessert Blog

Makes approx. 24 cookies

4 egg whites
1 tsp vanilla
1/4 tsp salt
1/4 cup Splenda* (if they're not for Passover), white sugar, or the equivalent amount of a kosher l'pesach alternative sweetener
1/2 cup plus 2 Tbsp ground pecans
2 cups dried shredded unsweetened coconut

Preheat oven to 325 F. In a large mixing bowl, whip the egg whites, salt and vanilla until frothy with an electric mixer. Slowly pour in the Splenda or other dry sweetener. Whip until stiff peaks form. Gently fold in the ground pecan and coconut gently. Do not over-stir - Batter should remain frothy.

Line a cookie sheet with parchment paper. Use a tablespoon measure to drop rounded tablespoons of batter onto the paper 1/2 inch apart. Remember that they won't rise or expand! Bake for about 20 minutes, or until golden brown around the edges (let them get a little browner than in this photo!). Turn off the oven heat, open the oven door slightly, and let the macaroons sit in the oven until cool to keep them from becoming overly moist.

*The Splenda available in retail stores is not kosher for Passover.

Tuesday, March 18, 2008

Chocolate-Peanut Butter Ricotta Creme


This is an easy and delicious creamy dessert that can be whipped up in minutes. Great for the sugar- and carb-conscious, but just as delicious for anyone who loves chocolate and peanut butter. Yum.

CHOCOLATE-PEANUT BUTTER RICOTTA CREME

[ Gluten-Free / Soy Free ]

1/2 cup low-fat part-skim ricotta
3 tsp unsweetened dutch cocoa
1-2 packets splenda, or 1-2 tsp agave nectar, to taste
2 Tbsp smooth, salted peanut butter
Pinch of salt

Blend ingredients on medium speed in a blender until smooth, or use a fork to blend thoroughly until no lumps remain. Serve cold. Can be stored for 24 hours in the refrigerator.


Friday, February 22, 2008

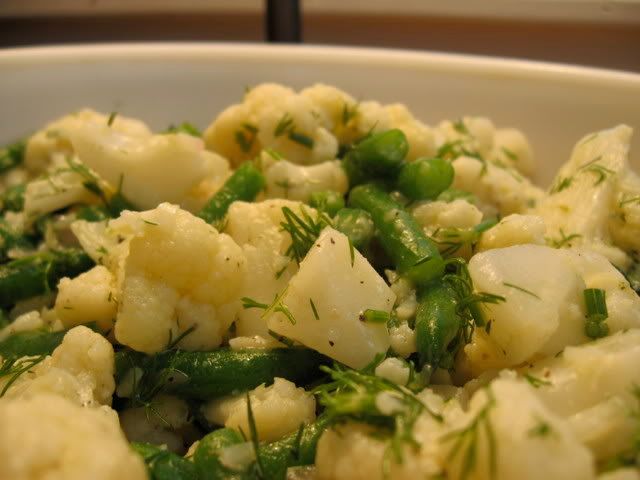
Herbed Cauliflower & Green Bean Salad A/K/A German Potato Salad Without the Potatoes


I've been having quite a hankering for German potato salad - Specifically, my "famous" Herbed New Potato Salad with Green Beans. Unfortunately, potatoes are super high-glycemic and are not considered "good" carbohydrates, and thus are verboten on the South Beach Diet, any low-carbohydrate diet, and the Glycemic Index / low-gylcemic approach to eating. What's a serious potato lover to do? Cauliflower!

I love cauliflower. I always have. Since eating a lower-glycemic diet I've been cooking my Lemon-Roasted Cauliflower with Dill and other roasted cauliflower recipes quite a bit. Another favorite cauliflower dish is my Aloo Gobi Mattar (Indian Potato, Cauliflower & Pea Curry) which I will also try making without potatoes one of these days.

Simply by replacing new potatoes with small florets of cauliflower boiled until tender, I was able to re-make this recipe into something healthier, more nutrient-dense and dramatically lower carbohydrate, without compromising the taste. I loved this salad, and it was even better a day and two days later when the cauliflower and beans had absorbed more of the marinade overnight.

I make a lot of salads and vegetable dishes that can be eaten cold on Shabbos since I don't cook on the sabbath. So I made this Friday to eat with my dinner, but also ate it for part of my lunch on Saturday. Heck, I even ate it for breakfast!

HERBED CAULIFLOWER & GREEN BEAN SALAD

[ Vegan / Dairy-Free / Pareve / Soy-Free / Gluten-Free ]

2 large heads of cauliflower
2 1/2 cups green beans, cut in thirds
2 Tbsp salt
1/4 cup minced fresh chives
3 Tbsp minced fresh dill
3 Tbsp dijon mustard
3 Tbsp apple cider vinegar
1/2 cup extra-virgin olive oil
1 large shallot, minced
1 tsp agave nectar, sugar or equivalent non-sugar sweetener
1 tsp freshly ground black pepper
Optional: Minced fresh flat-leaf parsley to taste

Combine all ingredients except cauliflower and beans in a large bowl. Wash cauliflower well and cut into 1/2 inch pieces. Cover with water by several inches in a large pot, and add 2 Tbsp salt. Bring to a boil, then reduce heat to medium-low and simmer until the cauliflower are tender without being mushy. Do not turn heat off, but transfer cauliflower into a colander immediately, and rinse with cold water several times. Allow to cool just until they are warm but can be comfortably handled.

Turn the heat up under the pot of water and add green beans. Cook uncovered for just a few minutes, until green beans are tender but still crisp and bright. Remove from water and drain. If you want to retain the brightness of their color, submerge them immediately in ice-water until cooled.

Add beans and cauliflower to the large bowl that contains dressing. Toss very gently to combine, stirring from the bottom to coat cauliflower and beans with the dressing. Allow to sit for 20 minutes before serving. Garnish with additional chopped herbs if desired. Serve while still warm, or at room temperature.

This recipe is part of the Weekend Herb Blogging event, hosted this week by Swirling Notions.

Thursday, January 31, 2008

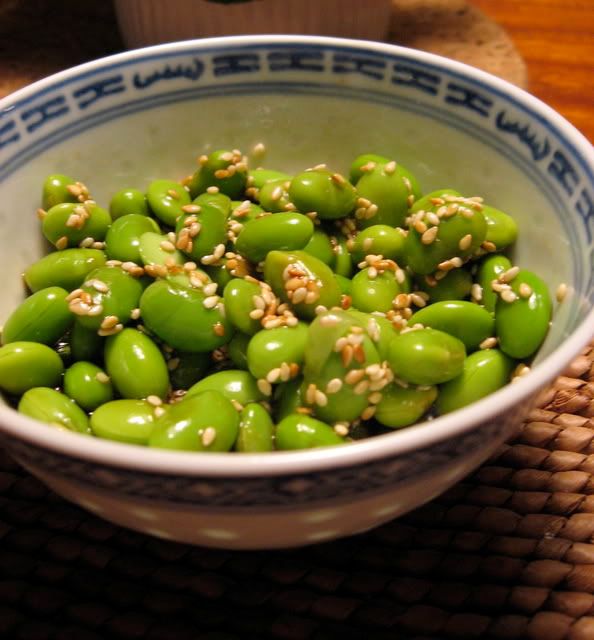
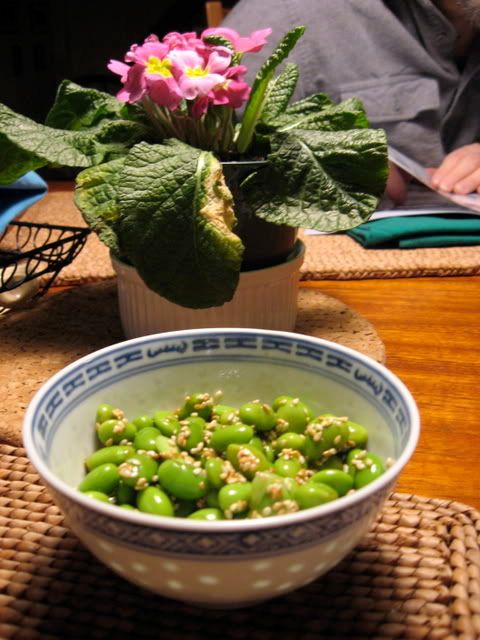
Sesame Edamame Salad


I have been eating a lot of edamame. I don't normally eat a lot of soy, but edmame (steamed or boiled soy beans) are a favorite snack on the South Beach Diet (especially during Phase 1) because they contains fiber and protein and are easy to travel with. I was a little tired of eating edamame plain so I decided to turn these humble little beans into a simple side dish with more complex flavors. What I ended up with was a dish that would be a wonderful compliment to a chicken or tofu stirfry, miso-ginger grilled fish, or sashimi and brown rice, as well as other dishes that reflect the use of Chinese or Japanese seasonings. It can also be used as a condiment of sorts, to sprinkle over the top of fish or meat. This flavorful vegan salad is high in protein and fiber, and contains no added sugars. It is suitable as an appetizer as well as a side dish. I'm a big fan of the flavors and textures of this dish and I guess my mother is, too, because I had to keep swatting her hand away from the bowl. I can tell I will be making it again and again. I thought it would last me at least two meals, but I wolfed the whole bowl down. This recipe is easy to double if you're cooking for more than one or two people.

Notes on ingredients: By the by, my partner discovered pre-shelled frozen edamame at her grocery store. It's made by Dr Praeger's, of all companies! (They are a favorite for kosher gluten-free goodies such as fish sticks and potato pancakes) I have been unable to find them anywhere else, and they're not yet listed on their website, but check your health food store or kosher grocery for them. Next time I'll use these, as they'll spare me 10 minutes of squishing the beans out of their pods. As far as rice vinegar is concerned, the brand I prefer for this dish is Eden Foods Organic Brown Rice Vinegar.


SESAME EDAMAME SALAD

[ Vegan / Dairy-Free / Pareve / Gluten-Free ]

1/2 cup shelled edamame
2 tsp gluten-free soy sauce
1 tsp sesame oil
1 tsp unsweetened brown rice vinegar or white rice vinegar
1 tsp sesame seeds

If the edamame you use are frozen, defrost them. Mix in a small bowl with soy sauce, sesame oil and rice vinegar. Adjust sesame oil to taste. For stronger flavor, marinate overnight. In a pan over low heat, toast the sesame seeds just until they start to turn golden. Immediately turn off heat, and remove directly from pan to the top of the edamame. Stir slightly and serve.

Tuesday, January 15, 2008

Spicy Black Eyed Peas and Collard Greens: A Gluten-Free Vegan South Beach Recipe


Changes are afoot around these parts. As anti-diet as I am on principle, I have chosen to embark on a new project - Kicking my major addiction to sugar and high-glycemic carbs. I've chosen to use the South Beach Diet as the framework for doing this. The general idea is that you start with a two week period (Phase 1) without grains, fruit, potatoes, sugar and other high-glycemic and high-carbohydrate foods in order to rebalance the blood sugar and get the body stopping craving high-sugar foods. This phase includes eating 3 meals and 3 snacks a day, with lots of vegetables and beans and lean protein and nuts and good fats. This is followed by Phases 2 and 3 which more or less involve gradually reintroducing whole grains and fruit (and, optionally, occasional small amounts of sugar) into the diet a little at a time until you reach an equilibrium that works for your body - In other words, until you find a way of eating where you're incorporating good carbohydrates into your diet while losing weight and fending off the sugar/bad carb cravings. It's neither low-fat nor low-carbohydrate, yet somehow it has worked for nearly everyone I know who's tried it. So when I made a commitment to losing weight and eating healthier for 2008 (a renewal of my Rosh Hashanah resolution - a second start is the advantage to having two New Years!) I realized this was worth exploring. I want to lose weight, but more than that I want my blood sugar levels to be stable, I want to keep myself from becoming insulin resistant since it runs in my family, and I want to stop craving foods that are addictive to my mind and body and bad for my health.

I have always struggled with inability to eat certain foods in moderation - Foods with refined sugar, potatoes, or "white" flours. As a gluten-free eater, "white flour" has taken on a new meaning - I now use that term to mean all the flours that are high-glycemic and/or not made of whole grains, such as tapioca flour, corn starch / flour, white rice flour, and potato starch. I will hopefully be able to find some kind of moderation with these types of ingredients in the future, but I have to start out by eliminating them.

I haven't been blogging much because in the past months I have been eating more healthfully and, frankly, I haven't thought that anyone would be interested in reading recipes that aren't gluten-free revisions of traditional gluten-y baked goods and other starchy favorites. The recipes people view on my blog most frequently are my breads and my cakes. The majority of the gluten-free cooks who e-mail me aren't interested in learning how to eat healthier now that they're gluten-free - They want to eat the same way they always did (what is called the "Standard American Diet" [SAD]). They want gluten-free versions of processed, refined, starchy, sugary comfort foods. So for a while I considered calling it a day. But I know that even if my posts on delicious and healthy recipes such as my Quinoa-Cannelini Burgers don't generate the comments or excitement from readers that my old recipes did, there is an audience for healthier gluten-free cooking. I know this from the fact that when I started blogging, most gluten-free bloggers were posting recipes for brownies, breads, and deep fried vittles - Whereas recently I've noticed several other gluten-free bloggers writing about transitioning to healthier ways of eating. I know that I do get e-mails thanking me for posting healthy alternatives. And I also know this blog is not just for my readers, it is for me - A document of the changes and growth in my own eating and cooking. So this is the next chapter in the life of Gluten-Free Bay, and I hope you will join me as I find new ways to approach food.

To kick off here is a recipe I whipped up last night when I needed a healthy and filling pareve dish that I could eat with both dairy and meat meals. It's great for Phase 1 of the South Beach Diet. It's vegan, it's nutritious and it's full of spice. The beans and greens are fabulously smoky thanks to the smoked sweet paprika. Best of all, it used up my very last collard green harvest - I dug the last collards out of a pile of snow the other day. There is nothing like harvesting fresh vegetables in the dead of a northeast winter!


SPICY BLACK EYED PEAS AND COLLARD GREENS

[Gluten-Free / Dairy-Free / Pareve / Vegan / Soy-Free]


5 cups collard greens, rinsed and chopped or shredded
2 15-oz. cans of black eyed peas, rinsed and drained
1/3 cup extra virgin olive oil
1 large onion, diced
5 cloves garlic, minced
1 1/2 tsp red pepper flakes
1/2 tsp cumin seeds
3 bay leaves
2 tsp chili powder
2 tsp smoked sweet paprika
1/4 tsp sea salt
1 large poblano or anaheim chili pepper, seeds removed, minced
1/3 cup wine (red or white)
2/3 cups tomato sauce
1/2 cup water or vegetable broth

In a large, heavy-bottomed pot or deep frying pan, heat the olive oil over medium heat. Add the onions and sautee until translucent. Add the garlic and pepper and all of the herbs and spices except the salt. Stirring frequently, cook the spices in the oil for several minutes. Add the collard greens and saute, coating the greens thoroughly in the spices and oil. Sautee for 5 minutes or until the greens begin to wilt. Add all of the remaining ingredients and cover. Turn heat to medium-low and simmer for 30 minutes or until the greens are tender. Stir regularly to make sure ingredients don't stick to the bottom of the pan. Serve hot, as a main dish or a side dish. Can be topped with sour cream, Tofutti Better Than Sour Cream, or vegan cashew sour cream.

Wednesday, December 05, 2007

Sweet Potato & Leek Latkes

gluten-free sweet potato latkes

Everyone in my family's been trying to eat a lower-glycemic, more nutritionally sound diet for a plethora of health reasons, so I thought we could do with a little change of pace this Chanukah. Breaking with tradition is always hard, but it can also be a good opportunity to try new recipes and create new relationships with ingredients. Tonight's experiment was one of those times when pushing the boundaries of "Jewish food" was well worth it. You may have noticed I am a big fan of the fried leek. In these latkes, the warm, mellow onion flavor of leeks compliment the sweetness of the sweet potatoes.

In addition to being healthier than traditional potato latkes, these sweet potato pancakes have a few other differences. They are less messy and easier to make. Because they don't have the potato starch that is so plentiful in white potatoes, they need a lot more help binding - Additional eggs and potato starch will do the trick (if you don't have potato starch, try tapioca or sweet rice flour - But stay away from grainier gluten-free flours such as regular white rice flour). Even with extra binder added, they have a looser and less sticky consistency so they need to be formed and placed in the oil and flipped with extra TLC. They take a bit longer to cook than regular white potato pancakes, so make sure to keep the oil turned down just a little below the heat you'd use for white potato latkes which will give them longer for the insides to cook before they become crispy around brown around the outer edges.

I recommend serving these tasty vegetable pancakes with sour cream or non-dairy cashew sour cream, but applesauce also works as a condiment. Chag sameach!

gluten-free sweet potato latkes

SWEET POTATO & LEEK LATKES


[ Gluten-Free / Dairy-Free / Pareve /
Vegetarian / Soy-Free ]


3 extra large sweet potatoes
3 large leeks
5 eggs, beaten
1/2 cup potato starch (not potato flour)
1 tsp salt
Freshly ground black pepper
Refined vegetable oil (preferably canola or corn oil)

Preheat oven to 200F (if you will need to keep the latkes warm).

Cut sweet potatoes lengthwise so that they are narrow enough to fit through the shoot of a food processor. Using the grater attachment of a food processor, shred the sweet potatoes. Alternately, use the largest holes on a box grater to grate the potatoes by hand.

Rinse the leeks well. Cut the dark green tops off of the leeks, as well as removing the roots from the very bottom. Cut in half lengthwise, and then slice widthwise in very thin slices. Combine the leeks with the grated potato in a large mixing bowl. Add salt, egg, and a generous amount of black pepper. Gently sprinkle potato starch across the top, then stir to combine thoroughly.

Heat 1/3 inch of olive oil in a large, heavy skillet over medium-high heat, until just below the smoking point.

Use your hands to pat a small handful of batter into a small, thin (no more than 1/3" thick) pancake. Gently lower each pancake into the hot oil. Press each latke with the back of a slotted spatula so that it becomes flatter and thinner. Fry until completely golden-brown on the bottom and crispy around the outside corners. Flip and brown on the second side. If the outside is getting browned and crispy before the inside has a chance to cook sufficiently, turn the burner down just slightly.

Transfer latkes to a plate lined with paper towels or several layers of brown paper (I use grocery bags). Allow paper to absorb excess oil, then transfer latkes to a cooling rack placed over a baking sheet in the preheated oven, where they will stay warm until ready to serve. Serve hot.

Extra latkes can be frozen on a baking sheet in the refrigerator, with parchment paper or freezer paper between the layers. When frozen, transfer to ziploc bags. Reheat in oven on 400 degrees F.

Serves 4.

Wednesday, November 21, 2007

Sample Gluten-Free Thanksgiving Menus

Since I know there are always folks who are looking for recipes or meal ideas at the last minute, here are a few possible gluten-free thanksgiving menus along with links to recipes.

MENU ONE:
THE GLUTEN-FREE TRADITIONALIST

Roast Turkey
Classic Stuffing
Cranberry and Pear Chutney
Gluten-Free Gravy
Kim's Sweet Potato Casserole
Green Bean Casserole
Buttermilk Biscuits
Pumpkin Cupcakes
Apple Pie with Crumble Topping
Persimmon-Pecan Cake

MENU TWO:
THE GLUTEN-FREE VEGETARIAN

Tofu Turkey Roast (Vegan)
Fresh Orange-Cranberry Sauce (Vegan)

Walnut-Sage Potatoes Au Gratin
Easy Vegetarian Collard Greens (Vegan)
Roasted Brussels Sprouts with Balsamic, Parmesan & Pine Nuts
Butternut Squash Timbales with Apple Chestnut Sauce
Scooped Biscuits
Cranberry Crumble (Vegan)
Pumpkin Cheesecake Creme Caramel
Apples Doused in Cardamom Wine

MENU THREE:
THE GLUTEN-FREE KOSHER OR DAIRY-FREE (GFCF) EATER

Maple-Cider Turkey

Gluten-Free Stuffing with Dried Fruit
Pumpkin with Cranberries
Mashed Potatoes
Roasted Brussels Sprouts
Parsnip & Carrot Pancakes
Cranberry Applesauce
Multigrain Miracle Bread
Apple-Quince Pie
Pumpkin Pie (Also see Part II and Part III)
Ginger & Cardamom Poached Pears


Have a safe and joyous Thanksgiving, everyone!

Looking for Gluten-Free Thanksgiving Recipes?

If you are one of the thousands of people who've found my site this week by doing web searches for gluten-free Thanksgiving recipes, thanks for stopping by! To make things easier for you here are some links to recipes and guides for having a healthy and happy gluten-free Thanksgiving:

Tuesday, November 20, 2007

Ginger & Cardamom Poached Pears

ginger poached pears
My dear vegan and milk-allergic readers, I have not forgotten you.

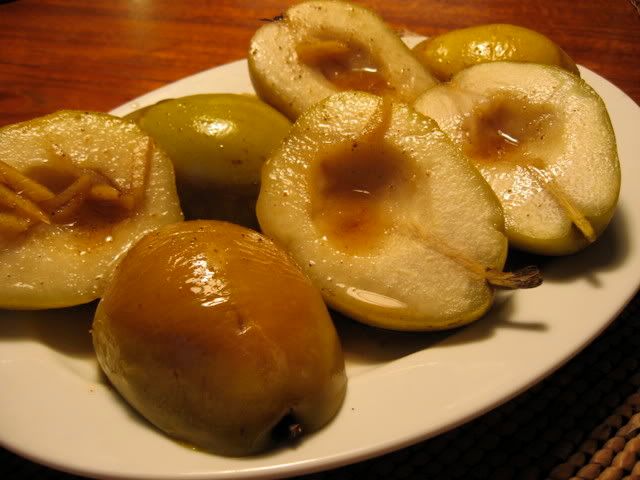
This has to be one of the most popular desserts I've made, when it comes to the reactions of the people who eat the food I cook. I didn't expect that. I think I'm a pretty good cake baker, but when I tried this recipe for the first time at Rosh Hashanah dinner, I got more mmmmms and wows and ohmyg0ds with this deceptively simple fruit dessert than with the honey cakes I served it with. I made it again for Shabbat dinner on Friday and it was every bit as lovely as before. It would be a wonderful gluten-free vegan dessert option for Thanksgiving.

Easy but sophisticated is what I was going for. Peeling fruit does not equal "easy" in my book, so I didn't bother. If you'd like to try peeling the pears before halving them, go for it! This recipe works best with pears that are just ripe enough to have some softness while being firm enough to be handled without their skin getting easily damaged. How long you cook the pears will depend on how ripe they were to begin with - Five minutes on each side is plenty for a ripe piece of fruit. As for sugar, any kind should work. I have used raw sugar both times I've prepared this.

I sure wish these photos were better. The bits of stuff on top of the pears is ginger pieces, which I like to serve with the pear though they can be removed if you prefer. These pictures were taken before the sauce finished reducing into the dark, thick syrup that is drizzled on top of the pears - So the thin sauce you see on the pears is just the pre-reduction version of it, which I spooned on top of them before taking pictures. Imagine a thicker, darker and more syrupy sauce that can be truly drizzled across each pear. This recipe inevitably makes extra of the reduced ginger-cardamom syrup. The leftover syrup is divine, with its rich and slightly spicy flavor and sweet pieces of nearly candied ginger floating in it. It would be wonderful on pancakes or vanilla ice cream, so I like to save it in a little tupperware container for later enjoyment.


ginger poached pears

GINGER & CARDAMOM POACHED PEARS

[ Vegan / Pareve / Soy-Free / Dairy-Free / Gluten-Free ]

2" piece of ginger root, peeled
1/2 tsp cardamom powder
3 cups water
1 1/2 cups sugar
1 cinnamon stick
1/4 tsp cloves (powdered)
Juice of 1/2 lemon
2" piece of lemon zest
5 semi-ripe Bartlett or Anjou pears, washed and dried

Slice ginger root into very thin slices. Cut slices into narrow matchsticks. Bring water, sugar, spices, lemon zest, lemon juice and fresh ginger to a boil in a wide, heavy saucepan. Reduce heat to medium and simmer for 5 minutes.

While the liquid is simmering, slice pears in half lengthwise and use a teaspoon to scoop the seeds out of each half. Place the pears cut-side down in the sauce pan and simmer for 5 minutes, then flip over and simmer for another 5 minutes. Baste occasionally with a spoon while cooking. Using a slotted spatula, carefully lift each piece of pear out of the liquid and place on a serving platter or individual plates.

Remove the lemon zest and cinnamon sticks from the liquid (you can remove the ginger pieces, too, if you like, but I think they're wonderful left in). Bring the liquid back up to a rolling boil, and boil until it thickens into a syrup. Drizzle 1 Tbsp of the syrup across each half of pear just before serving.

Serve warm or at room temperature.

Monday, November 19, 2007

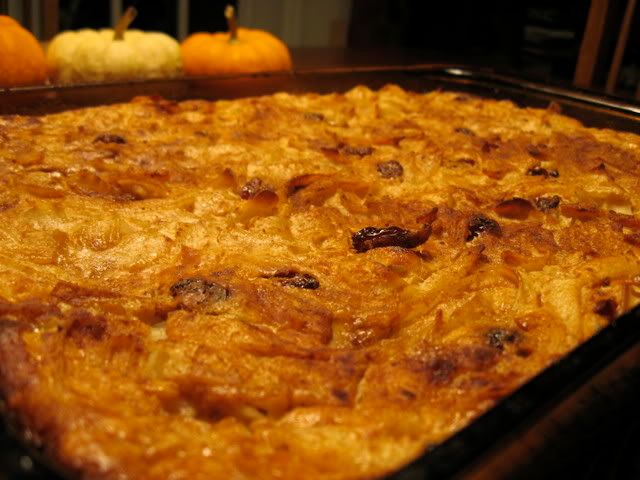
The Thanksgiving Kugel: Gluten-Free Noodle Kugel with Cranberries

gluten-free cranberry noodle kugel
I haven't been inspired by Thanksgiving yet this year, which explains the lack of Thanksgiving mania on this blog. But tonight I think the bug finally bit me, if only mildly.

This past spring I posted my recipe for Savory Gluten-Free Noodle Kugel, a hearty mushroom-flecked kugel made with Manischewitz brand gluten-free Passover egg noodles. I made a point of stocking up last Pesach so I'd have some of these fabulous noodles to last me through the year, and I used up another bag tonight making a sweet lokshen kugel (noodle and egg casserole). I still have two or three left, just enough to get me through to this spring when they are back on the shelves at kosher grocery stores. Though I generally prefer Tinkyada noodles for just about everything, there are a few things that a wide, flat egg noodle is better for - Kugel is one of them. The fact that the Pesach noodles are made from potato starch means that they are all the more absorbent, which is perfect for a kugel.

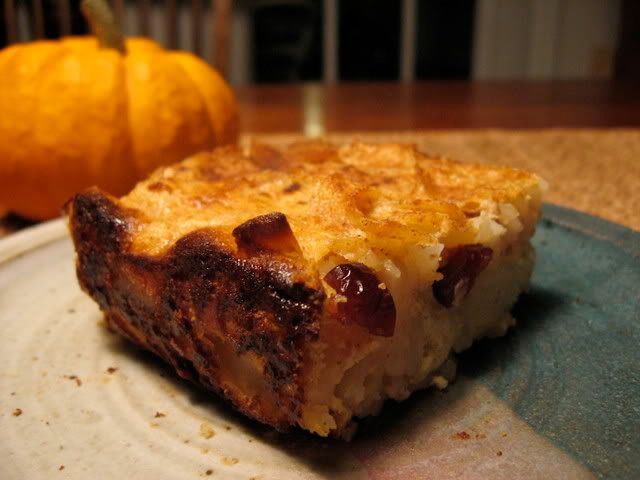
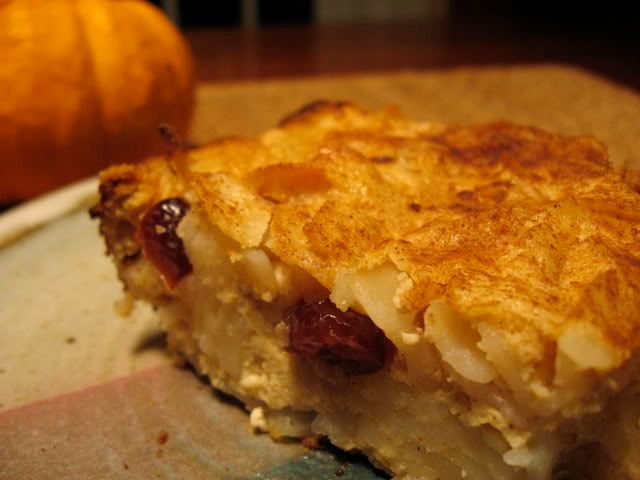
Our family has two different kugel traditions - My dad's side of the family makes savory noodle kugels. On my mom's side, it's sweet kugel all the way. Since I made savory kugel last time (and boy was it good) this time I tried to sweeten it up without overdoing it on the sugar. What I ended up with was the Thanksgiving Kugel. There are thousands of bubbes rolling over in their graves at the very mention of the words "Thanksgiving" and "kugel" next to each other. I'm usually a little bit of a purist when it comes to ethnic foods. But I think if any of those bubbes would taste this kugel, they would forgive me. The dried cranberries (or "craisins" as marketing gurus seem to have renamed them) really plump up like little sweet-tart gems and make a tasty replacement for the usual raisins.

I lightened the kugel up a little - Trying to make this kind of traditional food low fat is just not something I have the heart to do. But I did trim some fat from where the texture or flavor wouldn't suffer. If you like your sweet kugels really sweet, you'll want to add an additional 1/2 to 3/4 cups of sugar, since I made this to be a side dish more than a dessert. This easy kugel would be a really nice side dish for Thanksgiving, it works well by itself for breakfast, and it should heat up well in a toaster oven or conventional oven.

Eat it in good health!


gluten-free noodle kugel with cranberries

THANKSGIVING KUGEL
(GLUTEN-FREE CRANBERRY NOODLE KUGEL)


[ Gluten-Free / Soy-Free / Vegetarian / Dairy ]

16 oz wide gluten-free egg noodles*
6 eggs
7 to 8 oz farmers' cheese
2 cups low-fat sour cream
1/2 cup 1% milk
1 1/2 tsp pumpkin pie spice mix
1/2 tsp salt
1/2 cup brown sugar or raw sugar
1/2 cup dried cranberries
Butter or margarine for greasing the pan
Optional: Additional pumpkin pie spice and brown sugar for top

Preheat oven to 350 F. Bring a large pot of lightly salted water to a boil. Cook noodles until tender but not overly soft, remove from heat and drain immediately, rinsing with cold water. Set aside. Grease lasagna pan.

In a blender, combine spices, salt, sugar, milk, eggs, sour cream and farmers' cheese. Pulse until smooth. In a large bowl, pour liquid over the noodles. Add cranberries. Stir until well-combined. Pour entire mixture (including all "extra" liquid) into the greased pan. Dust the top with additional sugar and pumpkin pie spice.

Bake for 35-45 minutes or until the top is golden-brown and the egg mixture has become slightly firm (will still be somewhat soft - do not overcook!) Allow to cool for 15 minutes before slicing and serving warm.

*
If you don't have access to gluten-free Passover egg noodles, gluten-free tagliatelle or lasagna noodles (cut in strips after cooking) will work, though the texture won't be quite the same.

Wednesday, November 14, 2007

Kale & Ricotta Stuffed Giant Shells ... and Absent-Minded Food Bloggers


How do the rest of you food bloggers keep track of the recipes you're creating? I have a terrible habit of writing things down as I cook on the back of an old envelope, a piece of mail, a bill. And then I lose them. I would guess I lose track of half the recipes I write down on those random scraps. This is one of those recipes. It was lost for nearly a month. I have finally found it, only to have forgotten many of the "mental notes" I had made about how to write out the recipe. So here is the reconstructed version, put together from messy incomplete notes, my sad excuse for memory, and my instincts (which I trust more than my notes and my memory put together!)

I'm impressed with the Tinkyada Brown Rice Grand Shells. They hold up pretty darn well and are easy to stuff, though I recommend undercooking them slightly and handling them with a little extra care. They're wholesome and they taste great. You could feed this dish to your friends without anyone guessing it's gluten-free. Casseroles are very much fall and winter foods for me, even if they're not made with squash or sweet potatoes. This one is a winner. This is really a tasty meal, and reheats fabulously well. I like to reheat it with a little extra sauce and/or cheese added to it for extra yums. It's a nice way to get some more vegetables and fiber into your (or your vegetable-hating child's) diet.


ALL DRESSED UP AND NOWHERE TO GO:


KALE & RICOTTA STUFFED BROWN RICE SHELLS

[ Gluten-Free / Vegetarian / Dairy / Soy-Free ]

1 package Tinkyada Gluten-Free Brown Rice Grand Shells

FILLING:
1 Tbsp olive oil
2 cups of finely shredded or chopped kale, uncooked
1 1/2 cups crimini mushrooms, minced
1/2 onion, diced finely
2 cloves garlic, minced
4 ounces reduced fat mozzarella, shredded
15 ounces low-fat ricotta
1-2 Tbsp grated parmesan
1 egg, well beaten
1 tsp Italian seasoning
Freshly ground black pepper

SAUCE & TOPPING:
1 cup marinara sauce for under shells
2 cups marinara sauce for over shells
8 ounces reduced fat mozzarella, shredded
Optional: Additional parmesan

Boil shells according to package directions in lightly salted water until al dente consistency. Remove, drain, gently rinse with cold water and allow to cool.

Preheat oven to 375 F. In a heavy pan, heat olive oil over medium-high heat. Sautee onions until translucent, then add garlic and cook for 1-2 minutes. Add mushrooms and sautee until they let off a little bit of liquid. Add shredded kale and sautee until tender. Remove from heat.

In a medium bowl, mash together ricotta, 4 ounces of mozzarella, 1-2 Tbsp of parmesan, spices and egg. When combined, add the sauteed vegetables and mix well.

In the bottom of a baking dish spread one cup of marinara sauce. Stuff each pasta shell gently but generously with the filling (you know it's properly stuffed when some filling should is coming out of the shell) and lay in the baking dish. When you have stuffed all of the shells, pour remaining two cups of sauce evenly over the shells and sprinkle with mozzarella and optional parmesan. Cover with tin foil and bake for 35 minutes. Remove tin foil and bake for additional 10-15 minutes. Remove from oven and allow to sit for at least 15 minutes before serving.