 I'm recovering from being sick and am struggling to catch up with all my work-work and blogging-work and house-work, so I'm going to skip on the "featured recipe" this week and just hit you with a plain old straightforward list of delicious gluten-free goodies from food blogs far and wide. Enjoy, everybody!
Wednesday, January 31, 2007
Semi-Weekly Gluten-Free Recipe Roundup - 1/31/07
I'm recovering from being sick and am struggling to catch up with all my work-work and blogging-work and house-work, so I'm going to skip on the "featured recipe" this week and just hit you with a plain old straightforward list of delicious gluten-free goodies from food blogs far and wide. Enjoy, everybody!Monday, January 29, 2007
Pecan Rice Pilaf

Today I set out to answer the question:
What is wild rice, anyway?
According to Wikipedia, wild rice is part of the genus Zizania, which is a group of grasses that grow in the shallows of small lakes and ponds. Three varieties are grown in the United States. Wild rice is not a rice at all, but rather the seed of these aquatic grasses.
Almost always sold as a dried whole grain, wild rice is high in protein, the amino acid lysine and dietary fiber, and low in fat. Like true rice, it does not contain gluten. It is also a good source of the minerals potassium and phosphorus, and the vitamins thiamine, riboflavin and niacin. Because commercial, paddy grown wild rice is harder and denser than true rice, it must be cooked longer to become soft enough to be eaten; it generally requires cooking for at least 45-60 minutes in a ratio of wild rice to water of approximately 1 to 3. Because of its comparatively high cost and chewy texture it is often cooked together with true rice, often in a ratio of true rice to wild rice of 8 to 1 or 4 to 1.[Italics are mine, for emphasis]
Wild rice adds a satisfying chewy texture and compelling color contrast to brown or white rice, and is one of my favorite additions to rice pilaf. For this recipe, inspired by a recipe posted by a woman named Bev on a recipe board I frequent, I call for a blend of brown and wild rice. You can blend the rices yourself, using the ratios indicated above, or simply buy a pre-packaged blend of brown and wild rice. Lundberg Family Farms makes several of these mixes, including their Wild and Brown Rice Blend
Sadly, I have no photograph to accompany this colorful pilaf. I hope it speaks highly of the recipe that I ate it all before I had a chance to photograph it!
PECAN RICE PILAF
1 cup brown rice and wild rice mix
2 cups vegetable stock
1 1/2 tablespoons butter, ghee or olive oil
1 medium carrot, peeled and minced
1 stalk celery, minced
1/2 bell pepper, minced (optional)
1/2 cup white mushrooms, minced
1/2 cup toasted pecans, coarsely chopped
Salt & freshly ground black pepper, to taste
Follow the instructions on the package of brown rice-wild rice mix, using a medium-sized sauce pan and replacing the water with vegetable stock. Most mixes will call for 2 cups of liquid for 1 cup of rice. Bring the stock to a boil, add the rice, cover and turn heat to low. Simmer for the indicated amount of time (approximately 50 minutes).
In a 10" skillet, melt the butter or ghee (or heat oil) over medium heat. Add the carrot and peppers and saute for 2-3 minutes. Add celery, mushrooms, and pecans. Saute for about 2 minutes more, stirring frequently. Add the rice and stir until all ingredients are thoroughly combined and evenly hot. Add freshly ground black pepper to taste, and additional salt if necessary. Serve hot. Leftovers can be reheated or eaten as a rice salad at room temperature.
Makes about 6 servings.
Friday, January 26, 2007
The Day My House Became a Pupuseria

The first time I ate a pupusa I was living in San Francisco's Mission District. I discovered that just one block away (at 1142 Valencia Street) was El Majahual Restaurant, a tiny Salvadorean and Colombian restaurant and pupuseria. I was living on a tight budget and at just $1.65 each, pupusas were just about the cheapest and most filling healthy meal I could find. I recall reading an article that said the rule for making a meal of pupusas is "one for a snack, two for lunch, three for dinner." Sounds about right to me. It was easy to fall in love with these thick El Salvadoreño corn tortillas crafted out of masa harina, stuffed with cheese, beans or meat and topped with a spicy cabbage salad known as curtido.
This weekend my house became a pupusa factory. My friend Melanie came over for dinner, and we ate stacks upon stacks of pupusas con curtido de repollo. I filled some with a combination of goat jack cheese and cotija*, while others were stuffed with both cheese and refried beans. We ate them with salsa, curtido, and slices of ripe avocado. I had so much masa (dough) left over that I made more for my breakfast guest the next day... and yet another batch when my aunt and uncle paid me a surprise visit later that afternoon. I made extras for my own dinner the following day, plus a batch for some dear friends. There were pupusas coming out my ears!
Masa harina is the extremely finely ground corn flour that makes a silky dough that can be used for corn tortillas, pupusas, and other Central American delicacies. The manufacturer of Maseca brand masa harina has verified that it is gluten-free and was made in a facility that does not process wheat. Maseca is widely available in the US and is inexpensive. For more information on Central American products that are gluten-free, check out the Celíacos de México blog (it's in Spanish). There are no good substitutes for masa harina - Corn flour is the closest in texture but not a match, and corn meal will give you mealy, greasy, tough results. So stick to the real thing.
Folks who are vegan, lactose intolerant, or casein-free, can omit the cheese and just stuff the pupusas with refried beans. You can serve an army with these recipes, so cut them in half if you're cooking for one or don't want leftovers!

PUPUSAS DE QUESO Y FRIJOLES REFRITOS
5 cups masa harina flour
4 cups water
1 cup canned gluten-free, vegetarian refried beans
1 1/2 cups cotija, grated (or other hard, mild white cheese)
1 1/2 cups monterey jack or other meltable white cheese, grated
Vegetable oil
In a medium bowl, mix the two cheeses together and set aside. Pour masa harina into a large mixing bowl. Pour the water in slowly, kneading with your hands. Add water a tablespoon at a time until the dough forms a cohesive ball. The dough should be dry enough to handle but moist enough that it doesn't crack at the edges when you press down on it. Allow dough to rest for 10 minutes.
Take a small handful of dough and roll it into a ball about the size of an egg or a little smaller. Flatten it between your palms until it is about 1/3 inch thick. For cheese and bean pupusas, put a generous pinch of cheese and a heaping 1/2 teaspoon of refried beans at the center of the disk of dough. For cheese-only pupusas, use more of the cheese. Beans-only pupusas can take about a teaspoon of beans. After placing the filling at the center of the pupusa, fold the edges in carefully until they meet at the top and the filling is completely covered. Roll carefully into a ball again, this time with the filling hidden inside. Now flatten again between your hands until the ball becomes as flat and thin as possible without the filling seeping out (you can perform this step with a tortilla press if you have one). Ideally they should be about 1/4" to 1/2" thick. Repair any holes to make sure no filling is visible.
Brush a griddle or heavy skillet lightly with vegetable oil and place over medium-high heat. Place each pupusa carefully on the hot griddle. Cook 3-4 minutes on each side or until lightly browned and beginning to blister. Serve hot, topped with curtido or salsa. Leftovers can be refrigerated and heated up at 300 degrees in an oven or toaster oven.
CURTIDO DE REPOLLO
1 head green cabbage
1 cup apple cider vinegar or distilled white vinegar
1/2 cup water
1 medium onion
2 large carrots
1 teaspoon salt
2 teaspoons olive oil
1 1/2 teaspoons oregano
1 teaspoon cayenne pepper
1 teaspoon cumin
1 teaspoon brown sugar (optional)
Using a hand-grater or the grater attachment of your food processor, shred cabbage, carrots and onion. Combine all ingredients in a large mixing bowl. Use the back of a wooden spoon to press all the ingredients down so they are submerged in liquid. Allow to rest at room temperature or in the refrigerator for at least 4-6 hours before serving. Serve with pupusas, or as a topping for fish, quesadillas, or black beans. Makes 10-12 servings.
*Edited 3/09 to add: Because I keep kosher more strictly than I did when I originally wrote this post, and I have yet to find cotija or any similar cheese that is hekshered with a reliable kosher certification, I have been making this with just jack cheese now, and it's great. In fact, I think any mild, hard white, meltable cheese will work well.
Thursday, January 25, 2007
Grilled Chipotle-Lime Chicken
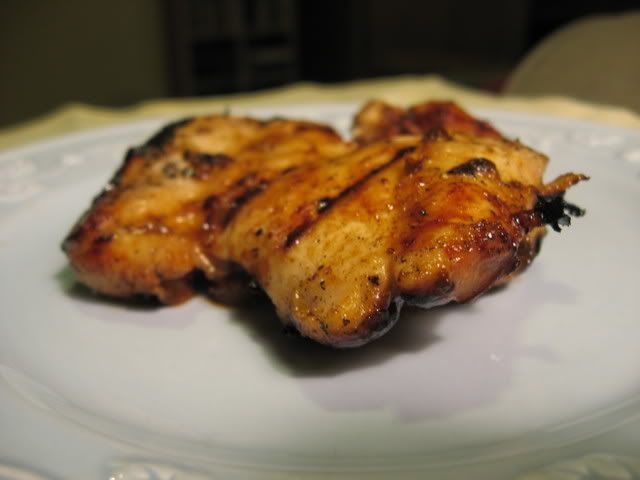
With a few tiny changes to make it spicier, this recipe truly made my taste buds sing. It is such a quick and easy way to prepare flavorful chicken, and the leftovers would be a delicious addition to any taco salad. I am such a big fan of the combination of sweet and spicy flavors - I think they compliment eachother perfectly. It wasn't until I met my ex-partner that I discovered that some people find sweet and spicy to be at odds with eachother, and even repulsive when combined. How do you feel about sweet-and-spicy foods?
GRILLED CHIPOTLE-LIME CHICKEN
1 1/2 lbs boneless skinless chicken breasts, thighs, or leg meat
2 chipotle chiles in adobo, minced
1 teaspoon adobo sauce, from the canned peppers
1/4 cup lime juice
1 garlic clove, minced or pressed
1/4 cup olive oil
2 tablespoons honey
Fresh ground black pepper to taste
If you are using a grill, preheat it to moderate heat for gas or medium indirect heat for charcoal. Away from the fire fire, lightly spray cooking rack with cooking oil.
In a small bowl, mix minced chipotle peppers, adobo sauce, lime juice, garlic, oil and pepper. Pour half into resealable bag. DO NOT add the honey at this point. Reserve the rest of the sauce for basting.
If you're not using kosher chicken (which is saltier), season the chicken with a little salt. Add chicken to bag and allow to marinate for 20 minutes at room temperature.
If you are using a grill pan, grease the pan and then place it over medium-high heat.
Remove chicken from marinade and place on preheated grill or grill-pan. Discard the used marinade.
Grill chicken for about 4-5 minutes, then flip over and cook another 4-5 minutes. Now add the honey to reserved marinade and baste the chicken. Immediately flip chicken and baste the unbasted side. Grill until lightly browned, about 2 minutes. Remove from grill and pour any remaining reserved sauce on top.
Makes approximately 4 servings.
Wednesday, January 24, 2007
Semi-Weekly Gluten-Free Recipe Roundup - 1/24/07
 Dear Readers,
It's here! The latest edition of the Gluten-Free Recipe Roundup, hot off the cyberpresses. I'm happy to include a few new blogs in this week's roundup and lots of tantalizing recipes that even our gluten-eating friends and family will love.
This Week's Featured Recipe:
When Bea of La Tartine Gourmande posted her Potato, Fennel, Pear and Fourme d'Ambert Timbale the blog world, myself included, oohed and ahhed at its glory. Unfortunately many blue cheeses have gluten in them, as they are often started with bread mold, so the timbale recipe needed some tweaking to become suitable for celiacs. Before I got a chance to try to work on it myself, the talented Brilynn of Jumbo Empanadas posted her own beautiful take on Bea's recipe, made with goat's cheese and aged cheddar instead of blue cheese, and adding asparagus for a tasty twist. Her Tater Timbales (see photo) are suitable for those on a gluten-free diet and sure look fantastic!
NOTE: Some of these recipes may call for ingredients that are available in both gluten-containing and gluten-free versions. Some examples of such ingredients include: bouillon cubes, hoisin sauce, fish sauce, soy sauce, chicken broth. As always, please read the labels carefully. When in doubt, contact the manufacturer to ascertain the food's gluten status.
For those who have noticed a suspicious lack of pork and shellfish on these weekly roundups... This is a kosher blog, so all recipes I post or link to are kosher or can easily be adjusted to be kosher. If you have a recipe to submit, please do e-mail me!
Tuesday, January 23, 2007
Maple Butternut Squash Puree

I fretted over the air bubbles that were visible in this photo at the bottom of the bowl until my Official Photography Consultant, M of Poet With A Day Job, pointed out that the bubbles just highlight the fact that this puree was photographed while it was still steaming hot. Phew!
I've discovered that I can eat cow's milk only every 4 days or so. Oddly enough, those fried mozzarella sticks hardly bothered my stomach... yet when I baked something using butter the following day, I got sick as a dog. I need to be more careful not to overload my frustratingly fragile GI system. On that note, I made a delicious dish last night that was buttery and decadent without making me sick. The key? Ghee, that fabulous Indian incarnation of clarified butter that seems to concentrate the dreamy butter flavor while removing the lactose and casein.
There is something about butternut squash that is so alluring this time of year - The vivid color reminds me of the marigolds I love to grow. Here in my Northern California garden last year's marigolds have finally died and this year's marigolds are beginning to sprout.
The taste and texture of butternut squash are so versatile - Cut in large pieces and roasted, mashed as a side dish, pureed for the filling for a tart or ravioli, combined with vegetable stock for a rich and creamy soup. Always delicious. The spicy main dish I made this time around called out for a sweet and lightly spiced side with a creamy texture. Butternut squash puree to the rescue!
Two tablespoons of maple syrup provides plenty of sweetness, but if you want stronger maple flavor you can certainly add more.
MAPLE BUTTERNUT SQUASH PUREE (Lactose-Free, Casein-Free)
1 medium butternut squash
1/4 teaspoon salt
2 tablespoons ghee or clarified butter
2-3 tablespoons maple syrup
2 teaspoons pumpkin pie spice
3 tablespoons rice milk or soy milk or almond milk
Peel squash, cut in half lengthwise, and remove seeds. Cut into 1 1/2 inch cubes and steam until tender. Place steamed butternut squash cubes and all other ingredients in a food processor or blender. Blend until smooth and creamy. Serve hot or warm.
Friday, January 19, 2007
Puy Lentil Salad with Feta
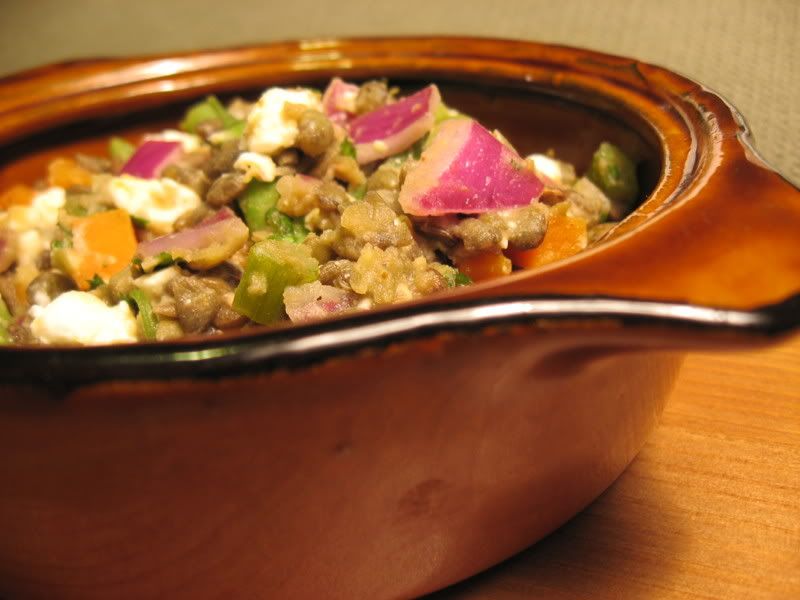
I'm always on the lookout for vegetarian gluten-free recipes that are rich in fiber and protein. This recipe sure meets the requirements, with 11.6 grams of dietary fiber per serving, and 13.6 grams of protein! This is my kosher adaptation of a recipe from user "de Roche" on RecipeZaar - The original called for diced ham.
Puy lentils are a small, flavorful lentil that hold their shape in salads better than brown or red lentils. They are more expensive than other types of lentils but well worth the cost, in my opinion. If you cannot find them, you can substitute beluga lentils, masoor dal, or brown lentils (which won't hold their shape as well as puy lentils). In the picture you can tell that I overcooked them a bit because I forgot to set the kitchen timer... Oops! Thankfully, the salad was still fabulous.
I used Eden Foods' unsweetened Brown Rice Vinegar which is gluten-free, kosher, and organic. You may use a white rice vinegar if that's what you have on hand, and if you prefer you can try one of the "seasoned" rice vinegars which have added sugar.
Use a high quality feta cheese for this salad if you can - It is worth avoiding Athenos or one of the other mass-produced fetas, if possible. I recommend a goat and/or sheep's milk based cheese for the best taste.
PUY LENTIL SALAD WITH FETA
1/2 cup puy lentils
2 bay leaves
1 cup green beans, trimmed and sliced in fourths
1 carrot, peeled and diced
1 stalk celery, diced
2 tablespoons fresh cilantro, finely chopped
1 small red onion, chopped
3 ounces feta, crumbled
2 tablespoons olive oil
2 tablespoons unseasoned rice vinegar
1 teaspoon sea salt
1 teaspoon fresh ground black pepper
Cover the lentils and bay leaves with several inches of water in a saucepan. Bring to a boil, then cover and lower heat. Simmer for 20 minutes or until the lentils are tender. Discard the bay leaf and drain the lentils. Allow them to cool to room temperature.
While the lentils are cooking, chop the beans, carrot, and celery. Steam them for about 5 minutes, or submerge them in boiling water for 1 minutes. They should retain a crisp texture - Do not overcook.
Toss vegetables and lentils together in a bowl. Add cilantro and onion. Combine oil, rice vinegar, salt and pepper. Add dressing to salad and mix well. Stir in crumbled feta right before serving. Serve slightly warm or at room temperature.
Makes 3-4 generous servings.
[Created for Weekend Herb Blogging]
Goat Yogurt from Redwood Hill Farm
 I purchased a 6 ounce container of Redwood Hill Farm's Apricot Mango Goat Milk Yogurt at the Berkeley Farmer's Market this weekend. I had enjoyed the Sebastopol-based creamery's fabulous goat cheeses in the past, including their raw goat's milk feta and their smoked goat cheddar. This yogurt, which is both kosher and gluten-free, intrigued me. I am lactose intolerant and somewhat sensitive to casein, but I seem to digest goat's milk and sheep's milk products far more easily than cow's milk. Redwood Hill Farm's website explains that the fat molecules in goat's milk are more easily digestable than cow's milk, and that due to the lactose and casein in goat's milk being structurally different, many people who can't digest cow's milk are able to eat goat's milk.
The first thing I noticed about the Apricot-Mango Goat Milk Yogurt was that it had the extremely creamy, rich texture and taste that I associate with full-fat yogurt. I checked the label to see if I'd purchased low- or full-fat yogurt and was surprised to see that there were actually only 3 grams of fat per serving, though the yogurt is made with whole milk.
Goat's milk yogurt has a distinctive flavor - There is certainly something slightly "goaty" about it- A grassy, slightly gamey flavor which some people will enjoy and others might find unappealing. However, with the addition of fruit, I found the taste deeper and more sophisticated than the taste of regular yogurt but still very pleasant. The fruit on the bottom was not oversweetened, as no additional sugar is added to their products.
I am looking forward to purchasing the plain yogurt in the future, for use in fruit smoothies or Indian dishes. I can't imagine enjoying it alone without the addition of fruit or other flavors, but it is great to know that there is a yogurt I can use in my cooking that won't make me sick.
To find Redwood Hill Farm's yogurts and cheeses near you, use their store locator. They sell their products nationwide. You can also order bulk quantities through their online store.
Wednesday, January 17, 2007
Mission Possible: Gluten-Free Fried Mozzarella Sticks

Though I'm usually content to eat healthy foods like brown rice, fish and vegetables - There are times when I miss comfort foods terribly. Like many people, my comfort foods are usually breaded, fried, high-carb, cheesy and/or made of potatoes. Fried mozzarella sticks dipped in hot marinara sauce fall into this category. At the time I became strictly gluten-free, I hadn't eaten them for at least 2-3 years. They haven't been a regular part of my diet since I was a teenager. Yet somehow the idea that I could never eat them again made me crave them more than ever.
Last night I decided it was time to tackle a mission I'd had for months - Making gluten-free mozzarella sticks from scratch. I fried up a whole pound of cheese, popped a couple of Lactaids and went to town. I got through just four of them before I decided to be kind to my stomach and switch to a salad. I froze the rest and will reheat them in the toaster oven when I need a cheese fix.
Be sure to use a flour with a very fine consistency (one that doesn't contain almond meal, corn meal, or other gritty flours). My Rice Flour Mix works perfectly. For bread crumbs, I used Ener-G's Fine Bread Crumbs - One of the few Ener-G products I like. You might also try the bread crumbs from Gillian's Foods or El Peto if you don't keep kosher, or make your own at home. This is definitely a job for fine, dry breadcrumbs rather than fresh ones. If you can get your hands on gluten-free Italian flavored bread crumbs, then eliminate all of the herbs and spices that the recipe calls for.
Oh, the cheesy deliciousness!
FRIED MOZZARELLA STICKS
1/4 cup gluten-free flour mix (such as my Rice Flour Mix)
2 cups dry gluten-free breadcrumbs (plain/unflavored)
1 teaspoon salt
1 teaspoon dried parsley flakes
3/4 teaspoon garlic powder
1/2 teaspoon onion powder
1/2 teaspoon dried oregano
1/4 teaspoon dried basil
1 teaspoon ground black pepper
4 eggs
2 tablespoons milk
1 lb whole milk mozzarella cheese, cut into 3/4 inch x 3/4 inch strips (or 1 lb of string cheese, with each stick cut in half)
1 cup vegetable oil
1 cup jarred marinara sauce
Heat the oil in a pan. In a small pot, heat up the marinara sauce (or use microwave).
Whisk eggs and milk together in a bowl or pie tin. In a second pie bowl or pie tin, combine bread crumbs with all of the herbs and spices. Place flour in a third bowl or pie tin.
Coat each piece of cheese with flour. Dip in egg and roll in bread crumbs.
Dip in egg and bread crumbs a second time, making sure that the entire piece of cheese is coated in crumbs.
Carefully place each cheese stick in the hot oil and cook until golden, about a minute on each side. Place on paper towels to absorb excess oil. Serve hot.

Monday, January 15, 2007
Semi-Weekly Gluten-Free Recipe Roundup - 1/15/07
 It's a good one this week, folks. I've been slacking on getting these roundups out on a weekly basis, but better late than never! Check out this gorgeous recipe collection... I can't decide what to cook first. I've decided to start a "Featured Recipe" section of each roundup, which may be a regular or... ahem... irregular feature.
This Week's Featured Recipe:
All you gluten-free cooks who've been lamenting that you couldn't join in the No-Knead Bread craze that's been sweeping the blogosphere, weep no more. Our own gluten-free superhero(ine), Gluten-Free Girl, has come to the rescue... No-knead bread can now be enjoyed by all! Check out Shauna's recipe for Artisanal Sorghum No-Knead Bread and ogle her lovely photograph to the right...
GLUTEN-FREE RECIPE ROUNDUP
 NOTE: Some of these recipes may call for ingredients that are available in both gluten-containing and gluten-free versions. Some examples of such ingredients include: bouillon cubes, hoisin sauce, fish sauce, soy sauce, chicken broth. As always, please read the labels carefully. When in doubt, contact the manufacturer to ascertain the food's gluten status.
If you've posted a gluten-free recipe that you'd like considered for the next Weekly Gluten-Free Recipe Roundup, please e-mail me.
[Gorgeous pizza portrait courtesy of Mike Eberhard of Gluten Free Blog. Recipe link above.]
Have a great week, everybody!
Oatmeal Spice Cake
 This recipe is a shout out to all those readers who said they'd like some dessert recipes using non-sugar sweeteners. This delicious, low-fat oatmeal spice cake loaf is sweetened only with applesauce and honey. In addition to being gluten-free, it's also dairy-free. I was skeptical about making a cake with oatmeal, thinking it would turn out too dense - But instead I was pleasantly surprised by a moist cake that has a really lovely texture. It's a great choice for breakfast, as it has a good amount of protein and fiber and is not overwhelmingly sweet. I wish I could share a photo that really showed how lovely this loaf looked - But this fuzzy cameraphone pic will have to do. Good news, though - A brand spankin' new digital camera is en route to me, scheduled to be delivered tomorrow! [Insert deep breath of relief here.]
OATMEAL SPICE CAKE (LOW FAT, DAIRY FREE, GLUTEN FREE)
1 1/2 cups almond milk or soy milk
1 1/2 tablespoons white vinegar
1 cup gluten-free rolled oats*
2 cups gluten-free all-purpose flour
1 1/2 teaspoons baking powder
1/2 cup unsweetened applesauce
2 teaspoons pumpkin pie spice
1/3 cup pecans
2 tablespoons raisins, chopped
1/4 cup honey
2 eggs, beaten
Preheat oven to 350 F. In a large mixing bowl, combine the vinegar and the almond or soy milk. Allow to sit for 5 minutes. Stir in oats, and allow to sit for 20 minutes. Pulse the pecans several times in a food processor. Add the pecans and all other ingredients to the vinegar/milk substitute/oat mixture. Mix well. Pour the batter into a greased bread pan. Use a flexible spatula to even out the batter. Optional: Sprinkle the cake with an additional tablespoon of ground pecans. Bake for 70 minutes. Invert onto cooling rack and allow to cool for at least 20 minutes before slicing.
*You can find buy certified gluten-free oats here.
Saturday, January 13, 2007
Gratitude & culinary feedback
Thank you all so much for coming out of the woodwork and expressing your thoughts, suggestions and love in countless private e-mails and comments here on the blog. I feel that warm glowy feeling that comes when you know you're appreciated. It means so much to me. It made me realize that there are a whole lot of people out there who are actually reading what I write and, better yet, cooking my recipes. That is so exciting (and intimidating)! I can't think of a bigger compliment than having your writing read and your recipes cooked - So thank you, from the bottom of my heart.
For those of you who've made the recipes I've posted, I would like to encourage you to rate them on RecipeZaar if you have the chance. I publish most of my recipes there after I post them on this here blog. It's free of charge. You can set very specific parameters when searching their massive recipe database- Today, for instance, I had the site sort out all the recipes for appetizers that are both vegan and gluten-free. It also shows you nutritional information for each recipe and allows you to add recipes to your own "virtual cookbook." You can post photos of recipes that you've made, share your own recipes, and connect with other people in the various community forums.
You can view my RecipeZaar recipes here. I will be adding many more in the coming days. When you take the time to rate and review my recipes on there, you give me the gift of valuable feedback on the food I create, which helps my cooking and recipe writing improve and gives me the motivation to keep cooking - As the saying goes: Progress, not perfection!
Friday, January 12, 2007
Leek Fritters: An amazing recipe, followed by a food blogger's worst nightmare
I cooked something gloriously delicious last night - A gluten-free adaptation of a Sephardic leek fritters, known in Greek as Prassokeftedes or Keftikes de Prassa. The recipe this is based on is by Chef Kate, a user on RecipeZaar. These are traditional for Passover in many mediterranean Jewish families, who make them with matzo meal. Because I used breadcrumbs (Ener-G brand), this recipe isn't kosher for Passover. However, you should be able to replace the breadcrumbs with additional egg and some potato starch to help keep the patties together during Pesach. I served them with Green Olive Relish, a recipe from RecipeZaar user Jewelies. You might also try making a tzatziki sauce to drizzle over the fritters.
Where does the ominous-sounding Food Blogger's Worst Nightmare part of the story come in? Well, just as I finished arranging these dishes on some lovely new plates I just bought... The screen on my digital camera went blank. My precious camera is broken, and I'm fairly sure it is beyond repair. It is definitely no longer covered under warranty. I could have cried - But instead, I suddenly realized that I have a brand new camera phone! G-d bless cell phone technology - At least I can give you a general sense of what these look like. Make these fritters, and I promise you'll forget about the terrible photographs!
PRASSOKEFTEDES (LEEK FRITTERS)
2 large potatoes, peeled and cubed
2 lbs leeks
2 large eggs, lightly beaten
3/4 cup gluten-free breadcrumbs
2 teaspoons salt
2 teaspoons fresh ground black pepper
2 tablespoons fresh oregano leaves (or 1 teaspoon dried)
Olive oil, for frying
Preheat oven to 200 F.
Trim and carefully wash leeks, removing the dark green part but leaving the white and light green areas. Go between the outer layers to remove sand and dirt. Slice in half lengthwise, then slice thinly crosswise.
Add one teaspoon of salt to about 1 1/2 quarts of water in a pot. There should be enough water to cover potatoes by at least two inches. Bring to a boil, then reduce to simmer and cook until soft (approximately 10 minutes).
Drain in colander, then place in large bowl. Use a potato masher to mash until smooth. Place the sliced leeks in a steamer basket over boiling water. Steam for 10 minutes, then remove from heat. Add the leeks to mashed potatoes. Stir in eggs, breadcrumbs, salt, pepper and oregano. Mix until all ingredients are thoroughly combined.
In a heavy skillet over medium-high heat, heat 1/2" of olive oil. When it is very hot, use a spoon to drop about 2 tablespoons of the mixture at a time into the oil. Flatten a little with the back of a spoon. Fry until golden-brown (about 3 to 4 minutes) and then flip. As you finish each batch, use a slotted spatula to move them to a paper-towel-lined plate. Keep them warm in the oven until ready to serve.


GREEN OLIVE RELISH
1 15-ounce can of green olives, pitted and roughly chopped
1/4 cup fresh parsley, roughly chopped
1/4 cup fresh basil leaves, roughly chopped
2 tablespoons pine nuts, lightly toasted
Zest and juice of 1 lemon
1 clove garlic, finely chopped
1/4 teaspoon dried chili pepper flakes
1 tablespoons capers, chopped, rinsed and dried
3 tablespoons extra virgin olive oil
1 tablespoon balsamic vinegar
Combine all ingredients in a bowl, and serve at room temperature.
Thursday, January 11, 2007
Who are you?
 My dear readers,
Come out, come out, wherever you are! I know there are a whole lot of you out there. Between my SiteMeter and Feedburner statistics I am aware (and shocked) that there are hundreds of regular readers of this blog... not to mention all you irregular readers (haha) who happen upon this site from Google or a web link.
In the words of The Who, now immortalized by CSI:
Well, who are you? (Who are you? Who, who, who, who?)
I really wanna know (Who are you? Who, who, who, who?)
Tell me, who are you? (Who are you? Who, who, who, who?)
'Cause I really wanna know (Who are you? Who, who, who, who?)
I don't blog just to have a record of what I ate for dinner or because I'm in love with the sound of my own typing. I blog because I adore sharing my cooking, and getting feedback and questions and encouragement and critique from all of you fine folks out there in the blogosphere. I like the connection, and the challenge to present you with something new, something pretty, something interesting or inspiring.
I appreciate all of you for making this blog so successful. Without you, I wouldn't be cooking as much, learning how to take better photographs, discovering new ingredients, and feeling motivated to share my recipes with the rest of the world. Every day I am shocked that there are people out there who actually want to read what I have to write and cook the recipes that I shared. So thank you, one and all!
This is National De-Lurking Week. I would just love it if you'd comment and let me know you're out there. Just say a quick hello, and then you can crawl back into your lurker caves. And if you're reading this via e-mail subscription or LiveJournal syndication... How about clicking over to the blog site (click here) to introduce yourself?
If you want to say more than "howdy"... Tell me what kinds of recipes you'd like to see. Is there a food out there that you need help re-creating in a healthier and/or gluten-free fashion? Are there genres of food that you'd like me to tackle in future posts?

[Graphic borrowed from here]
Wednesday, January 10, 2007
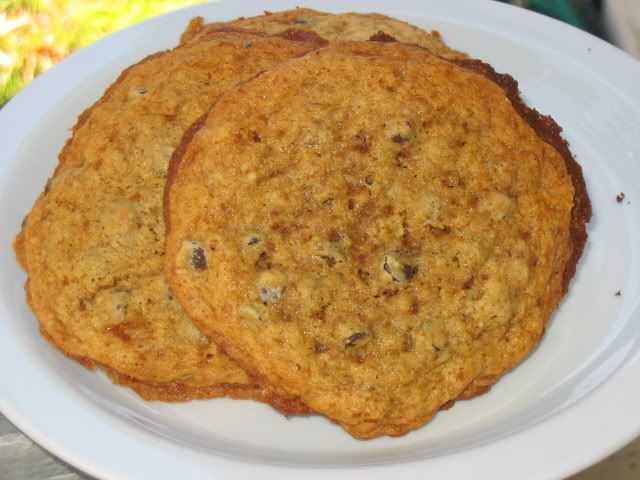
My first gluten-free chocolate chip cookies
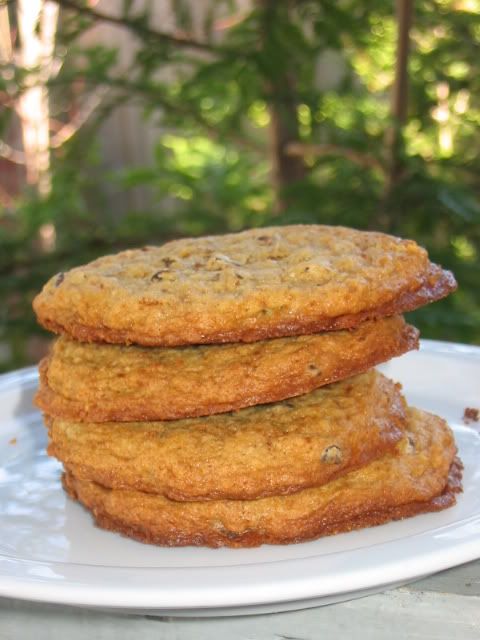
I've made cakes, I've made knishes, I've made gorgeous doughnuts. But one thing I've never tried baking since going gluten-free is something as basic as chocolate chip cookies. So this weekend I whipped up these cookies, based on a recipe I found on RecipeZaar. I used Enjoy Life's mini chocolate chips, and chose Pamela's Baking Mix* for the all-purpose flour. The tapioca and sweet rice flour were added for their glutinous (but not gluten-ous!) properties, which make the cookie stay chewy even once they cool. You can replace all the flours with a total of 1 1/2 cups of any gluten-free all purpose flour, but they will not turn out quite as chewy.
CHOCOLATE CHIP COOOKIES
1 cup gluten-free all-purpose flour
1/4 cup sweet rice flour (also called sticky rice flour or glutinous rice flour)
1/4 cup tapioca flour
2 tablespoons almond meal
1/4 cup softened butter
1/2 cup brown sugar or turbinado sugar
1/2 cup white sugar
1 large egg
1/2 teaspoon vanilla
1/2 teaspoon baking soda
1/2 teaspoon salt
1 cup chocolate chips
Preheat oven to 375 F degrees. Blend butter, sugars, egg and vanilla with a wooden spoon until creamy.
In a separate bowl, blend flours, baking soda, almond meal and salt. Fold dry ingredients into wet ingredients and mix well.
Grease a baking sheet and drop a tablespoon of the batter at a time onto the cookie sheet, leaving ample room between cookies. Bake for 10 minutes. Remove from oven and allow to sit for 5 minutes before transferring carefully to cooling rack.
*Edited 3/09 to add: Pamela's baking mixes are under kosher supervision but are not certified by a mainstream kosher certifying agency, so most people who keep strictly kosher kitchens will want to use another gluten-free all-purpose flour mix such as Arrowhead Mills Gluten-Free All-Purpose Flour Mix
Tuesday, January 09, 2007
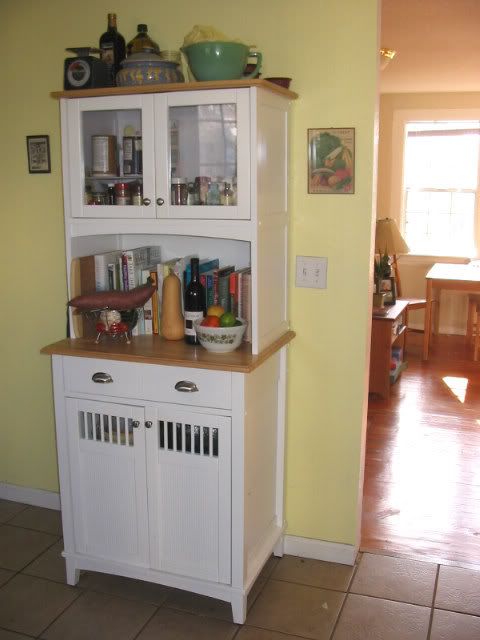
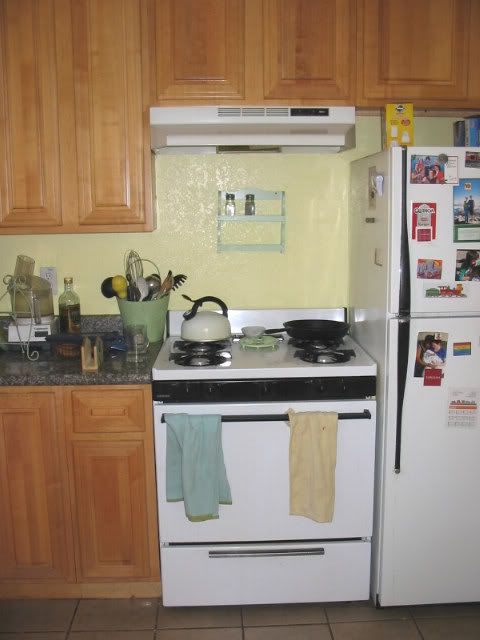
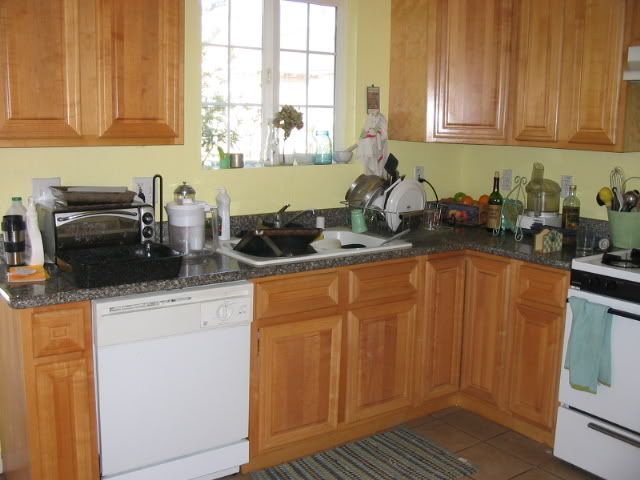
Step into my dirty kitchen
I wasn't planning to participate in the Show Us Your Kitchen event. My kitchen is perfectly lovely but unlike most of the other participants I don't have any expensive or fancy kitchen equipment or fixtures to show off. I live on a modest income in a very expensive area, I live alone, and I don't own my home so I have very little creative control over it. I had to beg my landlady to even let me paint the walls. It's not an impressive kitchen, just a very functional and well-loved one. Just for the heck of it, I figured I'd show it to you anyway. I took these pictures after I'd cooked up a storm and done only minimal cleanup. After all, cluttered counters and a sink full of dirty dishes will give you a more accurate sense of what my kitchen really looks like most of the time.

That slug-like creature above is, in fact, a massive garnet yam (ahem... sweet potato) sitting on top of some other produce. It dwarfs a poor, neglected butternut squash that I'm ashamed to say is about a month old.

To the left, behind a wire cookbook stand, you will see my prized possession, a Cuisinart given to me a number of years ago by an ex-girlfriend who still gets to occasionally reap its benefits in the form of latkes (a sort of Chanukah tithe to my Cuisinart benefactor).

I've lived in over half a dozen apartments in the last 6 years. When apartment-hunting, my main requirements are a big sink, enough room for two people to cook together, and a gas range. An electric stove is an absolute dealbreaker for me. My cottage meets all these requirements, and has plenty of other perks like counter space and numerous electrical outlets. I love the granite countertops. I find them aesthetically very unattractive (I am into a 1940s farmhouse aesthetic), but quite useful from a practical perspective. I really do love my kitchen. I feel blessed to have such a great space to create my (food) art.
One day I'd like to own my own home, with an eat-in kitchen featuring a butcher-block island, a cast iron pot rack hanging from the ceiling, and a big old-fashioned Wedgewood stove.
That slug-like creature above is, in fact, a massive garnet yam (ahem... sweet potato) sitting on top of some other produce. It dwarfs a poor, neglected butternut squash that I'm ashamed to say is about a month old.
To the left, behind a wire cookbook stand, you will see my prized possession, a Cuisinart given to me a number of years ago by an ex-girlfriend who still gets to occasionally reap its benefits in the form of latkes (a sort of Chanukah tithe to my Cuisinart benefactor).
I've lived in over half a dozen apartments in the last 6 years. When apartment-hunting, my main requirements are a big sink, enough room for two people to cook together, and a gas range. An electric stove is an absolute dealbreaker for me. My cottage meets all these requirements, and has plenty of other perks like counter space and numerous electrical outlets. I love the granite countertops. I find them aesthetically very unattractive (I am into a 1940s farmhouse aesthetic), but quite useful from a practical perspective. I really do love my kitchen. I feel blessed to have such a great space to create my (food) art.
One day I'd like to own my own home, with an eat-in kitchen featuring a butcher-block island, a cast iron pot rack hanging from the ceiling, and a big old-fashioned Wedgewood stove.
Monday, January 08, 2007
Polenta Lasagna with Feta and Kale
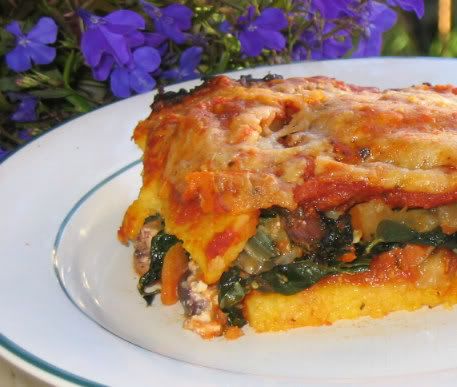
I don't share recipes with you folks unless I enjoyed them myself. Yet every now and then a certain dish will stand head and shoulders above the rest... A dish that makes me do a little happy dance. A dish so interesting or comforting that I have to stand back and feel proud, and then invite someone over to share it. This is one of those dishes. This easy one-dish gluten-free casserole is bursting with Mediterranean-inspired flavor. It is loaded with calcium, a nutrient I haven't been getting enough of since I started cutting down on cow's milk. It is comfort food, and delicious enough that I couldn't accept the delayed gratification of heating up the leftovers so I ate them cold instead. My dining companion gave it two thumbs up.
Some notes about the recipe:
- This recipe is free from cow's milk (though not dairy-free). It uses pecorino romano, a salty parmesan-like hard cheese made of sheep's milk. I used a goat's milk feta but you can use any type of feta you can find.
- Use lacinato kale (a/k/a dinosaur kale) if you can find it. If not, curly leaf will do.
- You can find tubes of pre-made, ready-to-slice polenta at most health food or gourmet food stores and some mainstream groceries. I use the traditional polenta (unflavored) from Food Merchants. If you have the time, you can make polenta from scratch, spread it on a baking sheet in a 1/4" layer while it's still hot, refrigerate it until firm, and use a juice glass to cut small disks out of the polenta.
POLENTA LASAGNA WITH FETA AND KALE
1 tube (18 ounces) prepared polenta
1 1/3 cup marinara sauce
1 cup pecorino romano cheese, shredded
2 tablespoons extra virgin olive oil
1/2 onion, chopped finely
5 cloves garlic, minced
1 teaspoon fresh rosemary, minced
1 small carrot, diced
1 bunch kale (preferably lacinato), shredded
1/4 cup pitted kalamata olives, chopped finely
1 1/4 cup feta cheese, mashed with fork
Extra olive oil to grease baking pan
Preheat oven to 375 degrees F.
In a large pan, heat olive oil over medium-high flame. Sautee onions and rosemary until the onions begin to brown. Add garlic and carrots. Sautee until garlic fragrances the oil, about 2 minutes. Add kale and sautee until tender, then remove pan from heat.
Grease the bottom and sides of a 8x8" baking dish. Cut polenta into slices no thicker than 1/4 inch. Line the bottom of the pan with 1/2 of the polenta slices, overlapping them slightly to cover the whole bottom of the pan. Pour 1/2 cup of the marinara sauce over the polenta and spread it evenly. Distribute mashed feta cheese over the marinara sauce. Scatter olives over the feta, then top with an even layer of the kale mixture. Place the remaining polenta slices in a layer, overlapping slightly. Spread remaining 3/4 cup of marinara sauce. Sprinkle shredded pecorino evenly across the top.
Bake for 25 minutes or until the top layer of cheese is beginning to brown around the edges. Allow to sit for 5-10 minutes before slicing and serving (use a spatula).
Sunday, January 07, 2007
(Semi) Weekly Gluten-Free Recipe Roundup - 1/07/07
Here's your belated gluten-free recipe roundup, the first for 2007. Enjoy!
- Thai Noodle Curry (use gluten-free fish sauce)
Saturday, January 06, 2007
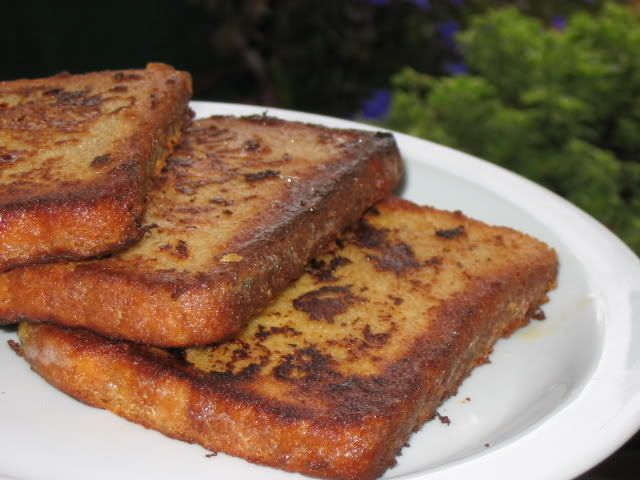
My Favorite French Toast [Gluten-Free, Lactose-Free & Casein-Free]
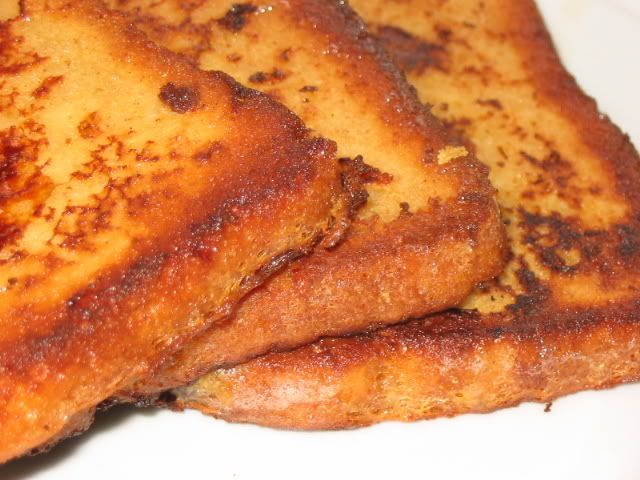
Do you have a loaf of gluten-free bread that is stale? No problem. Gummy? No worries. Dry? Great. Hard as a rock? Perfect! Believe it or not, some of those subpar store-bought gluten-free breads work perfectly for french toast. They sop up the eggy mixture and transform into a breakfast delicacy you can top with fruit preserves, fresh fruit, or maple syrup. The french toast pictured above is prepared with Food for Life's Brown Rice Bread, which I bought at the Trader Joe's. It tastes fabulous when prepared with ghee (which is Indian clarified butter that has all the lactose and casein removed). The ghee imparts a rich, nutty flavor. Extra egg mixture will store for several days. Bon appetit!
GLUTEN-FREE FRENCH TOAST (Casein & Lactose Free)
4 slices gluten free bread
2 medium eggs
2 tablespoons orange juice
1/4 cup almond milk or rice milk or soy milk (plain or vanilla)
1/4 teaspoon cinnamon
1/8 teaspoon nutmeg
1/4 teaspoon salt
1/4 teaspoon vanilla extract
1 tablespoon ghee, clarified butter or margarine
Optional: 2 teaspoons honey
In a pie pan or small baking dish, whisk together all ingredients except ghee/butter/margarine and bread. Heat ghee, butter or margarine in non-stick pan or griddle over medium-high heat. If you're using a dense bread, such as those from Food for Life, Soak for 4-5 minutes on each side. If you're using a homemade bread or a softer or more crumbly bread, soak for only 1-2 minutes on each side. Using a fork or tongs, remove each slice of bread from the liquid and allow excess liquid to drip off. Place in hot ghee/butter/margarine and cook on each side until browned. Serve immediately with maple syrup, jam and/or fresh fruit.
Friday, January 05, 2007
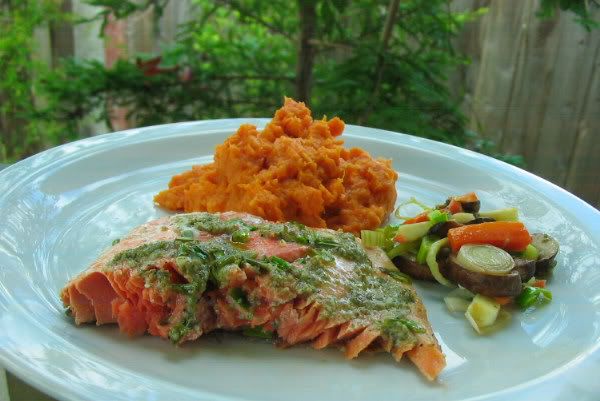
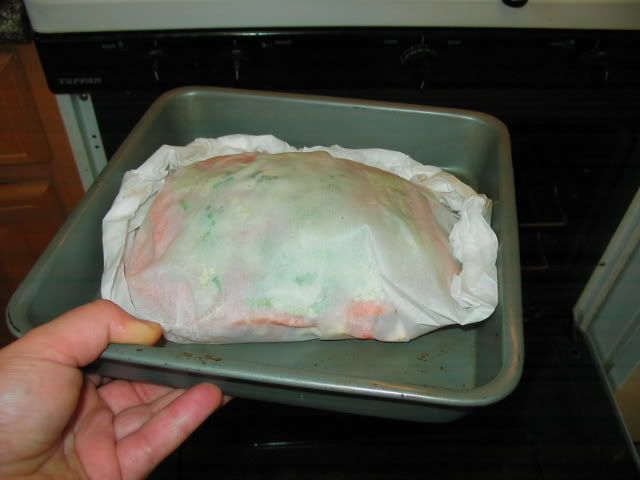
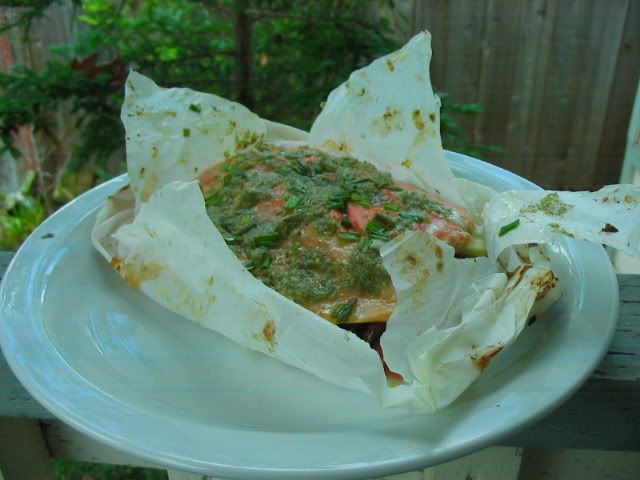
Salmon with Sage and Vegetables in Parchment Paper
Thursday was one of those days when I just didn't want to make a big mess. I was home from work, recuperating from another epidural steroid injection. These procedures cause me a lot of pain for the 2-3 days afterwards, so I was sore and stiff and a little stoned on Tylenol with codeine. But being a blog martyr, I couldn't pass up the opportunity to prepare something delicious for lunch despite being in pain. I based the dish around my limitations (no bending to load or unload the dishwasher, no pulling out kitchen appliances not already on the counter) as well as the two fresh herbs I had on hand: sage and chives. They were starting to go bad and I just can't bear to watch beautiful fresh herbs go to waste. The best motivation of all was my New Year's commitment to participate for the first time in the Weekend Herb Blogging event, hosted this week by the ever-motivated and talented Kalyn.

Parchment paper is seriously underrated, my friends. There is a real thrill in a complete meal wrapped up in a little self-contained packet. The joy of pulling out of the oven a perfectly cooked filet of buttery herbed salmon over flavorful vegetables wrapped neatly in a pouch of parchment paper is not so different from the satisfaction of the tasty knishes I posted about in November. Not quite as carb-laden, of course, but still satisfying and aesthetically pleasing.
In the top picture you'll see that I served the fish alongside the vegetables that it was cooked with it, accompanied by a generous portion of Coconut Mashed Yams on the side. You might also try roasting some potato wedges and throwing the parchment-wrapped fish and veggies on top of the potatoes for the last 12-15 minutes of cooking.
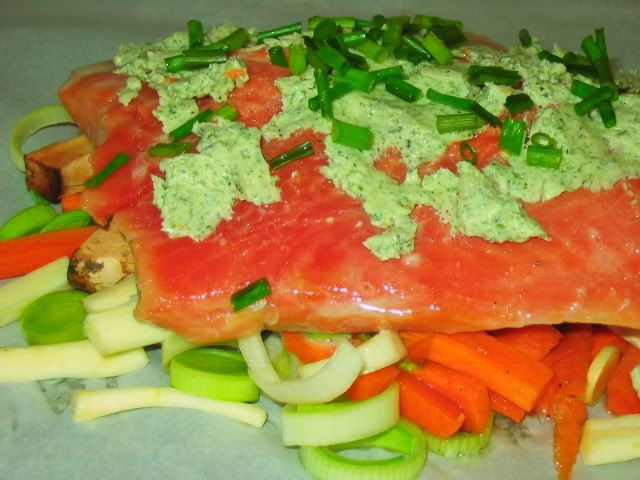
A step by step pictorial:

SALMON WITH SAGE AND VEGETABLES IN PARCHMENT PAPER
1 (8-12 ounce) boneless salmon fillet
1 small leek
1 small carrot
1/2 small parsnip
2 large cremini mushrooms
2 tablespoons unsalted butter, softened
1 fresh garlic clove
1 tablespoon fresh sage leaves (tightly-packed)
1 small lemon, juice of
1/2 teaspoon fresh ground black pepper
1/4 teaspoon salt
2 teaspoons fresh chives, chopped finely
parchment paper (One 15x24 inch piece)
Optional: 1/4 teaspoon thyme, dried or fresh
Preheat oven to 400 degrees F. Cut the tough, darker green tops from the leek and slice the tender lighter-colored section into very thin rounds. Cut (julienne) carrot and parsnip into matchsticks approximately 1/2 inch long and 1/4 inch wide. Slice crimini mushrooms in half lengthwise and then into 1/4 inch slices.
Combine butter, lemon juice, thyme, sage, pepper and salt in a food processor and pulse until thoroughly pureed.
Mix vegetables together. Lay them in a nest about the size of the salmon filet on one side of the parchment paper. Place 1/3 of the sage-butter mixture on top of the vegetables.
Place salmon on top of vegetables and spread with the rest of the sage-butter mixture. Sprinkle chopped chives on top, distributing evenly. Fold the other side of the parchment paper over on top of the salmon. Roll and crimp edges together to create a tightly-sealed half-moon shaped packet. Place packet on baking sheet and bake for 12-15 minutes. Remove from oven and allow to sit for 5 minutes.
To serve, place the packet on a dinner plate and create two slashes on the top of the paper in the shape of an X with a sharp knife. Peel back paper and enjoy. Alternately, you can cut the salmon into 2-3 pieces and place on individual plates next to a generous spoonful of the vegetables.
Coconut Mashed Yams
 In my book, you can't go wrong with coconut. It is amazingly versatile and I enjoy it in all its many forms, particularly rich and creamy coconut milk. This flavorful side dish is ever-so-slightly adapted from a recipe in The Millennium Cookbook
Note: What is referred to here as a "yam" is actually technically the Garnet variety of "sweet potato" (bright orange flesh, dark orange skin). A lot of Americans, including myself and the authors of this cookbook, use the two interchangeably and inaccurately.
COCONUT MASHED YAMS
2 large garnet yams, peeled
1 teaspoon olive oil
4 cloves of garlic, minced
1 teaspoon dried thyme
1/4 teaspoon allspice
1 teaspoon sea salt
1/2 cup coconut milk (light or full-fat, no sugar added)
1/4 teaspoon ground white pepper
Heat oil in small saute pan over medium heat. Add the garlic and thyme and saute until the garlic is golden. Remove from heat.
Slice the yams into 2-inch cubes. Bring 2 quarts of water to a boil. Add the yams and boil for 15 minutes or until the yams are soft. Drain in a strainer and then return to pot. Add sauteed garlic and remaining ingredients. Mash until creamy, using a potato masher. Serve hot.
Still life with lunch
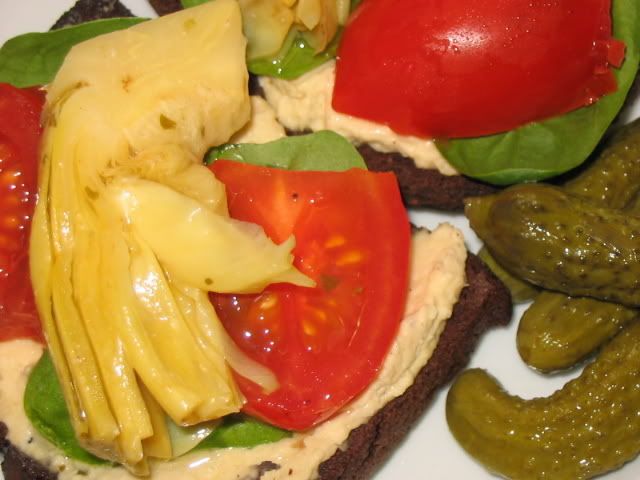
Creamy Roasted Garlic Hummus on toasted Food for Life's Black China Rice bread with cornichons, plum tomatoes, baby spinach and marinated artichoke hearts. Perfect!
Thursday, January 04, 2007
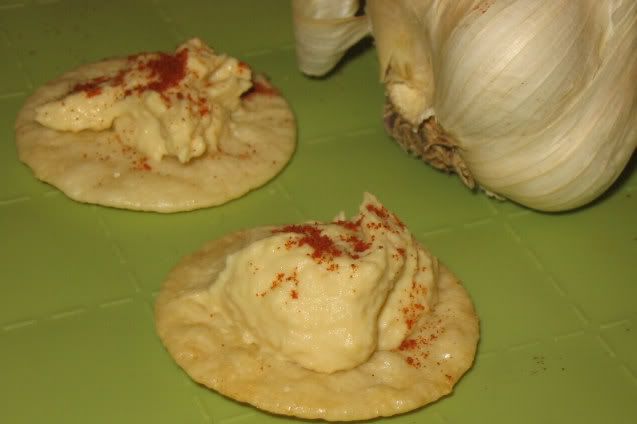
Creamy Roasted Garlic Hummus
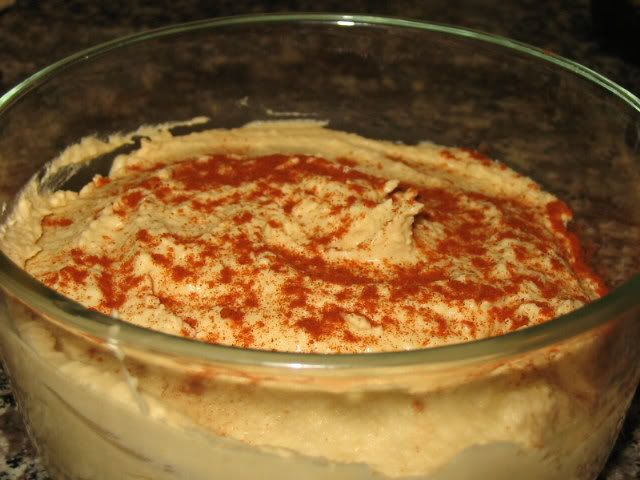
Seeing as it's one of my favorite foods, it's not surprising that I have several dozen hummus recipes. In October I posted my Spicy Hummus recipe. This time, it's all about the roasted garlic. Though it may seem time consuming, roasting garlic is very easy and really brings out garlic's nutty and sweet flavor while cutting down on its sharpness. It's well worth your time, I promise.
Though I've yet to find a good gluten-free pita bread recipe, there are many other ways to enjoy hummus - It makes a great sandwich on toasted bread with other ingredients like baby spinach, tomatoes, olives, pickles and/or goat cheese. I bring small containers of it to work with slices of raw carrot, celery and red bell peppers or with rice crackers. In a pinch, I'll mix it with additional lemon juice for a salad dressing.
CREAMY ROASTED GARLIC HUMMUS
2 cups canned or cooked chickpeas (garbanzo beans)
2 tablespoons tahini
4 tablespoons olive oil
1/4 cup warm water
1 head garlic
1 lemon, juice of
1/4 teaspoon sea salt
Preheat oven to 375°F. Cut off the very top of the garlic clove (about 1/4") so that the tops of most of the cloves are exposed slightly. Coat with a little olive oil and wrap securely in tin foil. Roast garlic in oven for 1 hour. Remove and allow to cool.
Using your fingers, squeeze the soft, roasted garlic out of each clove into food processor. Add all other ingredients and blend until completely smooth. Scrape ingredients off sides of food processor to make sure it blends evenly.
Serve at room temperature with crudites, warm pita or crackers. Optional: Sprinkle with chopped parsley or paprika before serving.
Subscribe to:
Posts (Atom)


