Oh, my friends, this is the craziest of crazy times, this 4 week period of one Jewish holy day after another! A veritable Jewish spiritual marathon, really, and it's not over yet- Sukkot is nearly upon us and Simchat Torah is right around the corner. The cooking I've been doing has been under time constraints not to mention religious ones - The food has been wonderful and well-appreciated, but there's been little time for photographing and blogging. This fabulous insanity will continue for a while yet.
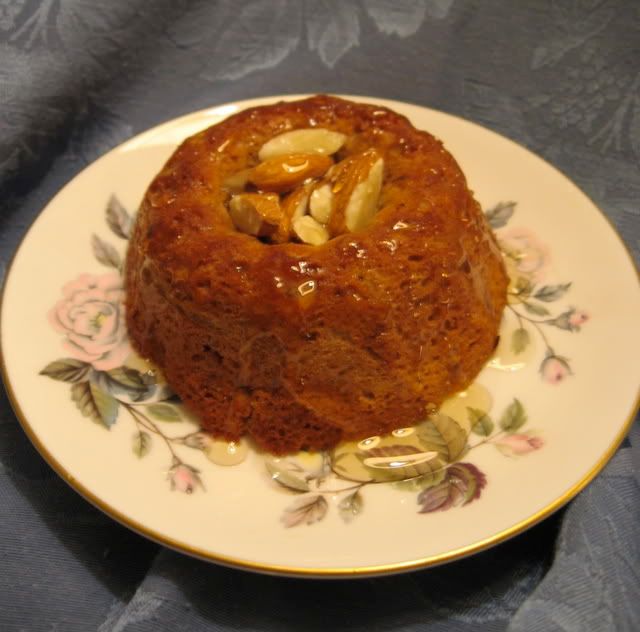
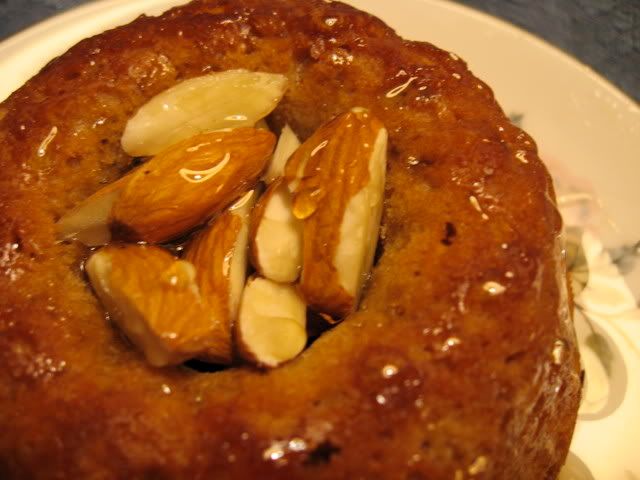
But you know, it's okay. There is some grace to be found in all this, and some joy in cooking for the sake of cooking rather than for the sake of blogging. And what better way to spend my cooking energy and celebrate the approach of autumn than on preparing a multi-course feast for friends and family on erev Rosh Hashanah? The Rosh Hashanah menu included a terrific beef tzimmes (basically my vegetarian tzimmes with big, tender chunks of beef cooked into it); Roasted Butternut Squash, Marcona Almond and Pomegranate Salad which is a spectacular celebration of fall; the Lacy Potato Kugel I've been making at every holiday since I fell in love with it; steamed green beans tossed with lemon oil; a pareve gluten-free Honey Cake drizzled with local honey and topped with slivers of toasted almonds; and ginger-poached pears (recipe forthcoming) which truly surprised me by stealing the show. Oh, and P.S. I also made gluten-free challah!
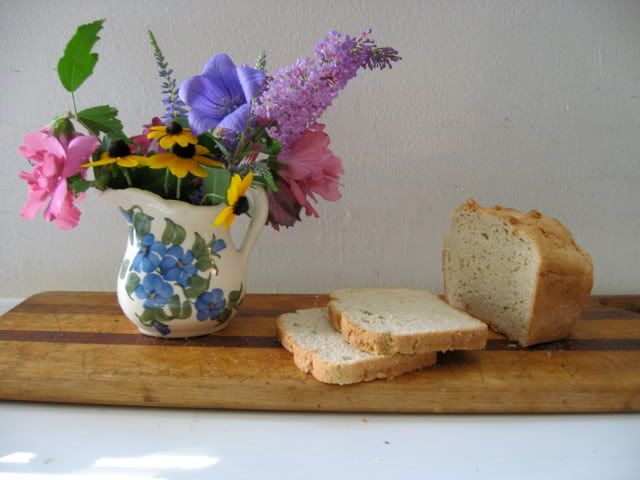
I based this recipe roughly upon Sara Nussbaum's gluten-free challah recipe, which Ellen posted her version of a while back. Is this the perfect gluten-free challah, that Jewish celiac equivalent of a holy grail which tastes just like what you remember from your childhood? No, it's not perfect - It's a work in progress. But is it delicious? Oh yes, it most certainly is. It turned out more challah-like than I expected, and it was delicious dipped in honey on Rosh Hashanah and made into the loveliest challah French toast in the days that followed.
To get the most challah-like texture without gluten, you need to have a dough with a high liquid content, which would be more like a batter than a dough and thus unable to be handled. This is why most gluten-free challah recipes can't be braided. Most gluten-free recipes that I've seen which create braid-able doughs use dough conditioners that are not easily available / kosher. Making a bread pareve further impacts the moisture. So, in order to make a bread I could shape into something vaguely resembling a traditional shape, I used far less liquid than your usual GF bread recipe would call for. The result is a dough that can be (very carefully) handled, perhaps even braided by a very skilled and well-greased hand - But this also resulted in a bread that was quite a bit less moist than what I'm used to. It was absolutely wonderful when it was still warm out of the oven, but after it cooled completely, I found it needed some light toasting to restore its texture.
I created it in a pull-apart challah style. You can see Bureka Boy's photographs of what a gluten-y pull-apart challah looks like here. It's obvious from my photos that the pull-apart idea didn't really work with this dough, but that forming the challah from balls of dough helped give the top of the bread the bumpy shape that looks similar to how braided round challahs appear. If you don't care how your challah looks, skip that step and just pour the dough into the cake pan at once, smooth the top, glaze it, and bake it.
I considered not sharing this recipe until I improved upon it, but I realized there is no reason to not let you in on my process. The journey that a recipe goes through as it is perfected is often a long one, and I will keep you posted as I improve upon this recipe in the coming months.
It was so nice to get to eat challah along with everyone else on Rosh Hashanah this year. It made me feel downright almost normal. (Yes, even weirdos can occasionally feel normal.)

GLUTEN-FREE CHALLAH
[ Gluten-Free / Dairy-Free / Soy-Free /
Vegetarian / Pareve ]
1 package active dry yeast
2 tsp sugar
1 cup warm water
1 1/2 cups cornstarch
3/4 cup brown rice flour
3/4 cup white rice flour
1/4 cup plus 3 Tbsp tapioca starch
1/4 cup Vance's Foods DariFree Original Powder (or other powdered non-dairy milk substitute)
1 Tbsp guar gum
1 1/2 tsp baking powder
1 tsp salt
1 Tbsp dry potato flakes
1/4 cup vegetable oil
1/4 cup honey
4 eggs + 1 extra egg yolk (at room temperature)
1 egg yolk beaten with 1 Tbsp water, for glaze
1/3 cup raisins (optional)
Poppy or sesame seeds (optional)
Baking spray / vegetable oil spray (non-dairy)
Turn oven on 200 F for 10 minutes, then turn oven off. Mix yeast and sugar with warm water in a small bowl. Cover with tin foil, and place in the oven for 10 minutes or until the top becomes bubbly.
In the bowl of a standing mixer, combine cornstarch, white and brown rice flours, tapioca starch, guar gum, salt, baking powder, powdered non-dairy milk and potato flakes. Add yeast mixture, oil, honey and eggs (except for reserved egg glaze). Blend thoroughly on high speed. If you are adding raisins, fold them in with the mixer set to a low setting until they are evenly dispersed throughout the dough.
Grease an 8- or 9-inch round cake pan (preferably silicone). Spray baking spray all over the palms of your hands, and place a ball of dough of about 3" diameter in the center of the cake pan. Continue to roll dough into balls, placing them in concentric circles around the center ball until they reach the edge of the cake pan. Do not pack them in too tightly, they should touch each other but some spaces should be visible. The dough is very sticky, so you will need to spray oil on your hands frequently in order to be able to handle the dough and roll it into balls (if you get too much dough sticking to your hands, wash them off, dry them, and re-oil them).
Using a pastry brush, brush half of the egg glaze over the top of the dough. Cover with a dish cloth and place in oven, which should still be warm but should not be on. Allow to rise for 1 hour. It should rise to the top of the cake pan or higher.
Remove the pan from the oven, and set oven to 350 F. Remove the towel from the pan, and brush the remaining egg glaze on the dough. Sprinkle with poppy or sesame seeds, if desired. Return pan to oven, uncovered. Bake for 20 minutes, then cover with foil and bake for another 25 minutes.
Allow bread to cool slightly before transferring it to a cooling rack. Eat while warm, or slice and toast it. Will keep for up to a week at room temperature in a ziploc storage bag, or you can slice and freeze it for longer storage.